How to use Supervision on Mentalyc
Supervision sessions are integral to therapy practice, where a supervisor helps a supervisee review cases, improve clinical skills, meet licensure requirements and get the support supervisees need through their experience as a therapist. Mentalyc's platform simplifies this process by offering tools to manage supervision sessions and document them effectively.
This guide provides detailed steps on how to use the supervision feature effectively, including sending and managing invitations, generating supervision notes, and more. By following these instructions, you can optimize your Mentalyc experience and ensure smooth supervision workflows.
Steps
A. How to invite a Supervisor or Supervisee
As a first-time user, the first thing you need to do is invite a supervisor or a supervisee. The process for inviting someone varies slightly depending on your type of practice—whether you’re a solo practitioner or part of a group practice or you own a group practice. Let’s start with solo practitioners and those that are members of a group practice:
For Solo Practitioners / those that are members of a group practice
Whether you are a solo user or you
1. Log into your Mentalyc account and navigate to the "Supervision" tab.

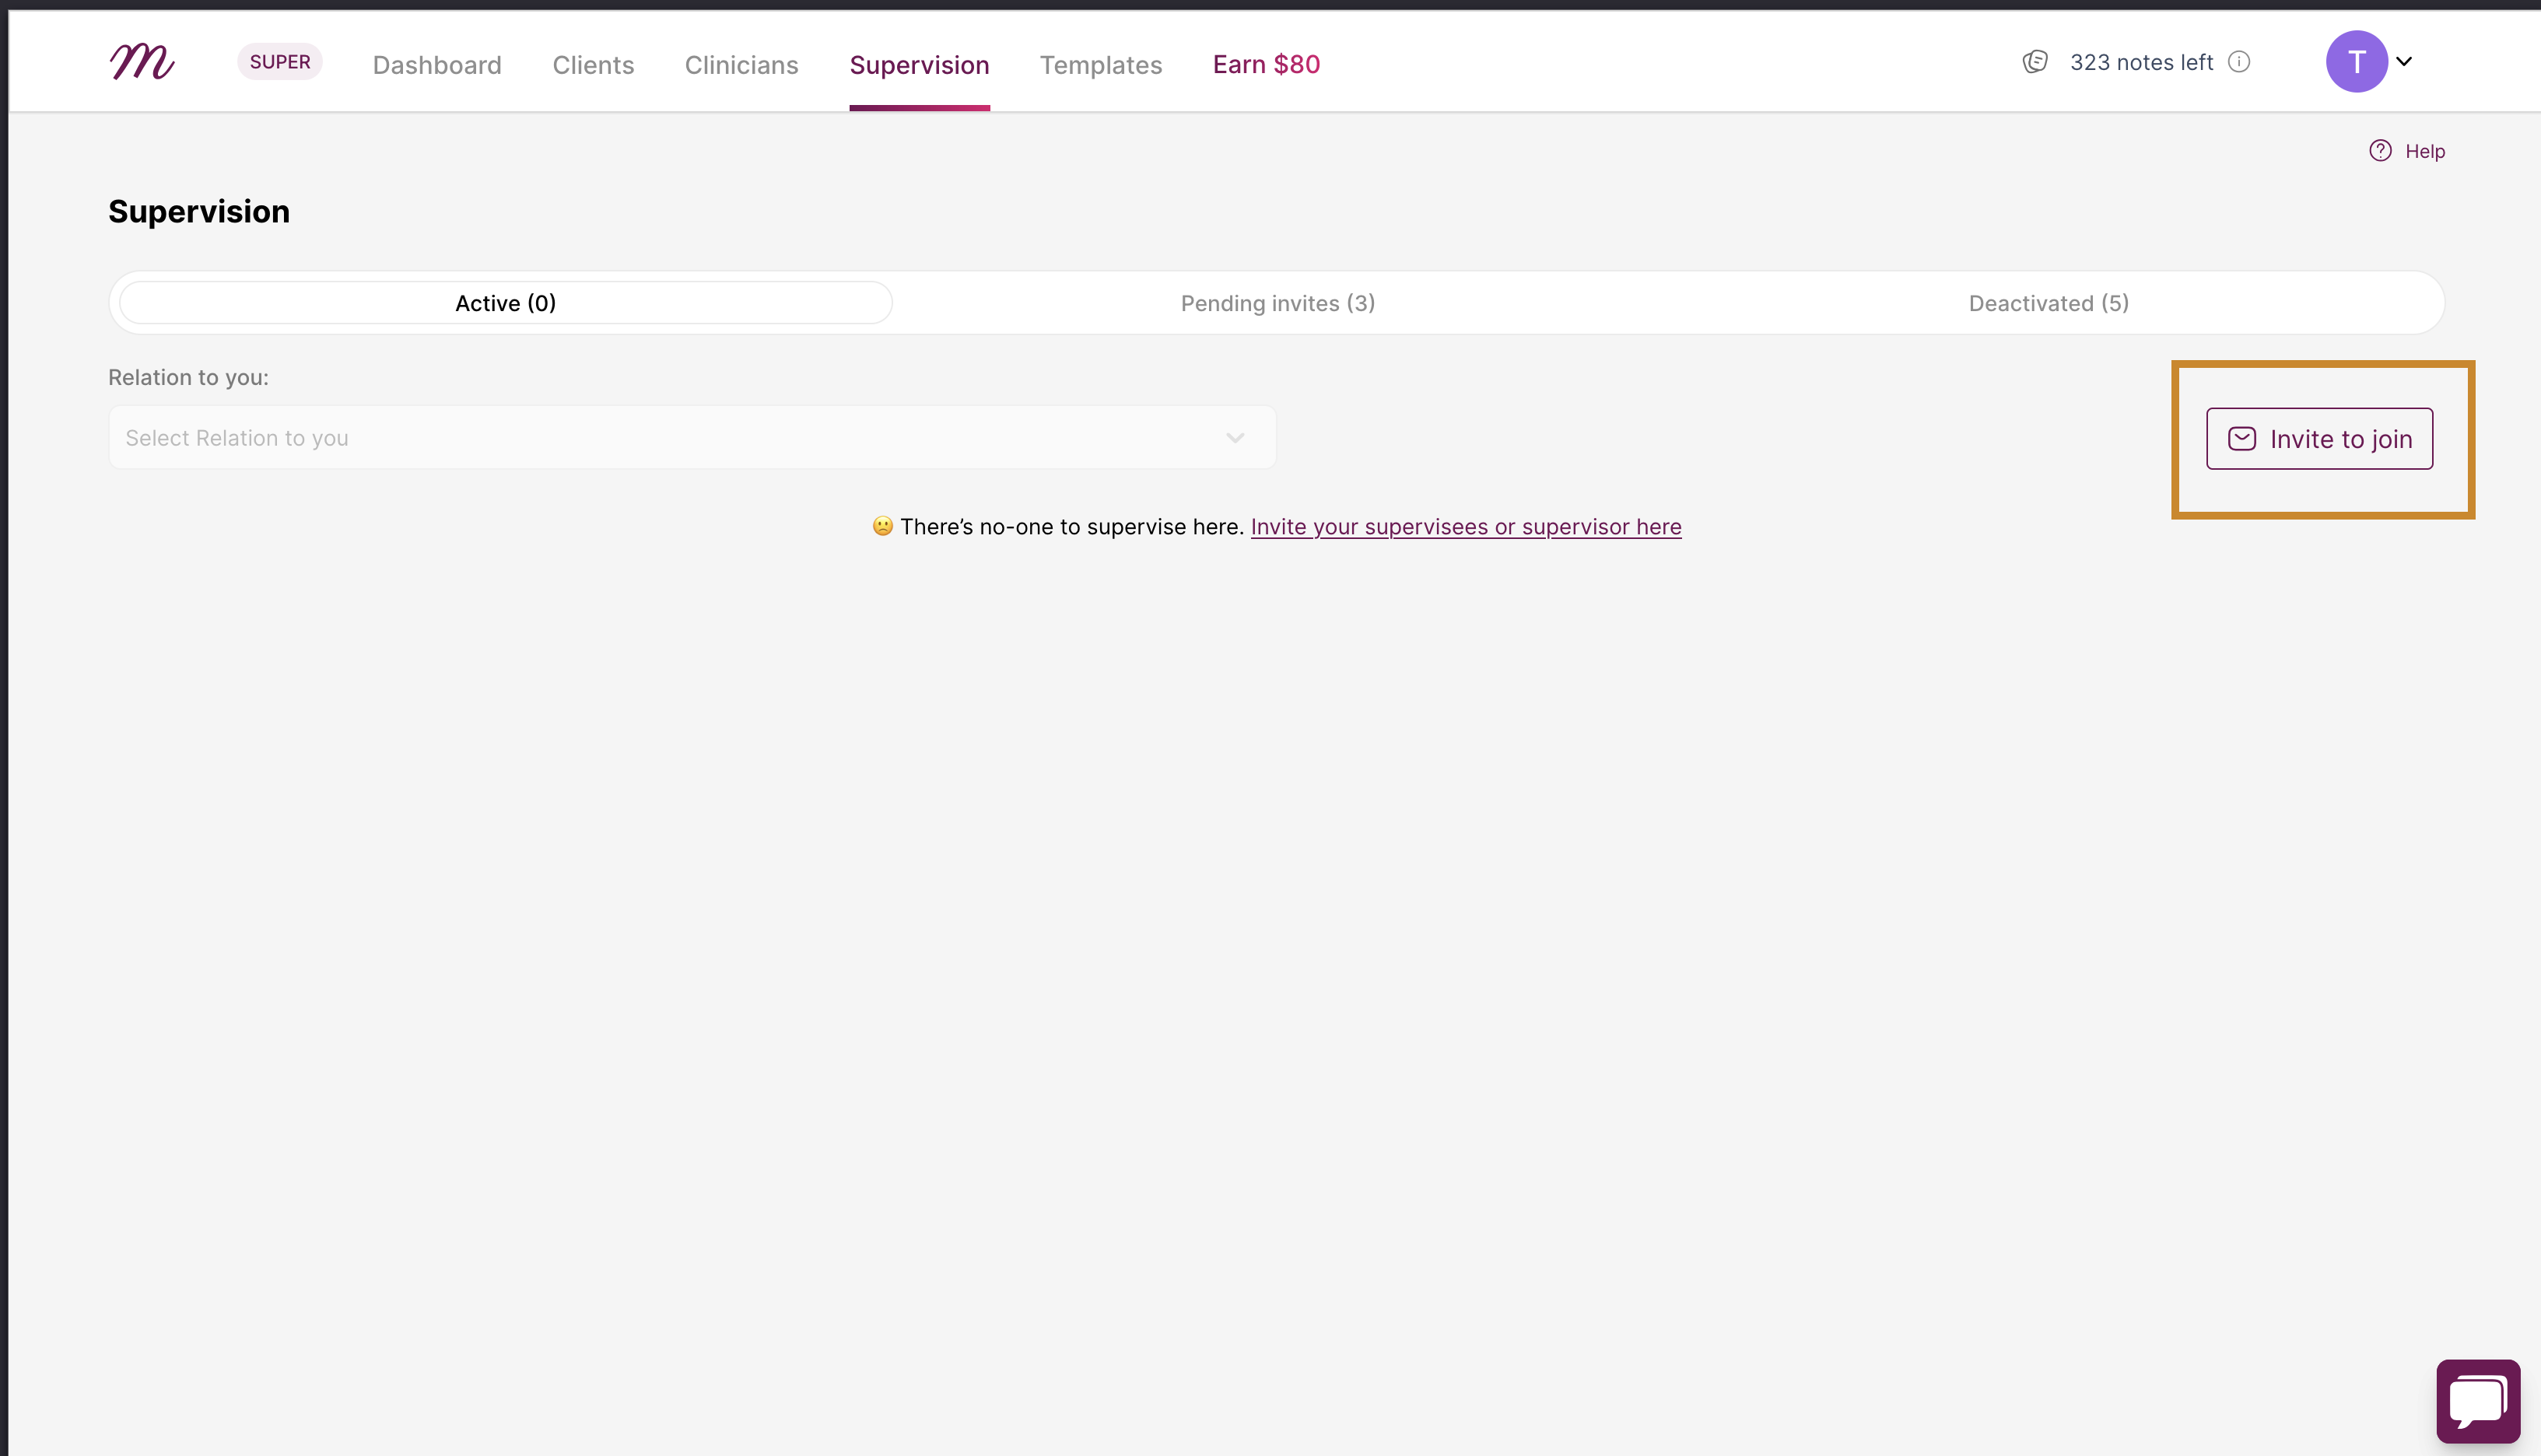
2. Click “Invite to join”
This button is located on the left part within the main page.
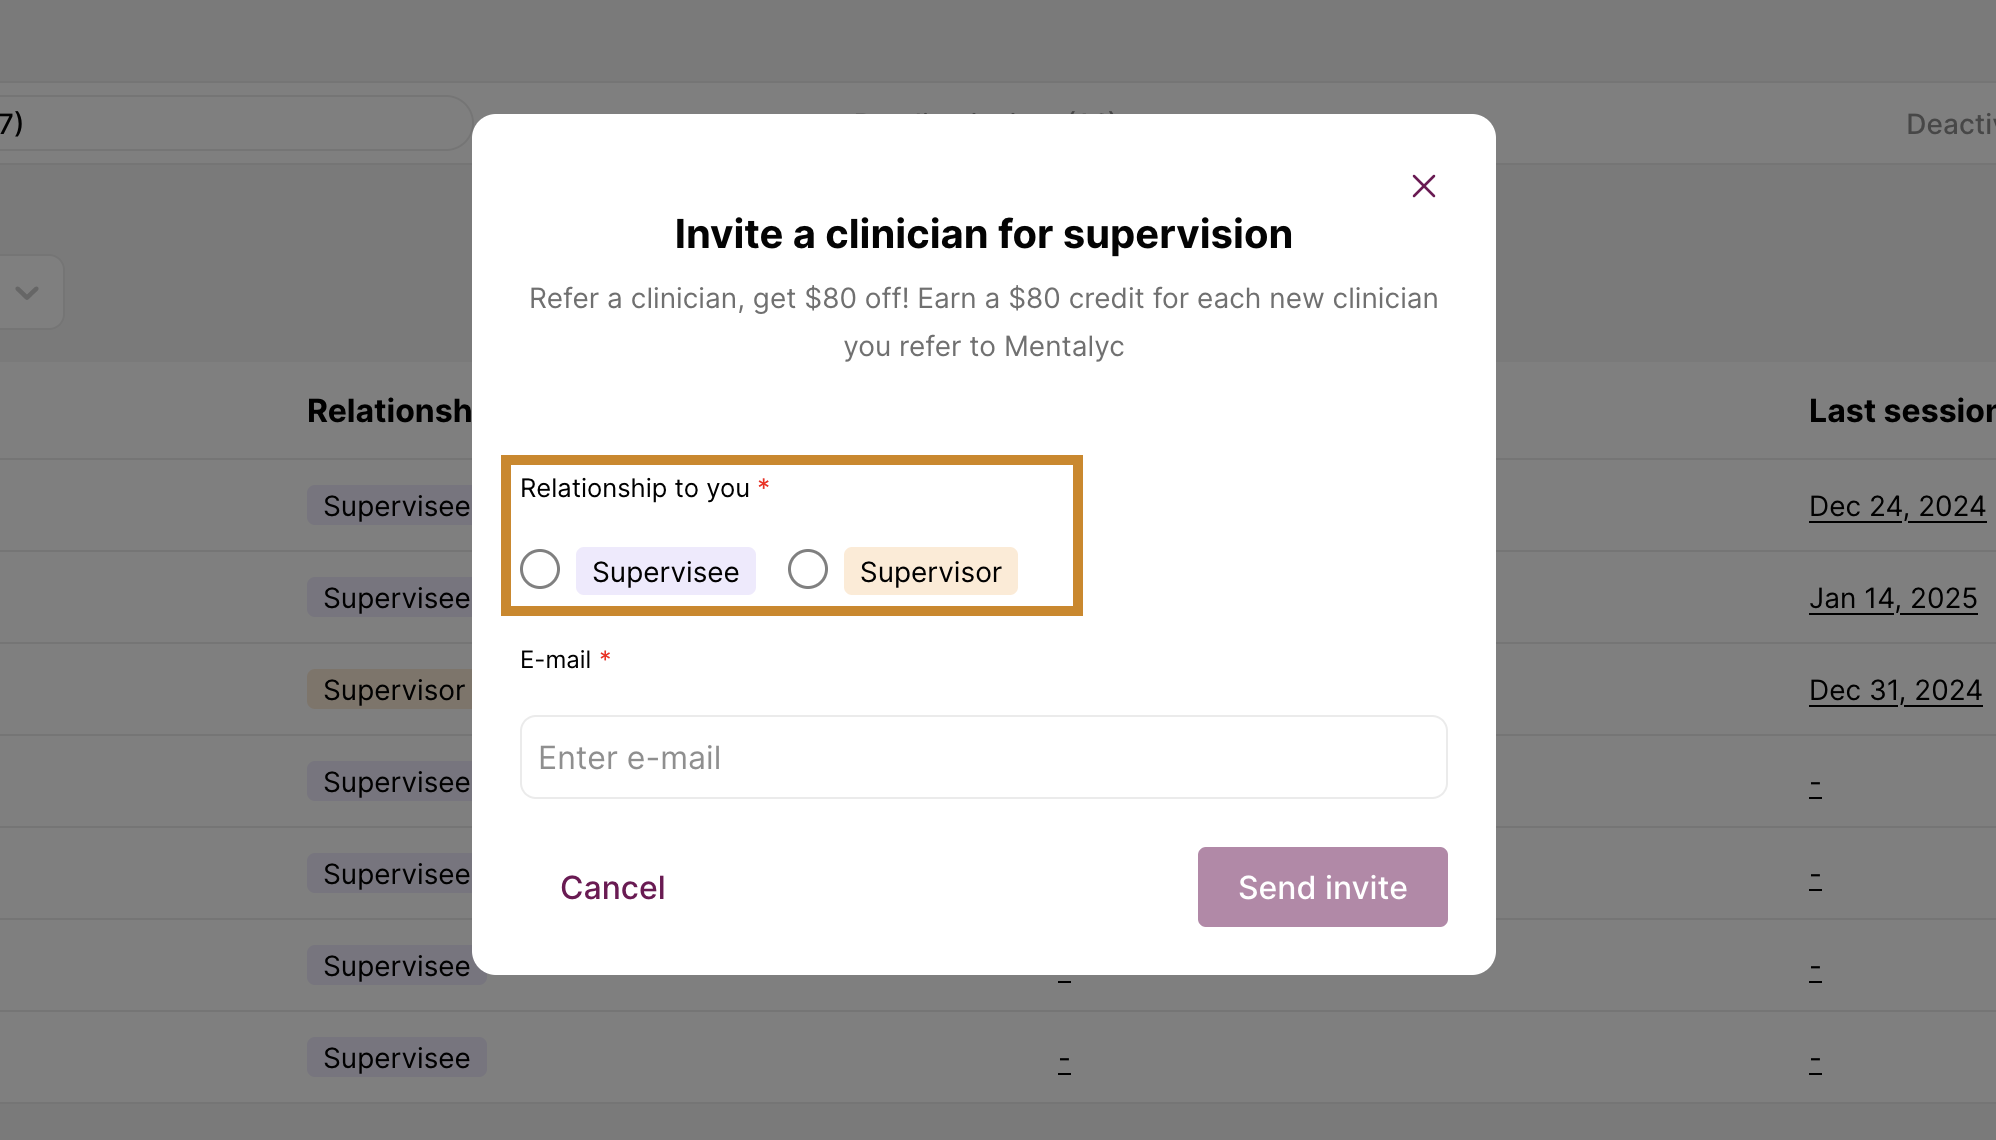
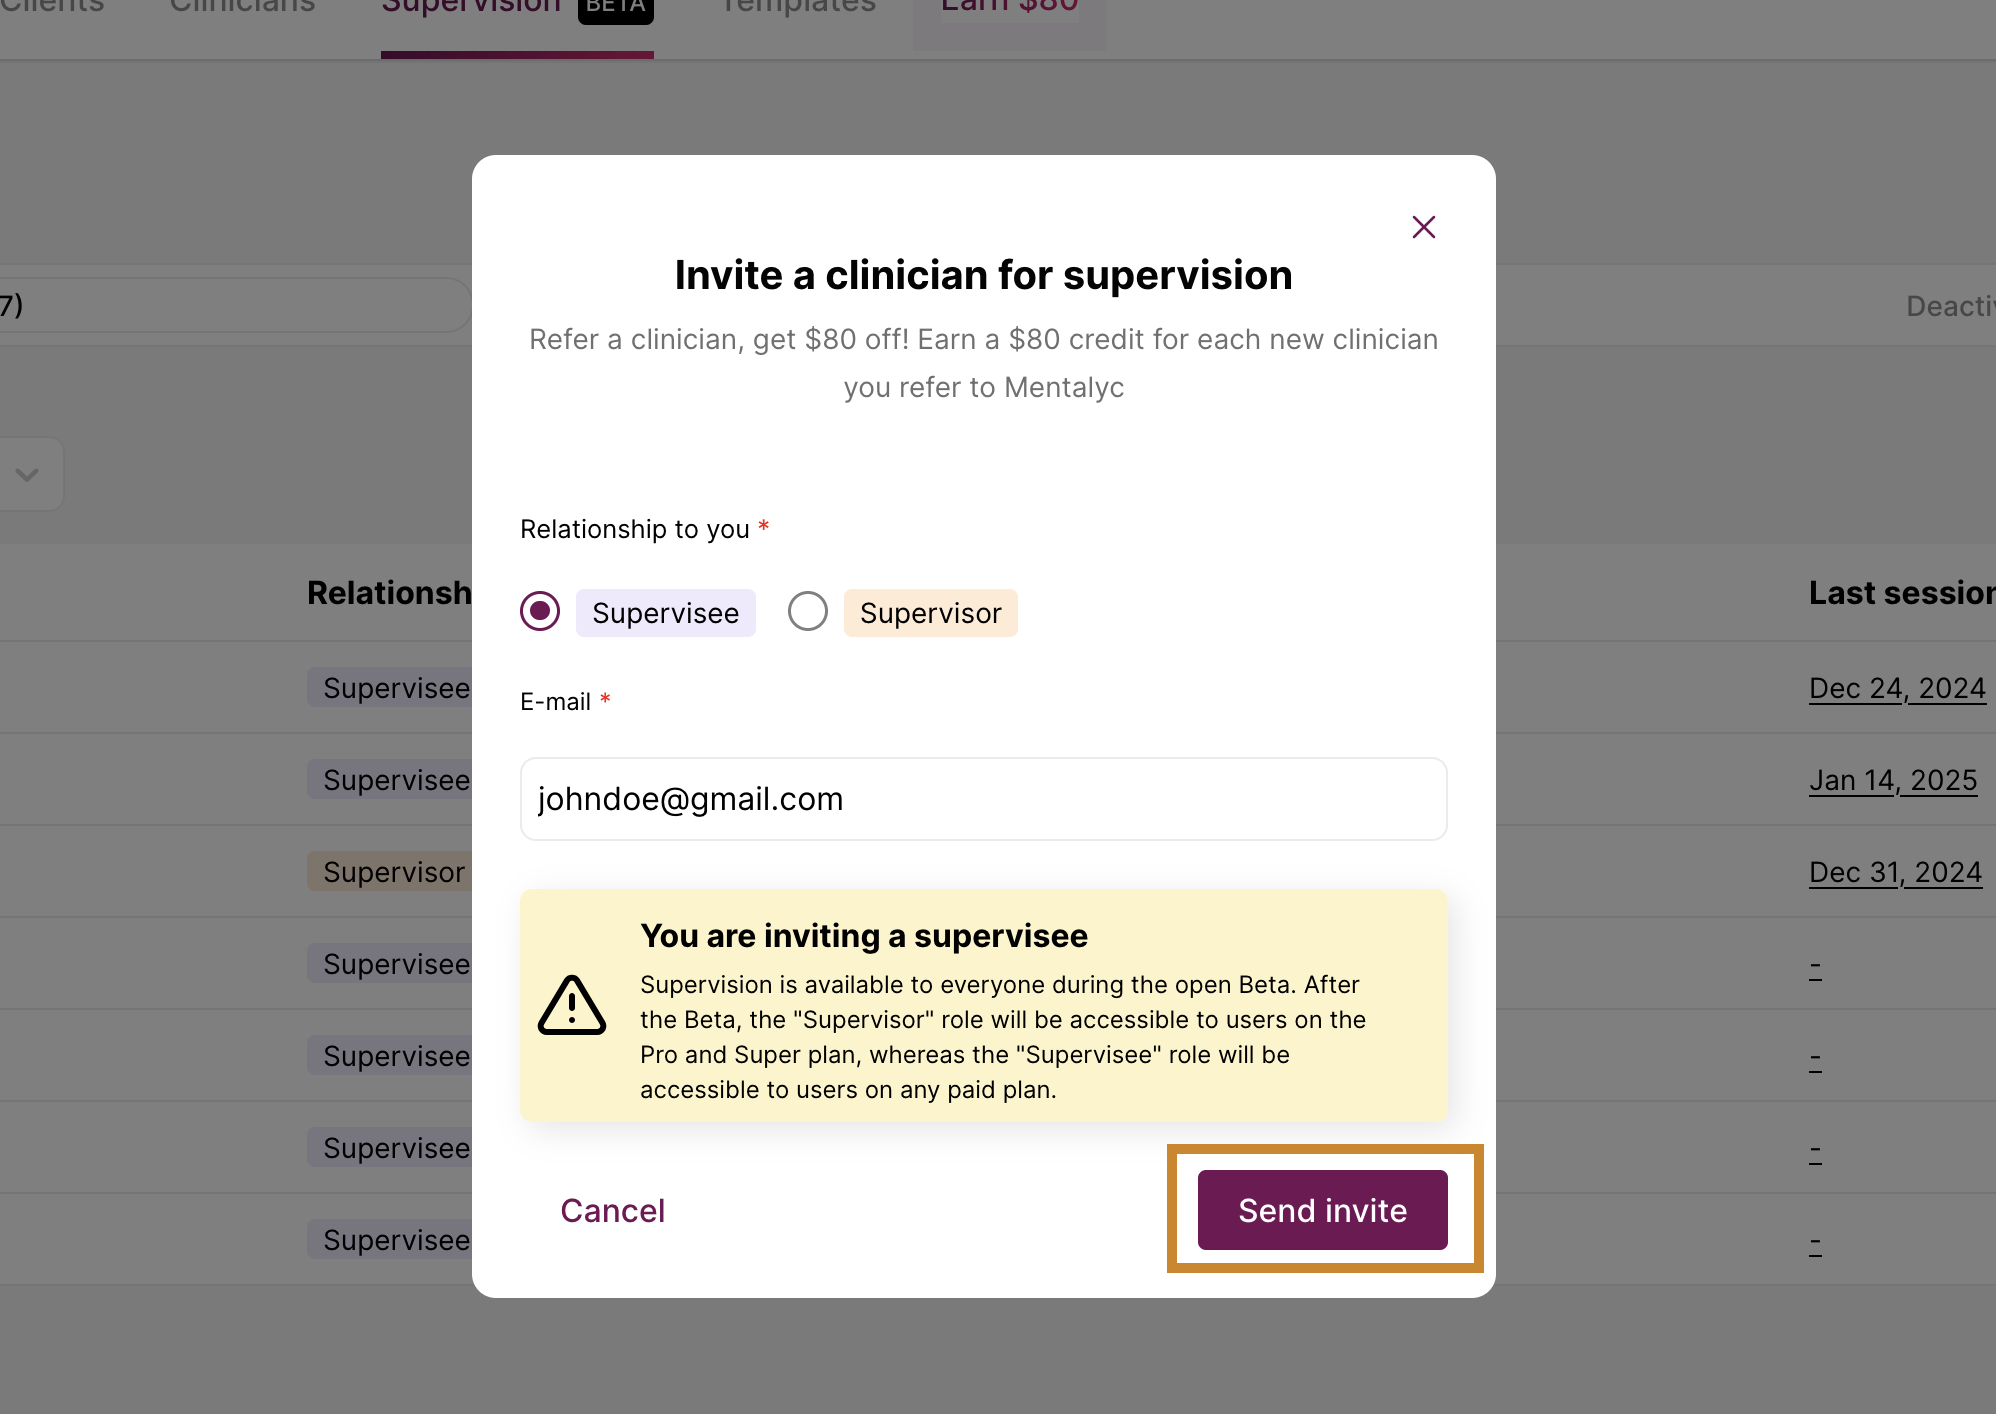
3. Select the Role: A pop-up will appear asking if the person you’re inviting is a supervisor or a supervisee. Choose the appropriate option based on your needs under the “Relationship to you” section.
- Enter Their Email: Once you’ve selected the role, type in their email address.
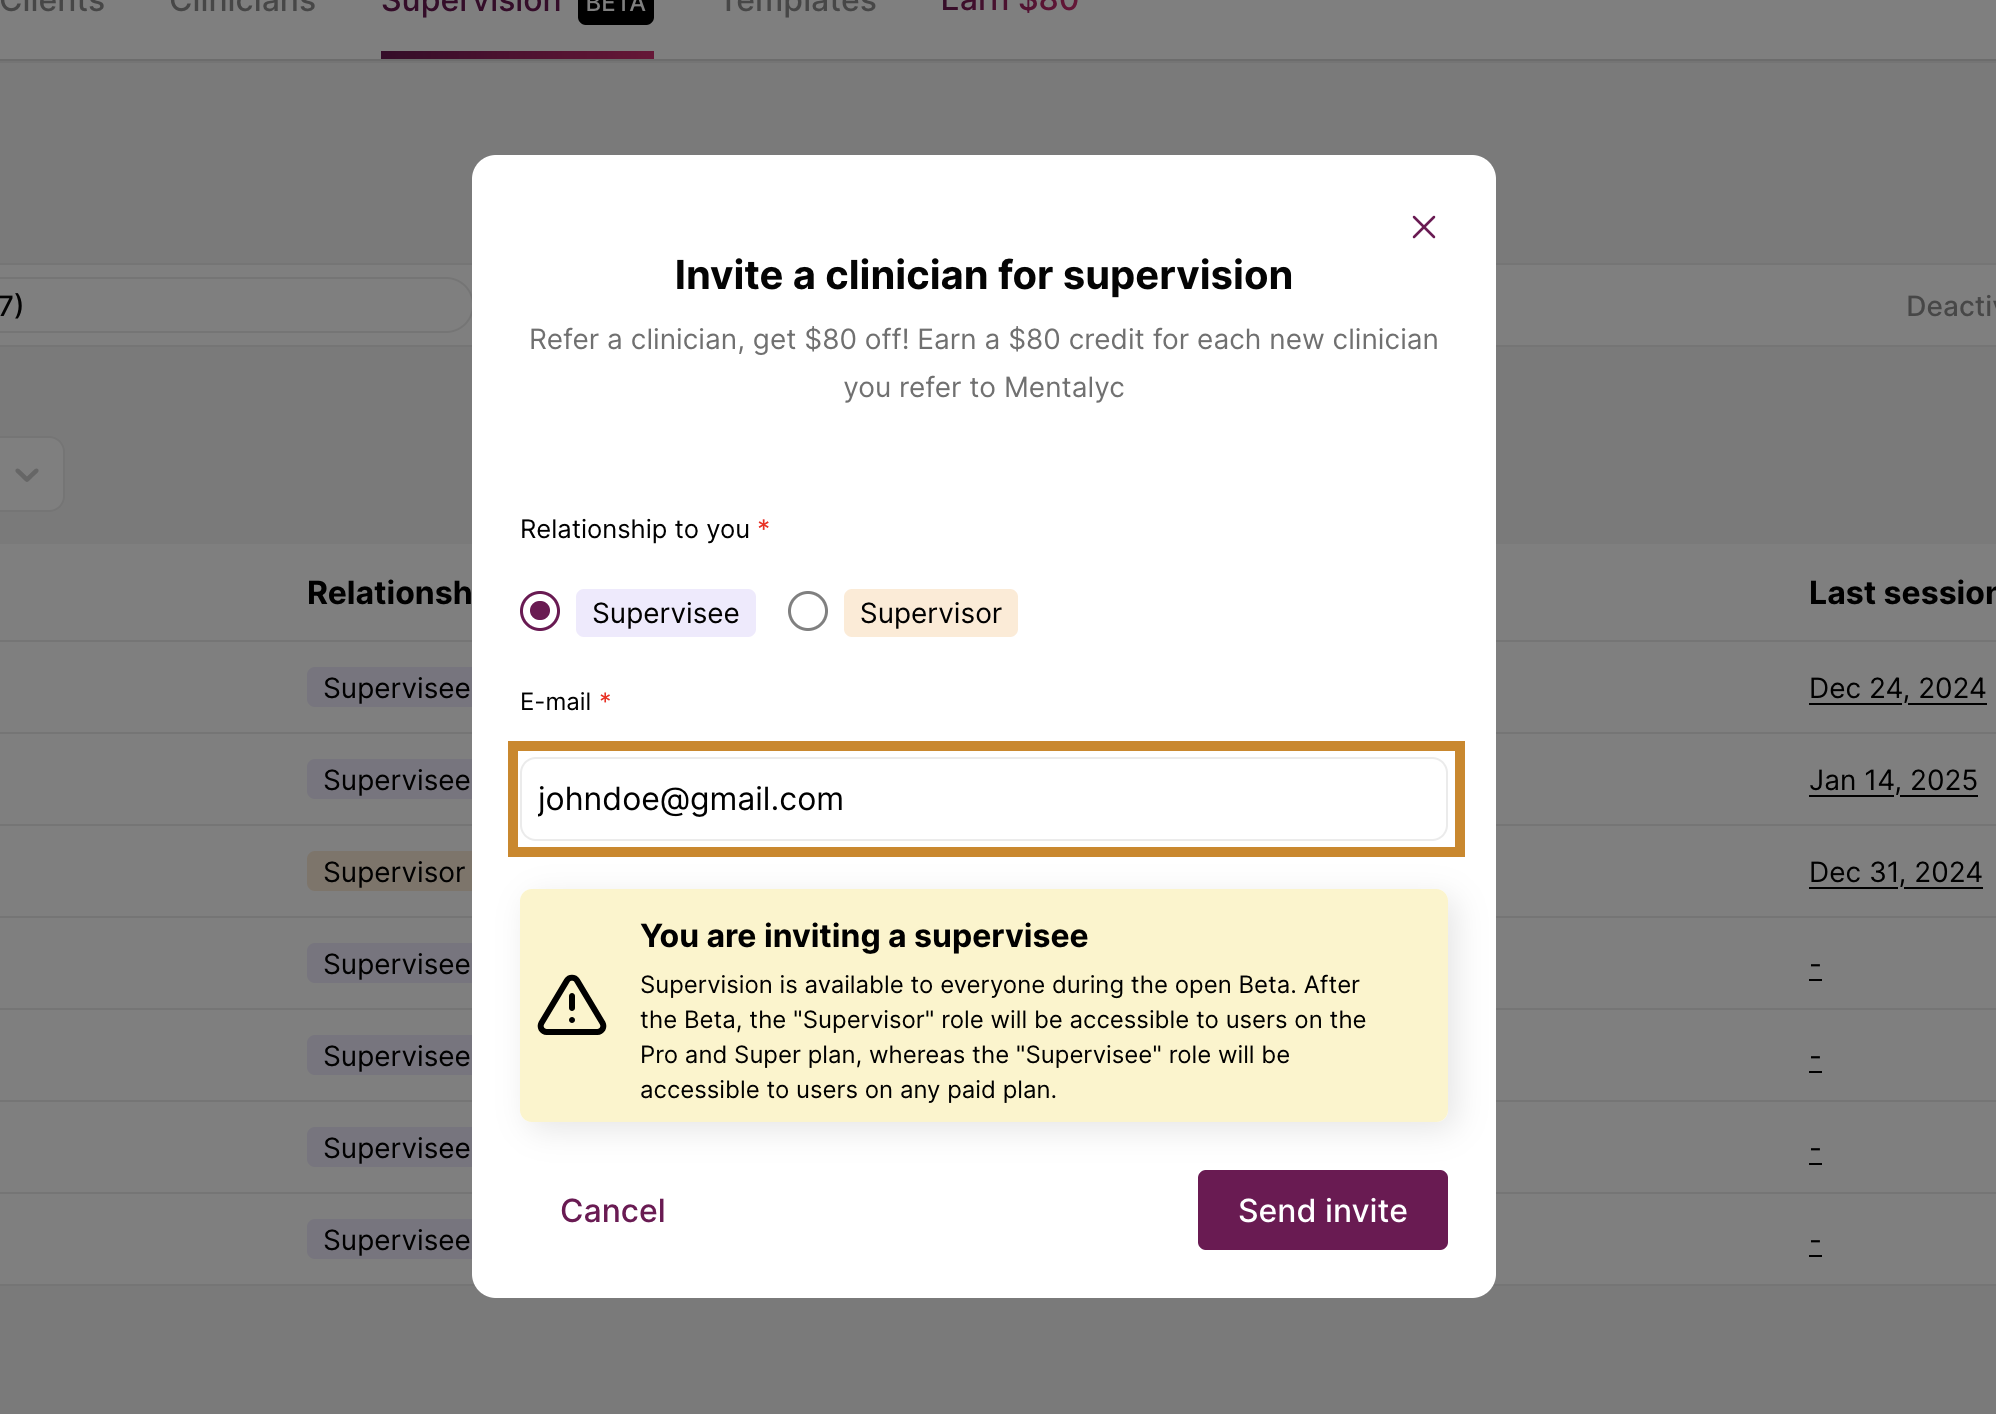
- Send the Invitation: After entering the email, click "Send Invitation."
For Group Practice Owners
The process is similar, but there’s an extra step:
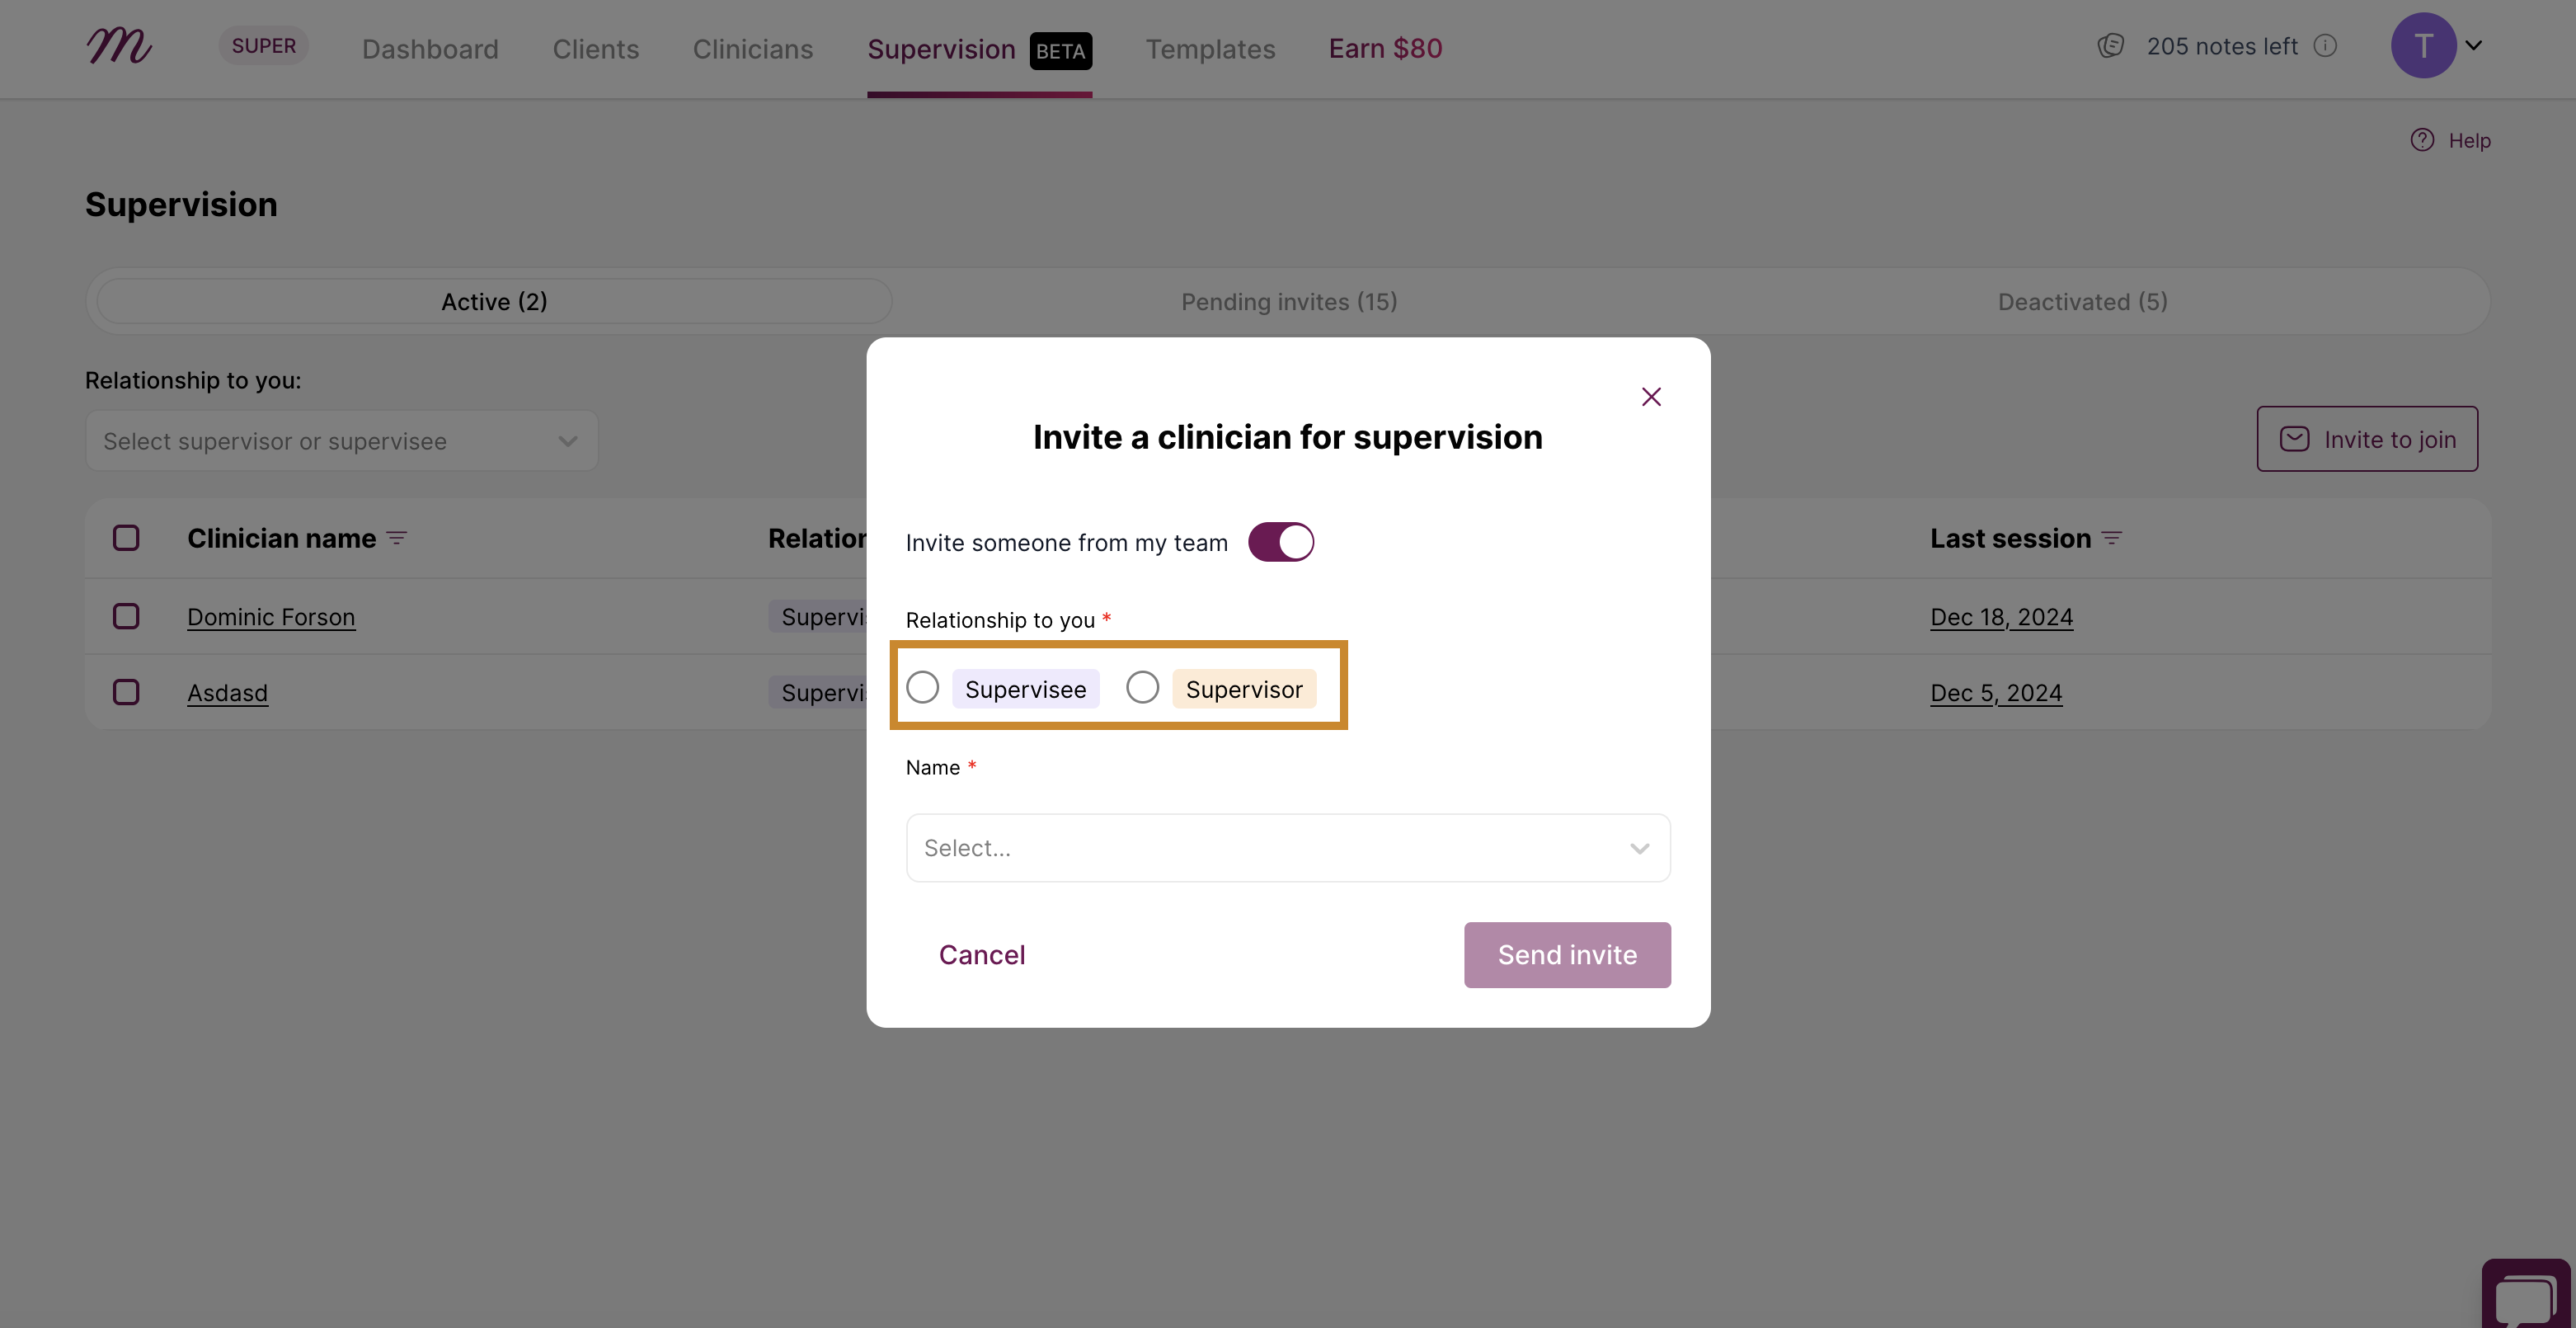
1. If you are the owner of a group practice with a Mentalyc team setup, you can invite your team members as supervisors or supervisees by toggling on the “Invite someone from my team” button.

2. Click "Supervisee" or “Supervisor” option under the “Relationship to you” section.
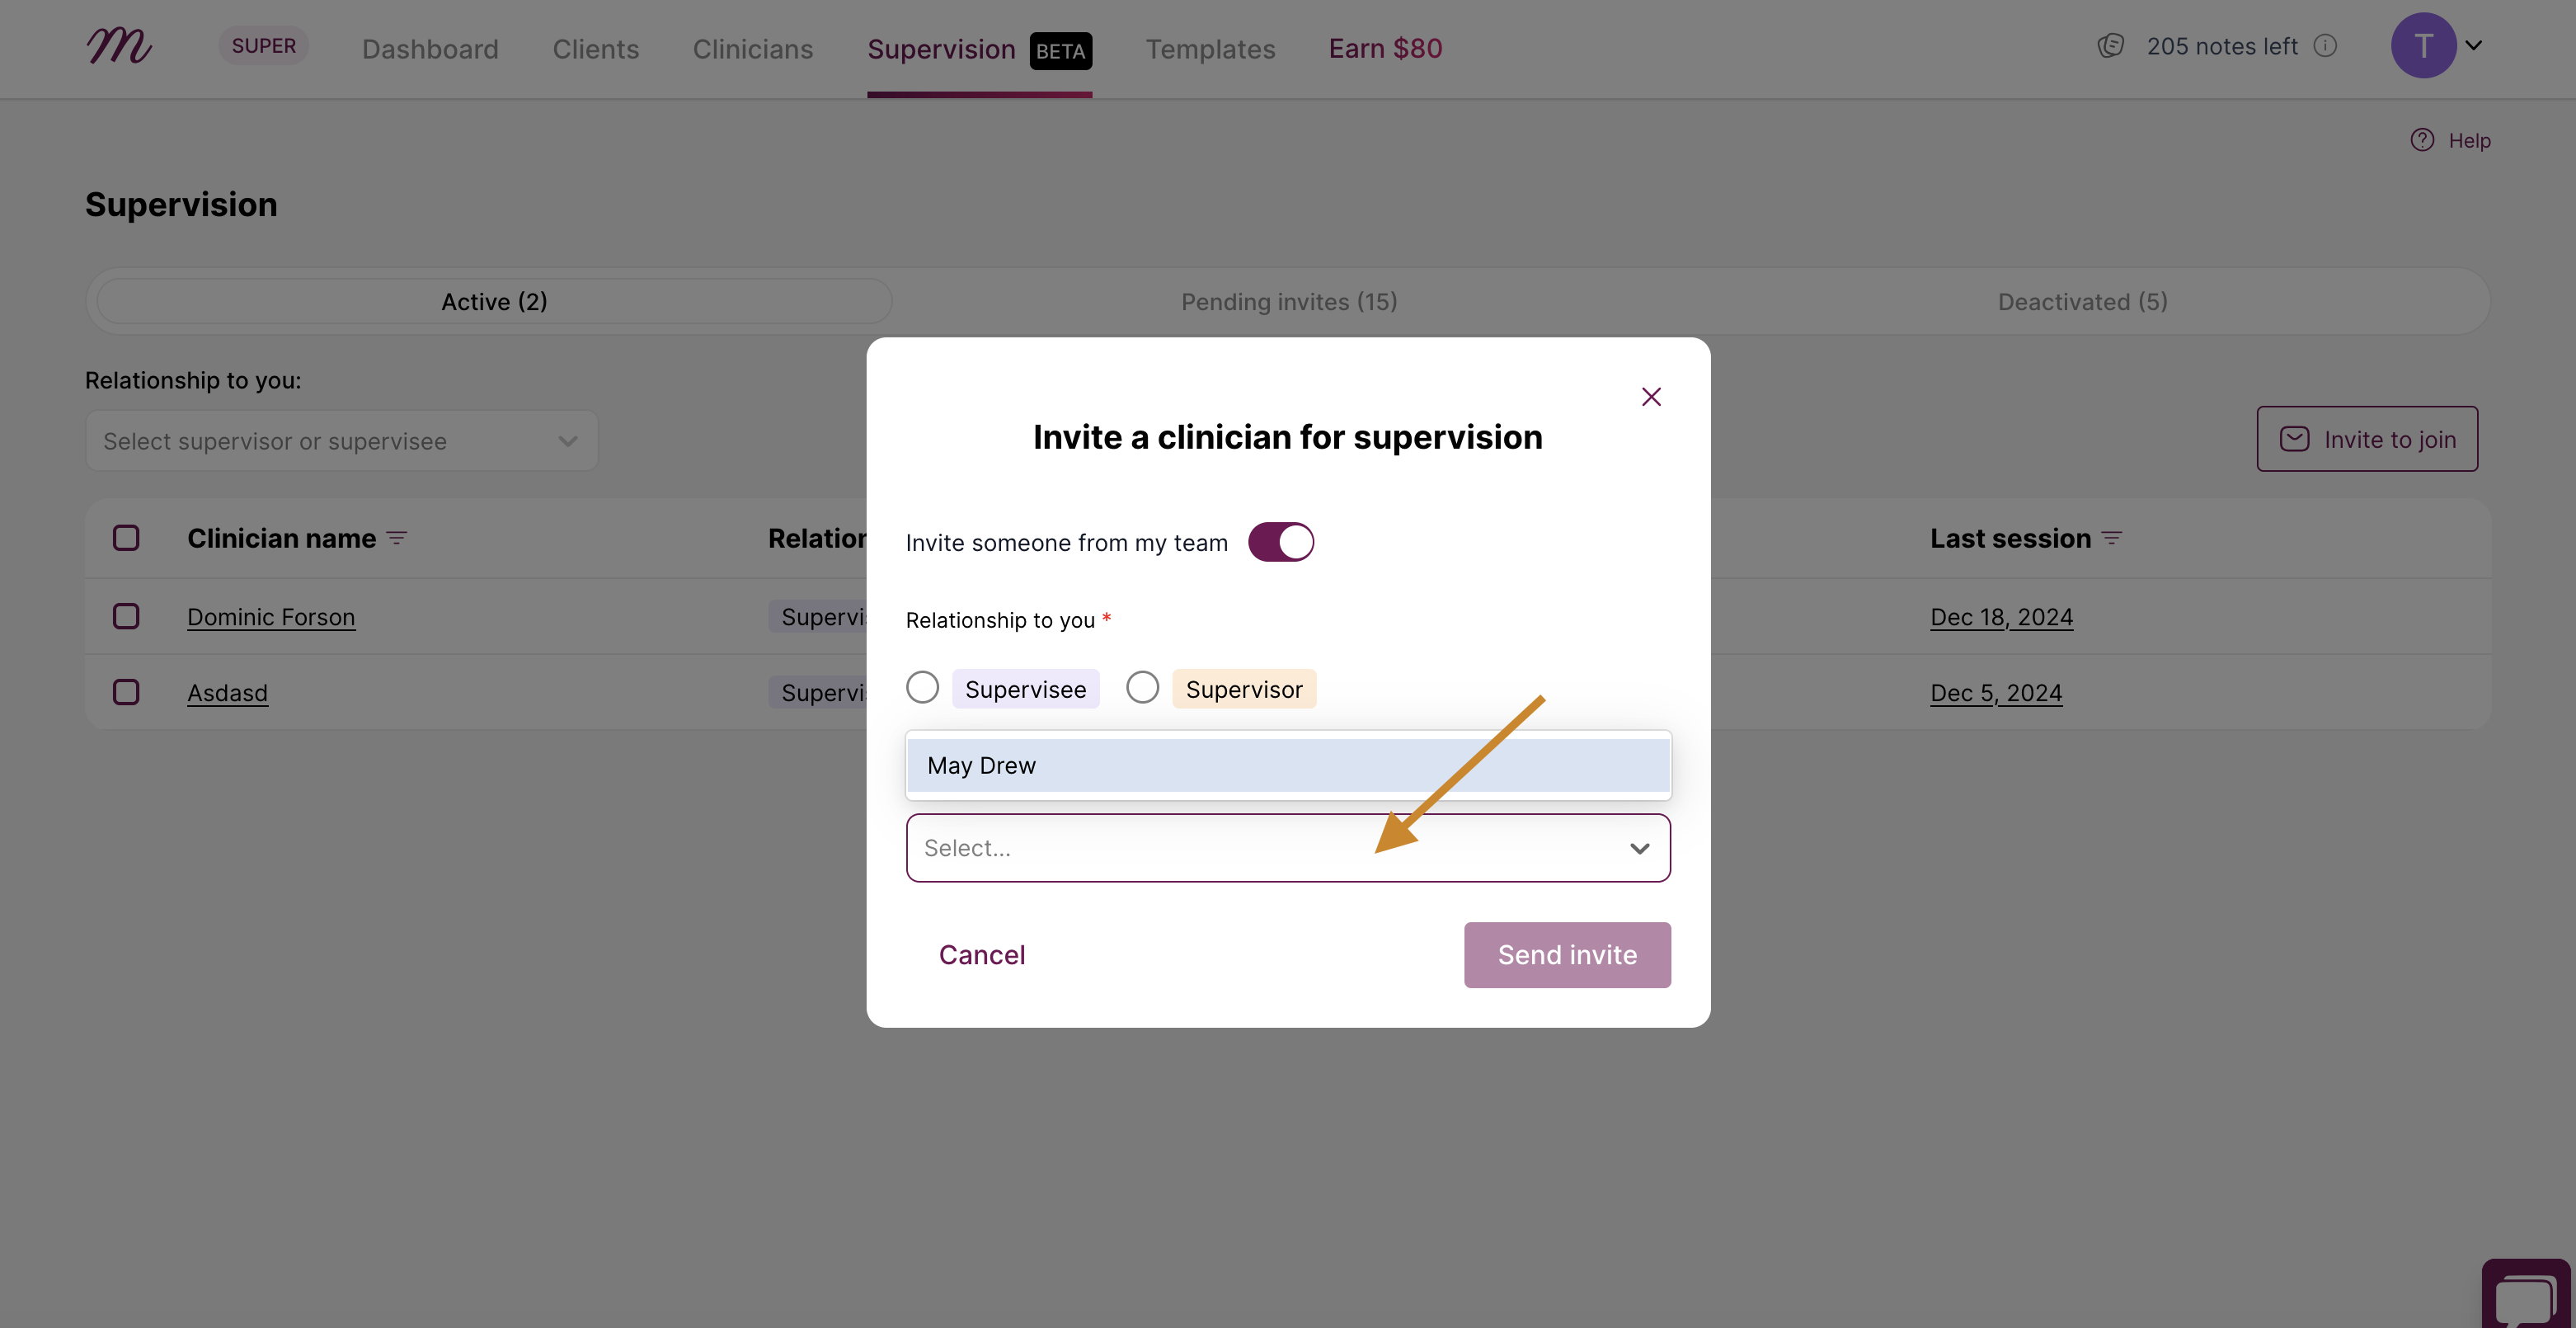
3. Select a user(s) from the list of people within your organization
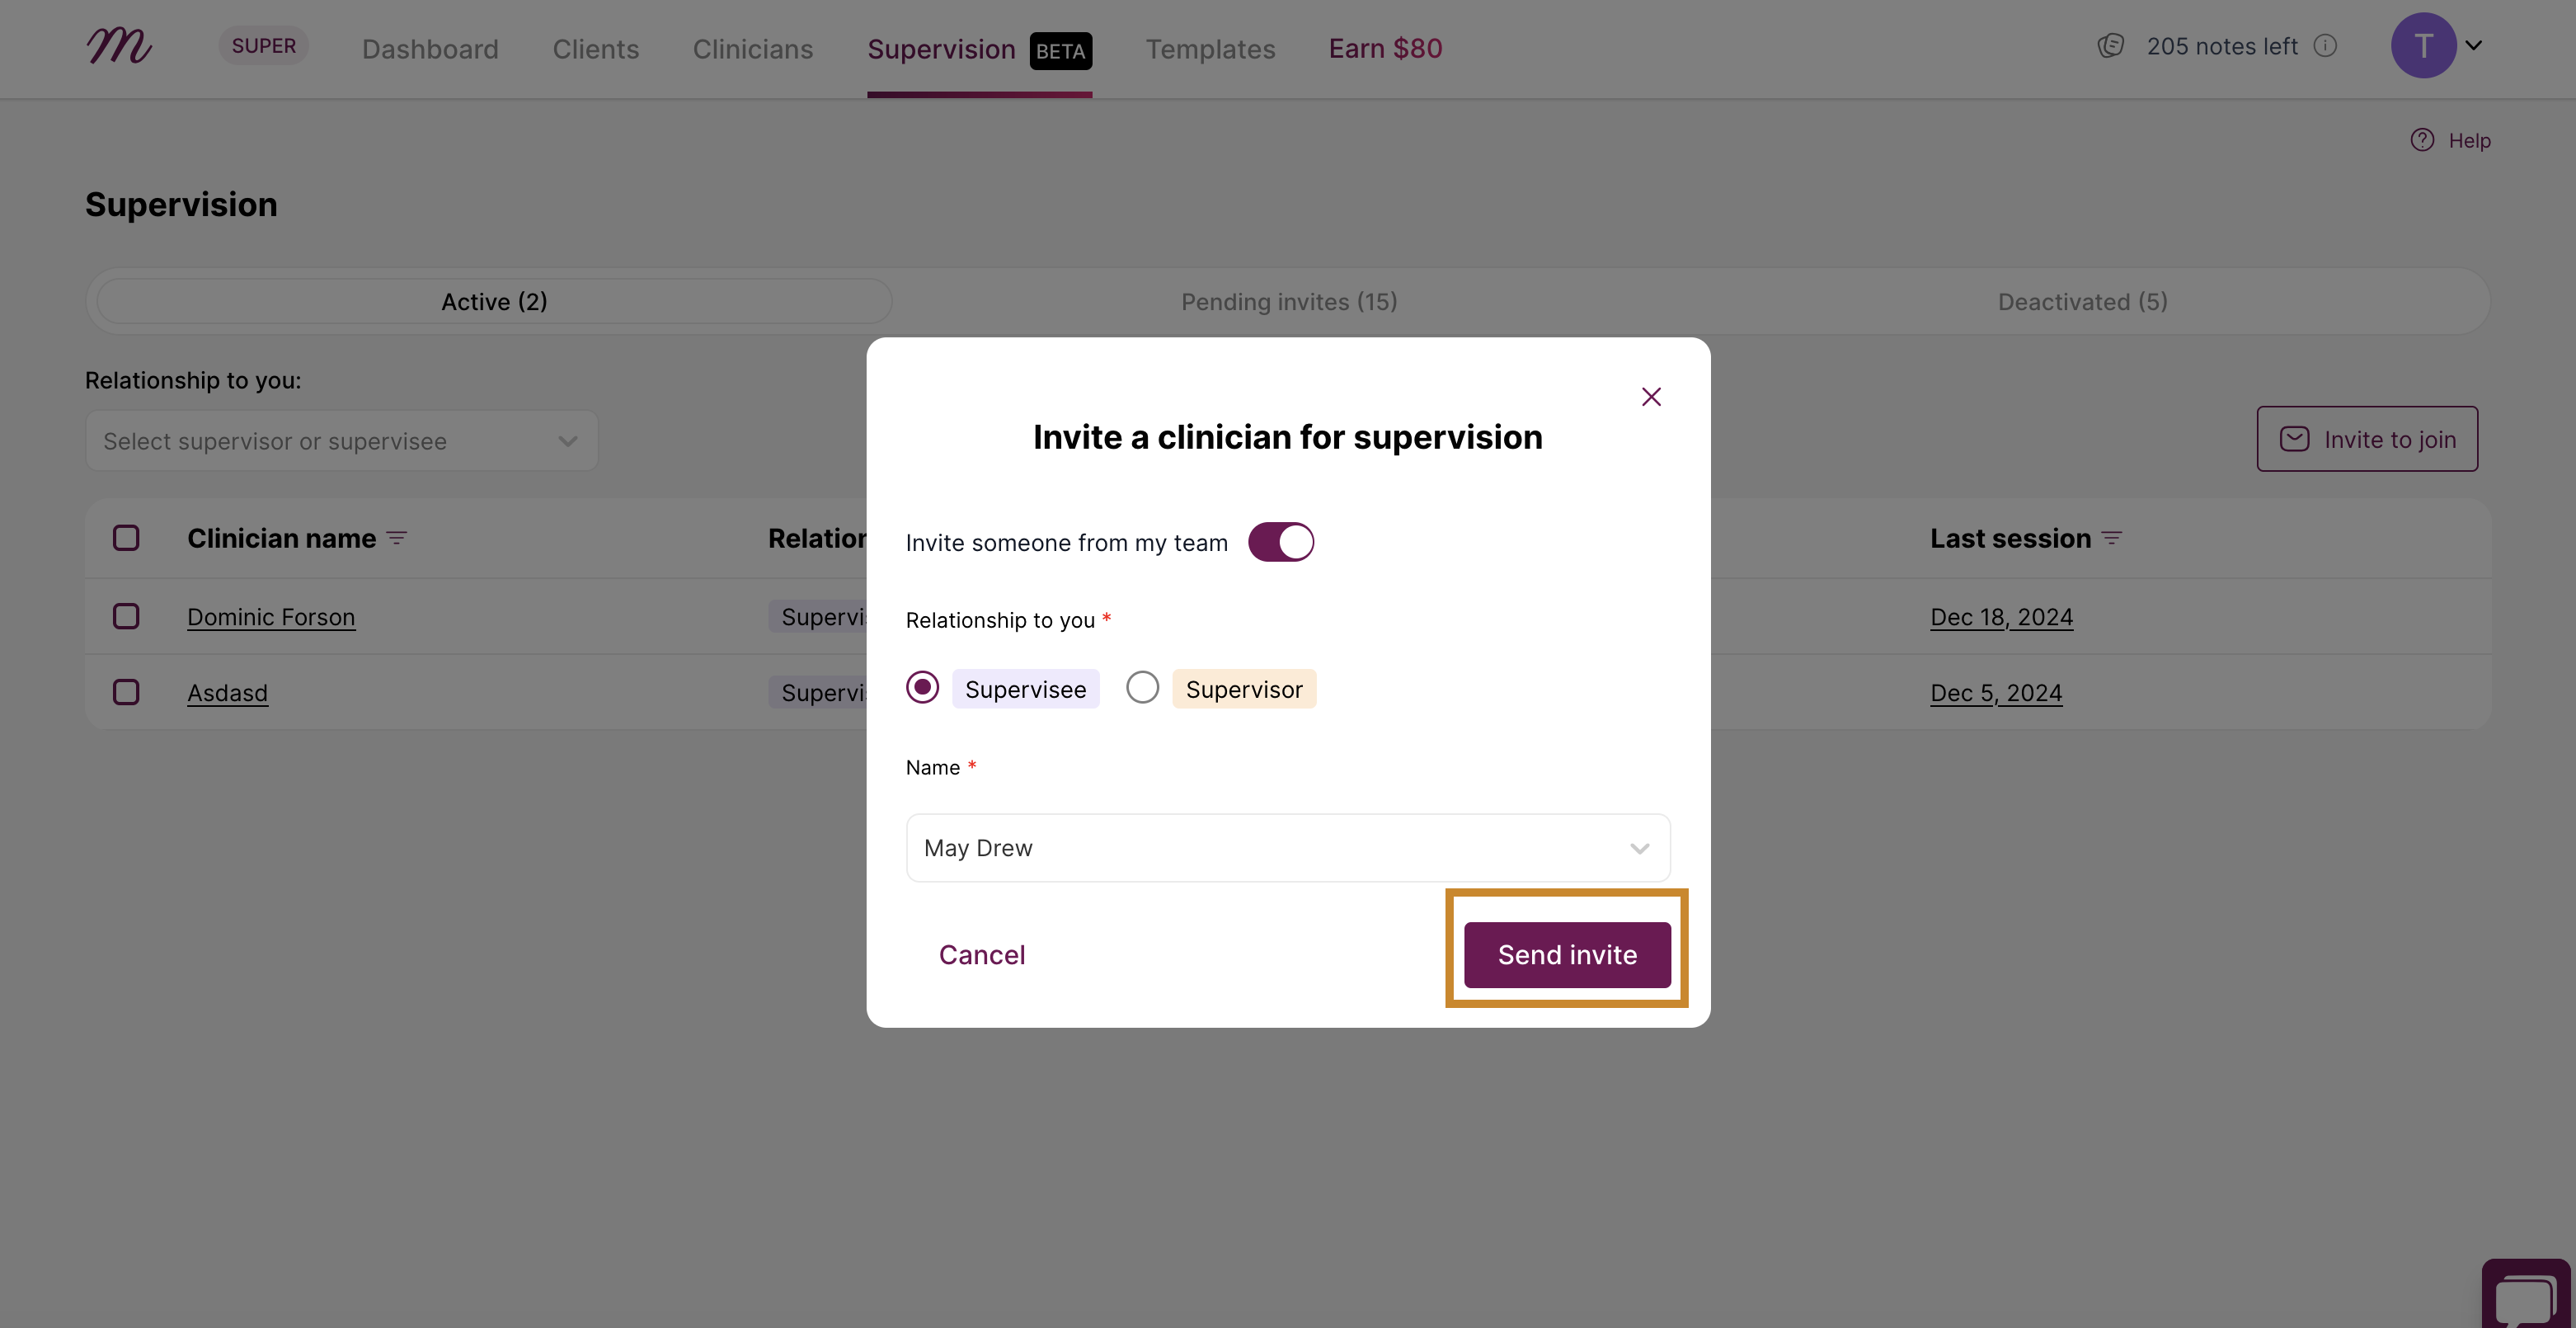
4. Click on “Send invite” they will receive an email
B. How to Manage Supervision Invites
1. Pending Invites
After sending an invitation, you can manage it from the Pending Invites section. Locate the invited supervisor’s name on the list.

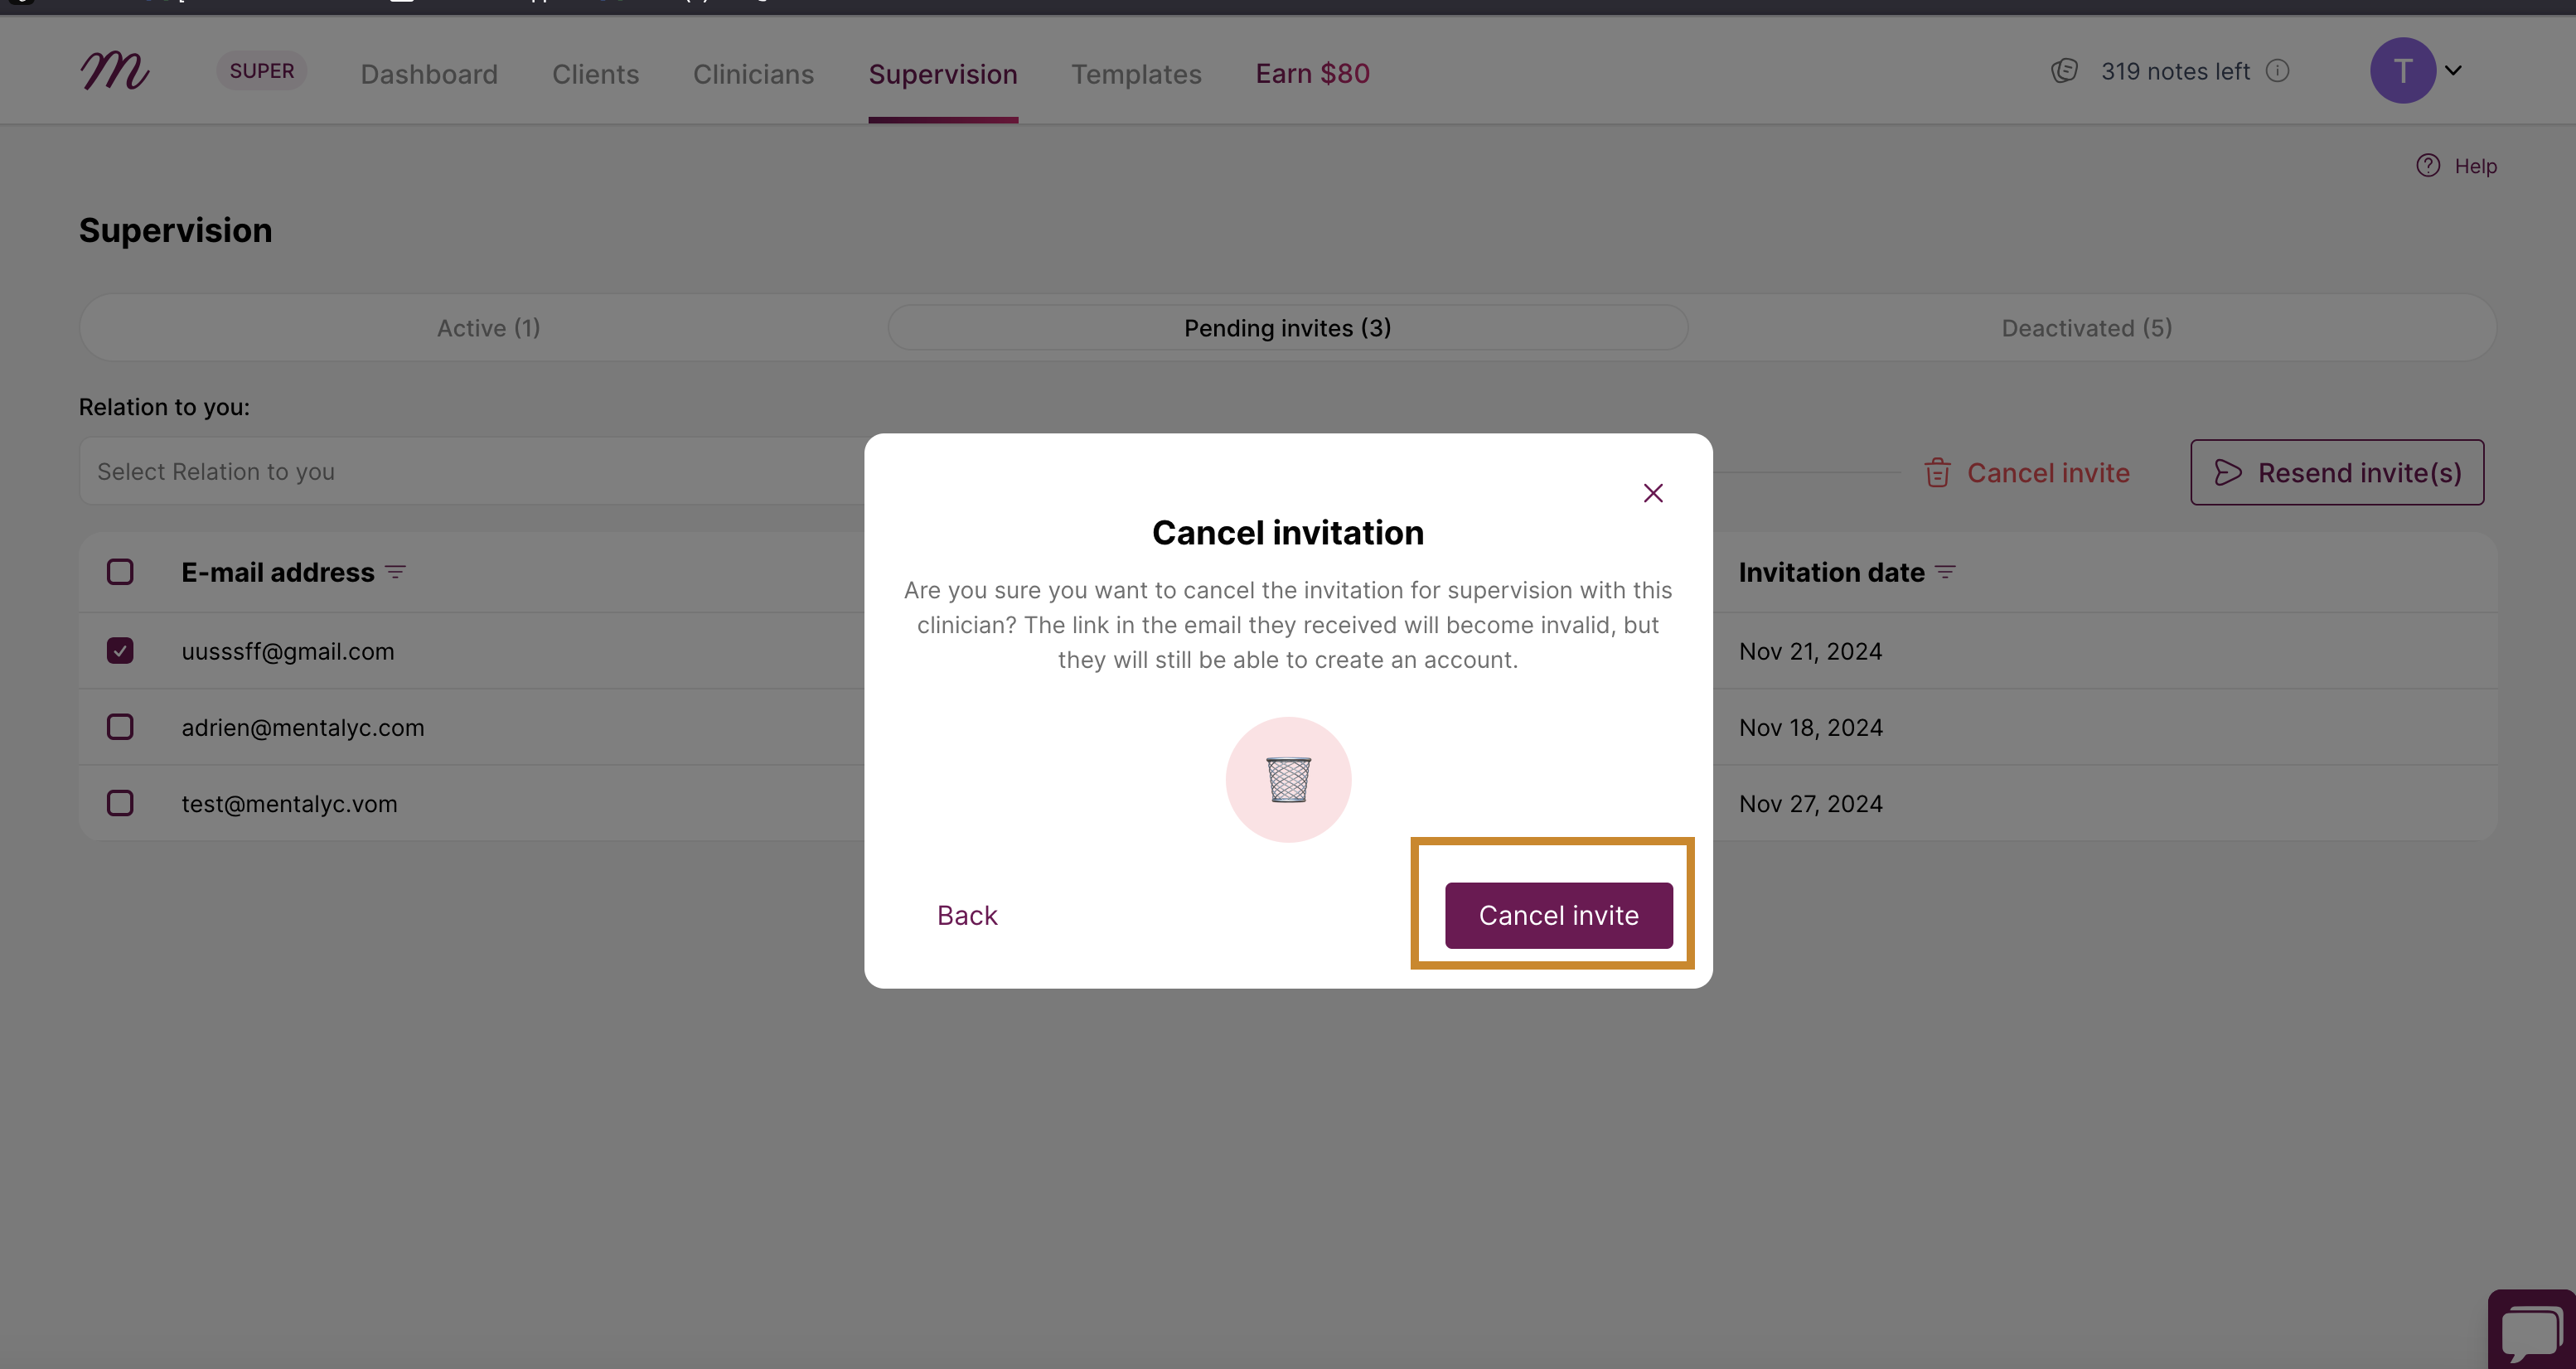
2. Cancelling Pending Invitations: If the supervisor or supervisee is yet to accept the invitation and you do not want to invite them anymore, wheb you are already on the “Pending invites”, click the small box beside the email address of the supervisor or supervisee invited on the left side of the page, then click on the “Cancel invite” button on the right side of the page above.

3. This pop up will appear. Then, click on “Cancel invite”
4. Re-sending Pending Invitations: If the supervisor or supervisee is yet to accept the invitation and you are not sure if the first invitation you sent was successful, when you are on the “Pending invites” tab, click the small box beside the email address of the supervisor or supervisee invited then click on the “Resend invite” button. And the invites will be sent again.

5. This pop up will appear. Then, click on “Resend invite”.

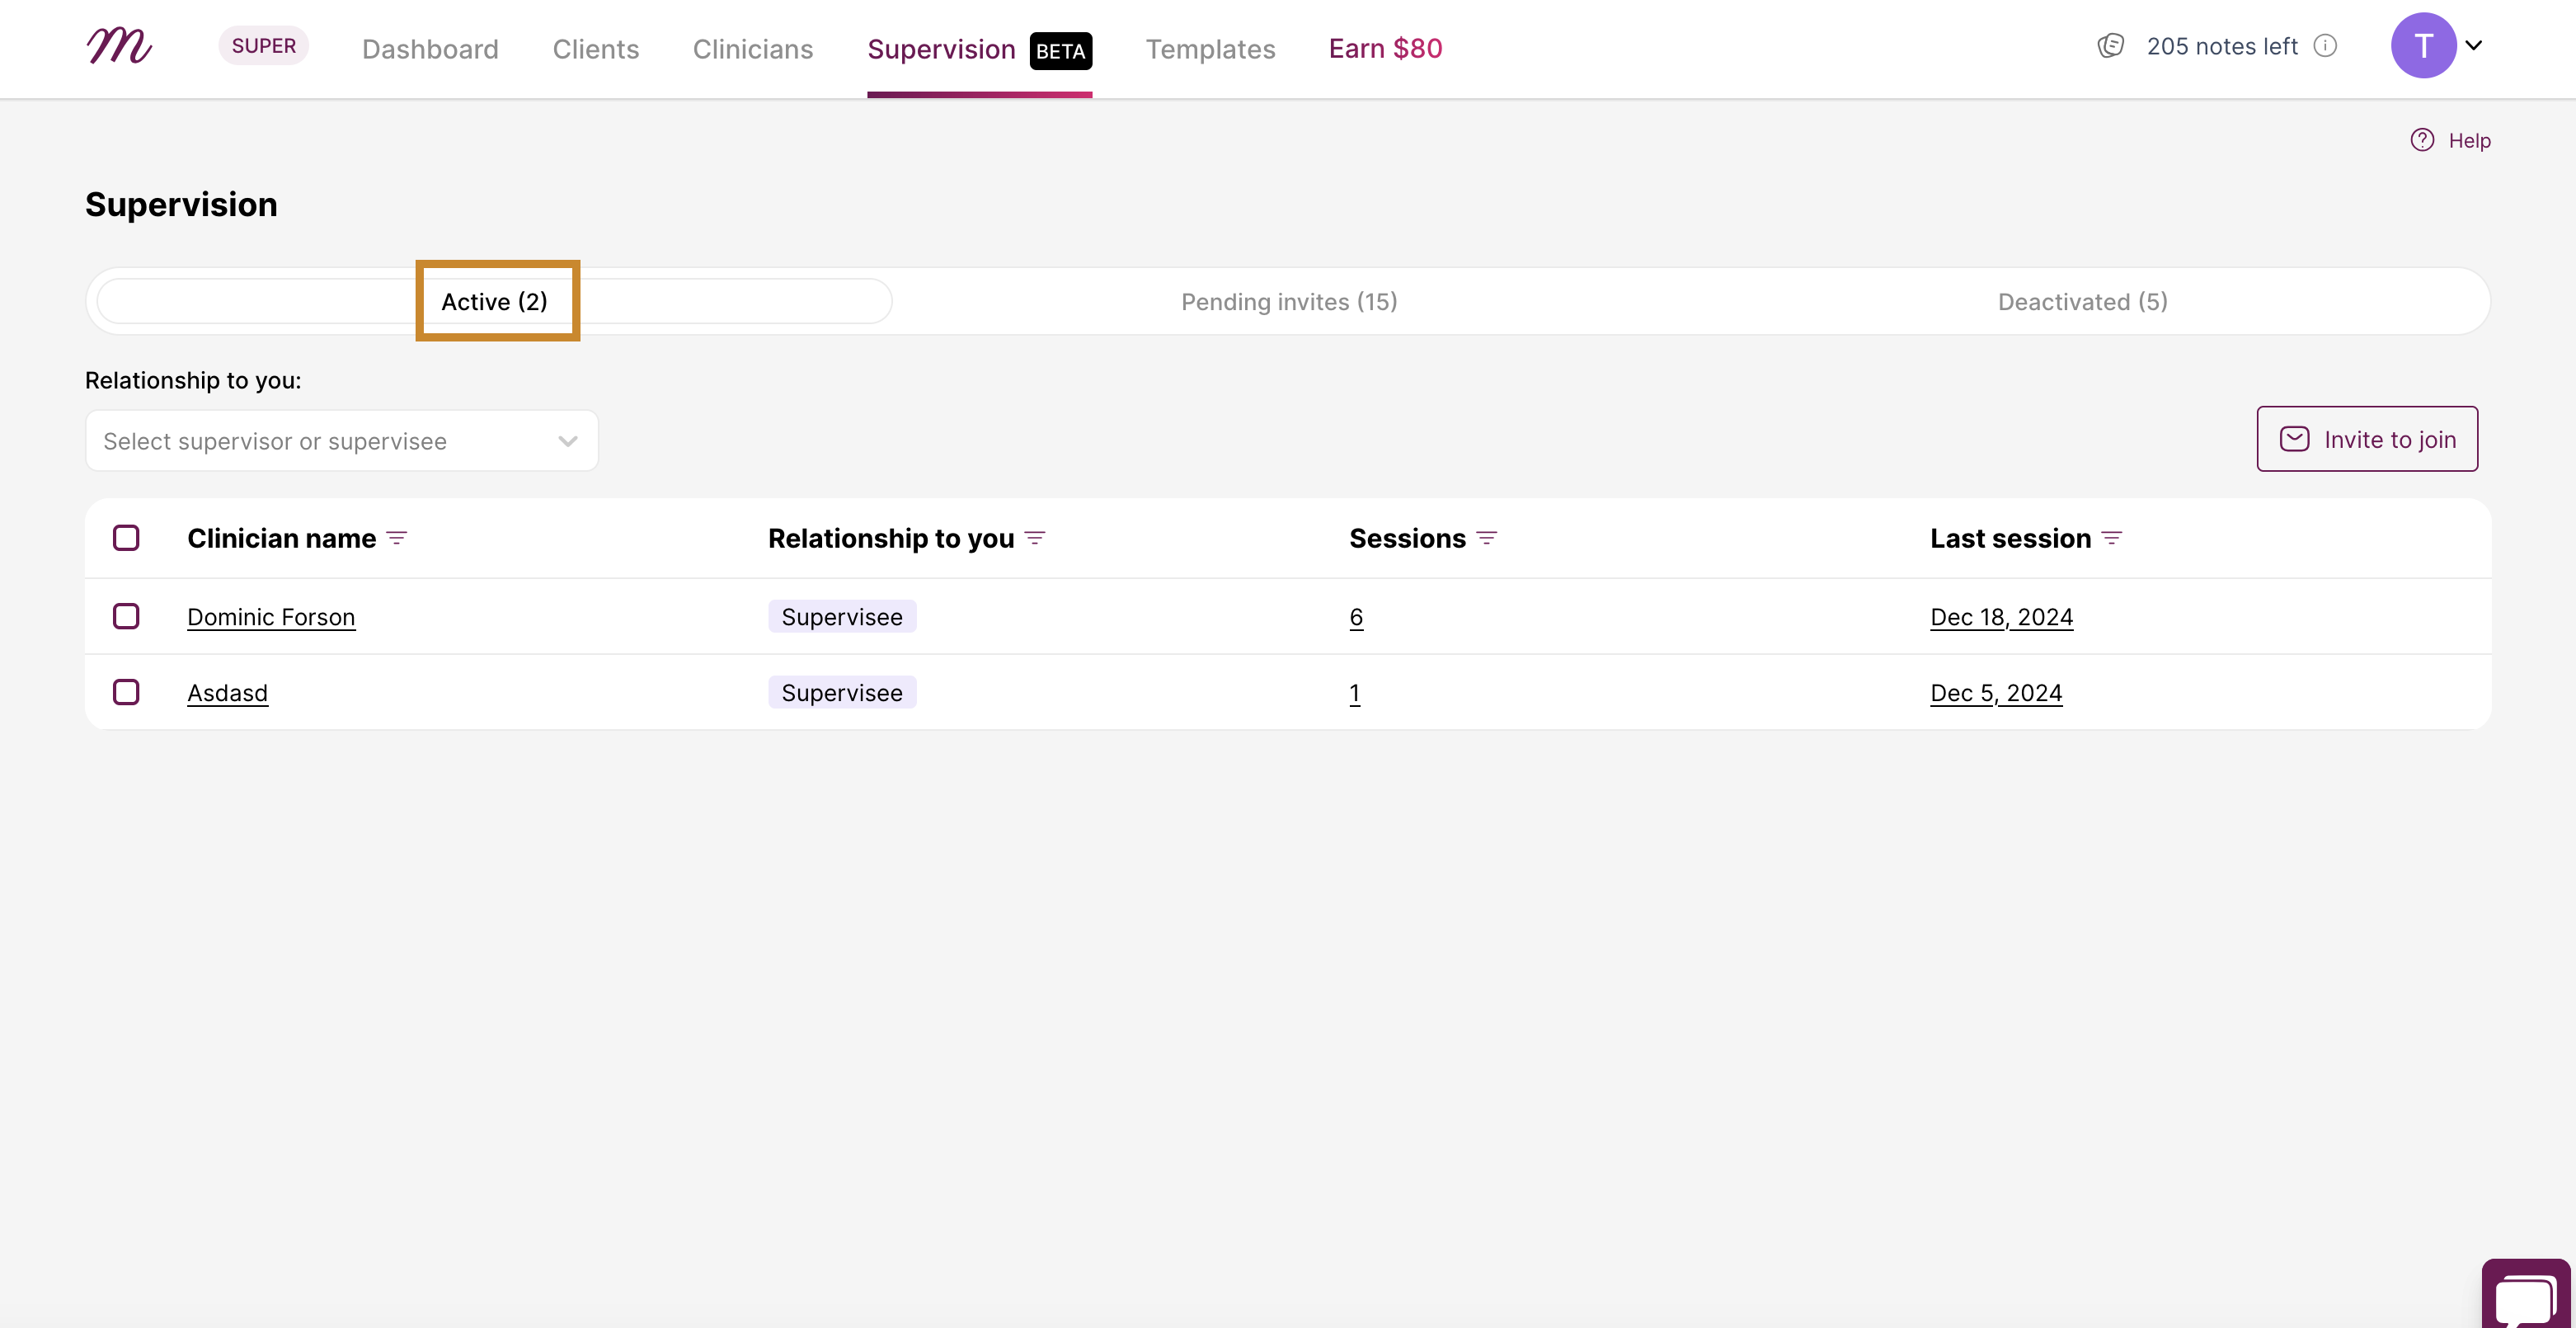
6. Active Invites
Once the invitee accepts the invitation, they will appear as an active supervisor in your list. If they are being active, that means you can run sessions with them.
7. Deactivating Active Supervisor / Supervisee
You can deactivate an active supervisor / supervisee. Once deactivated, you'll still be able to access them. It's just that you can't run sessions with them anymore.
when you are on the “Active invites” tab, click the small box beside the email address of the supervisor or supervisee, then click on the “Deactivate” button.
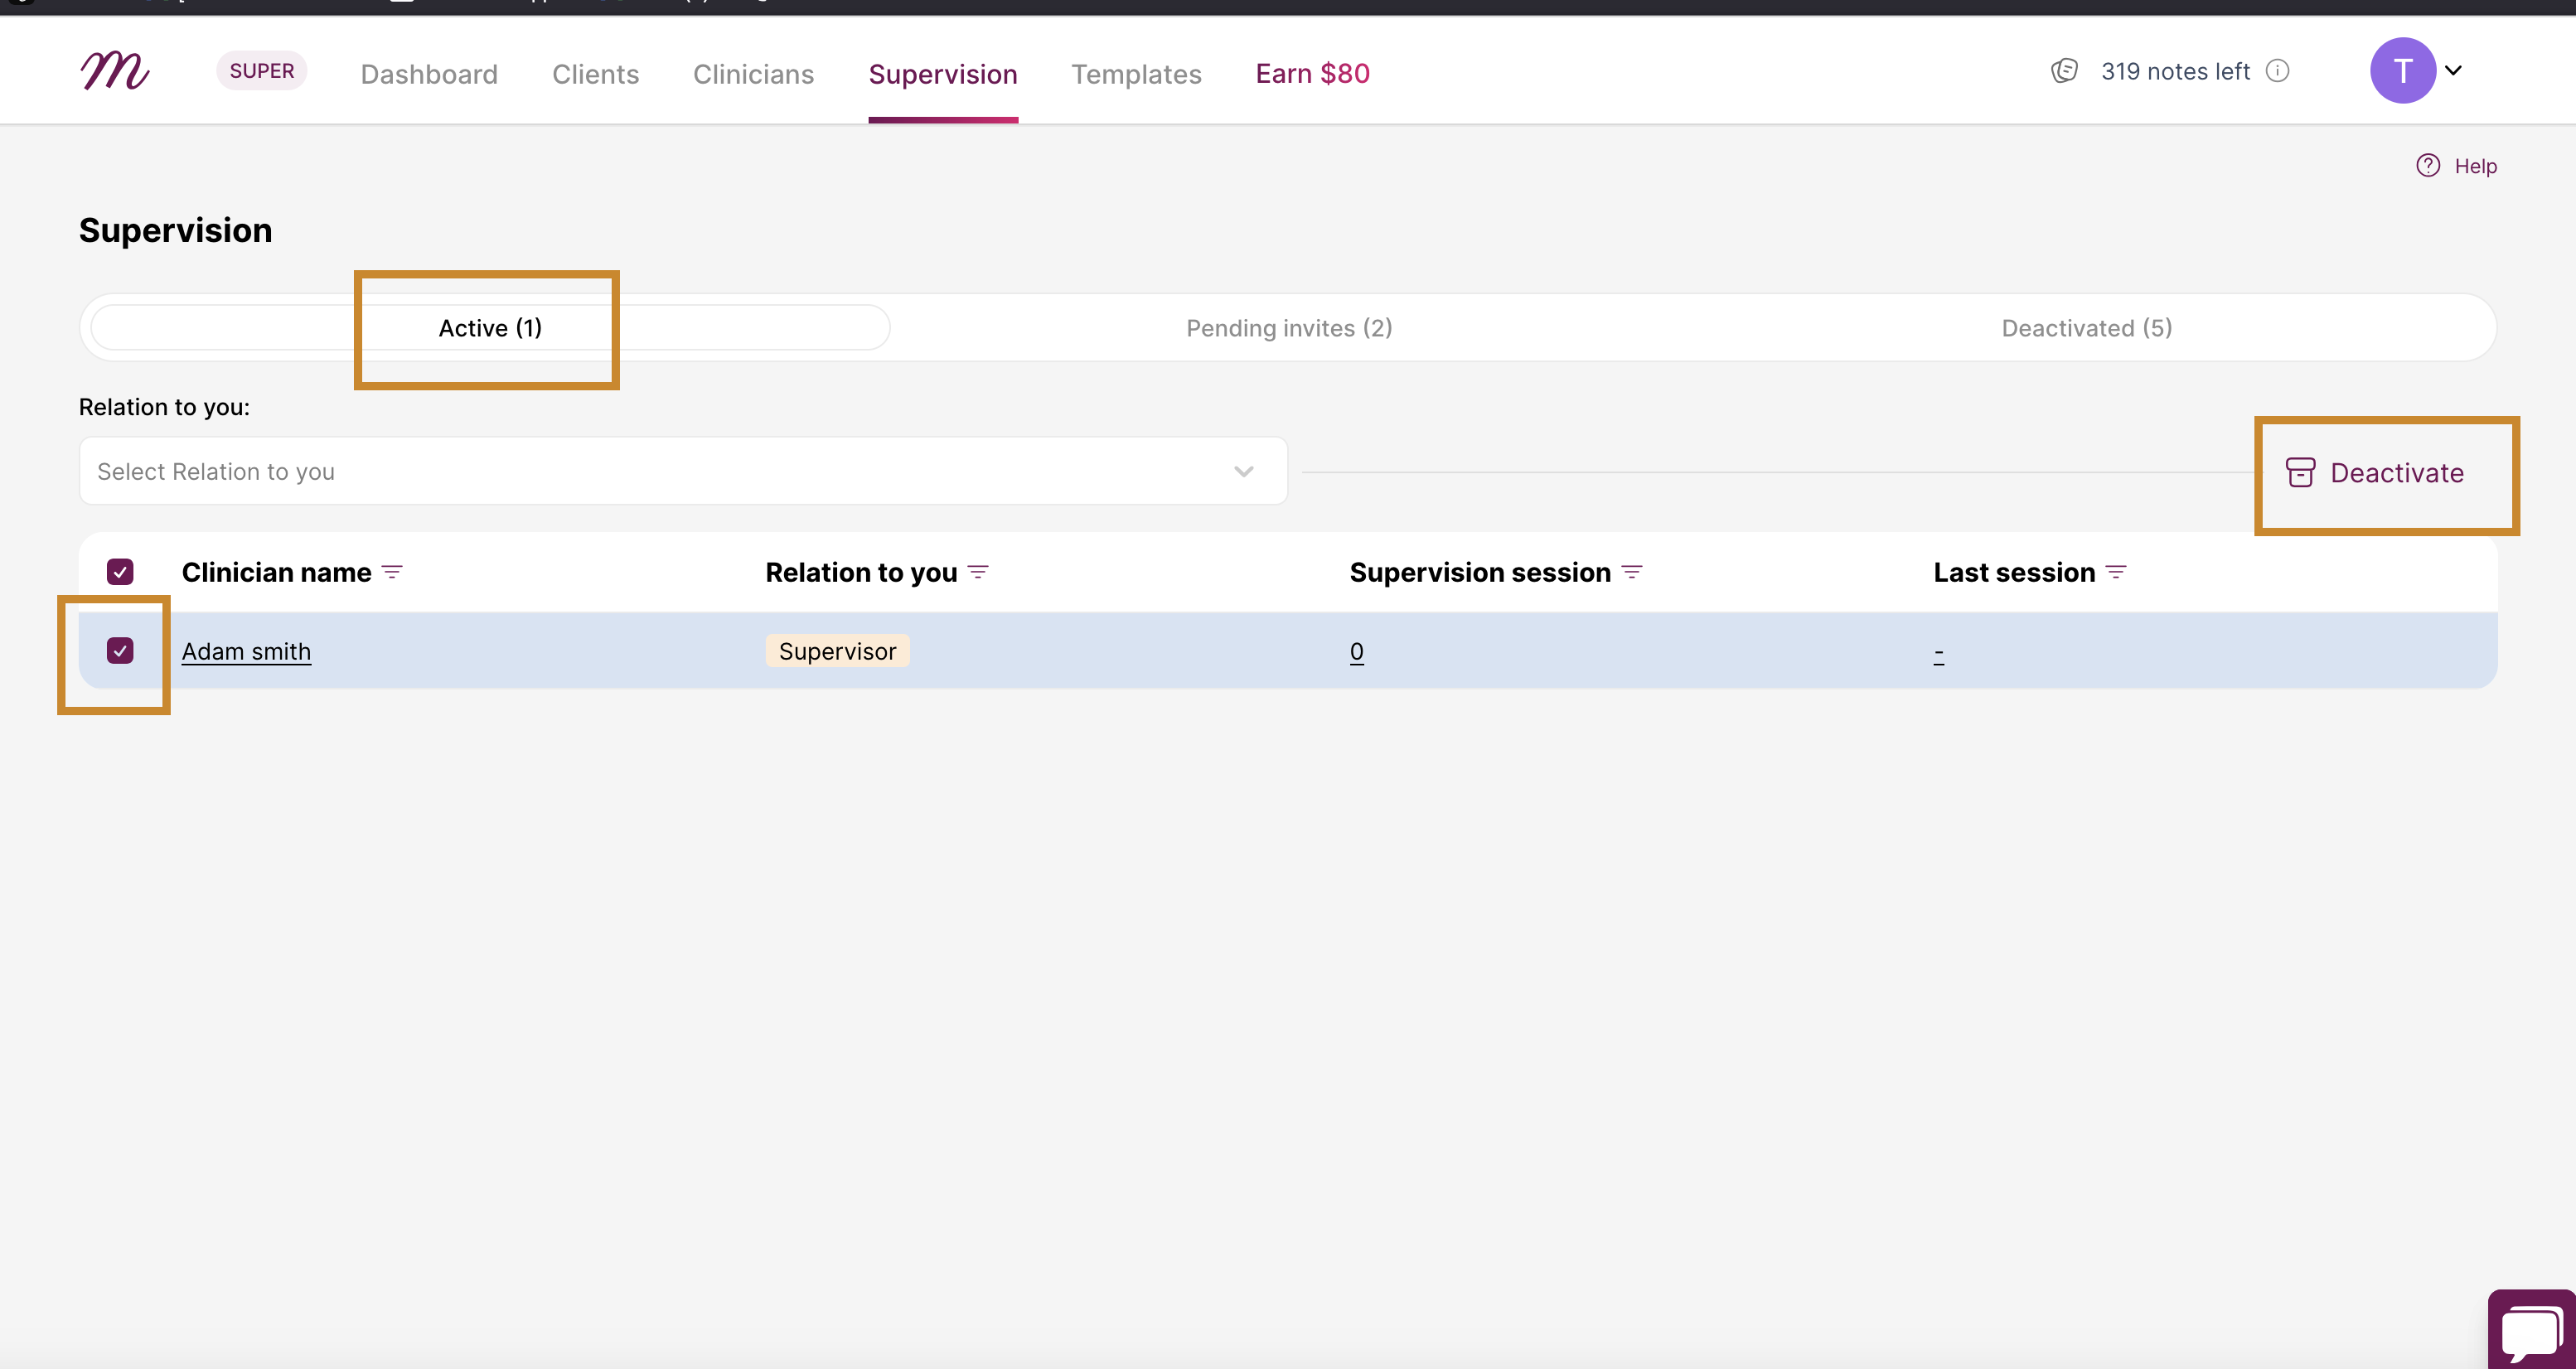
8. This pop up will appear. Then, click on “Deactivate”

9. The supervisor / supervisee deactivate will be moved to the “Deactivate” tab
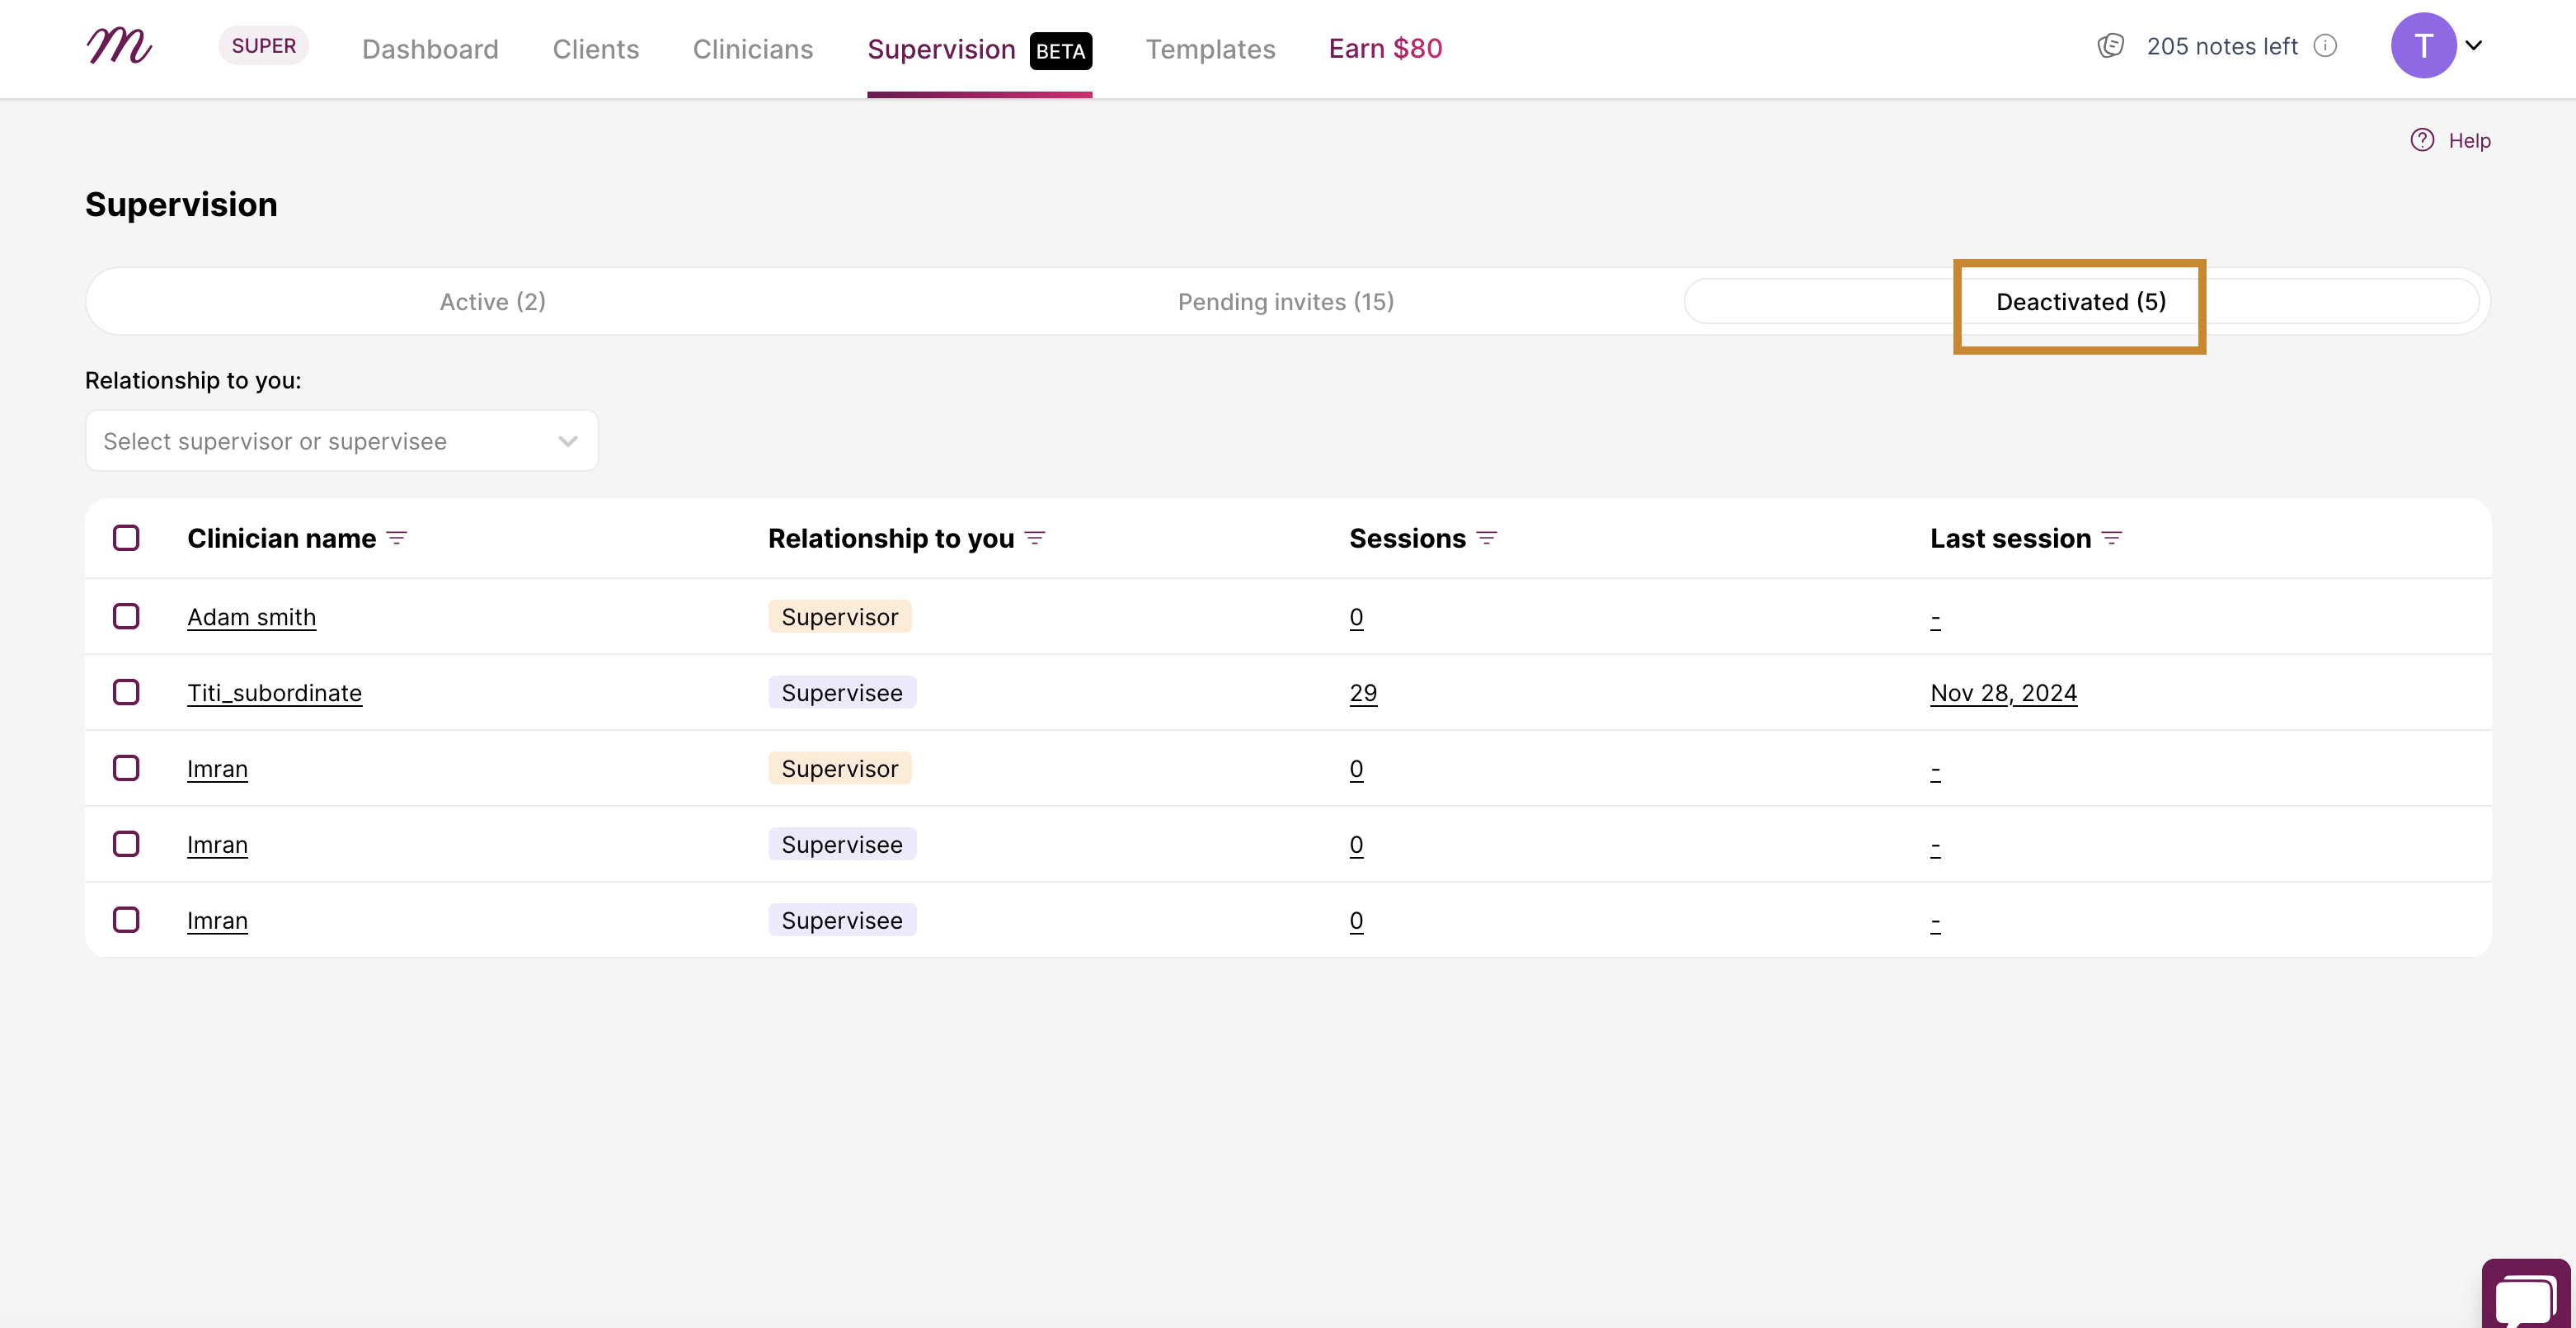
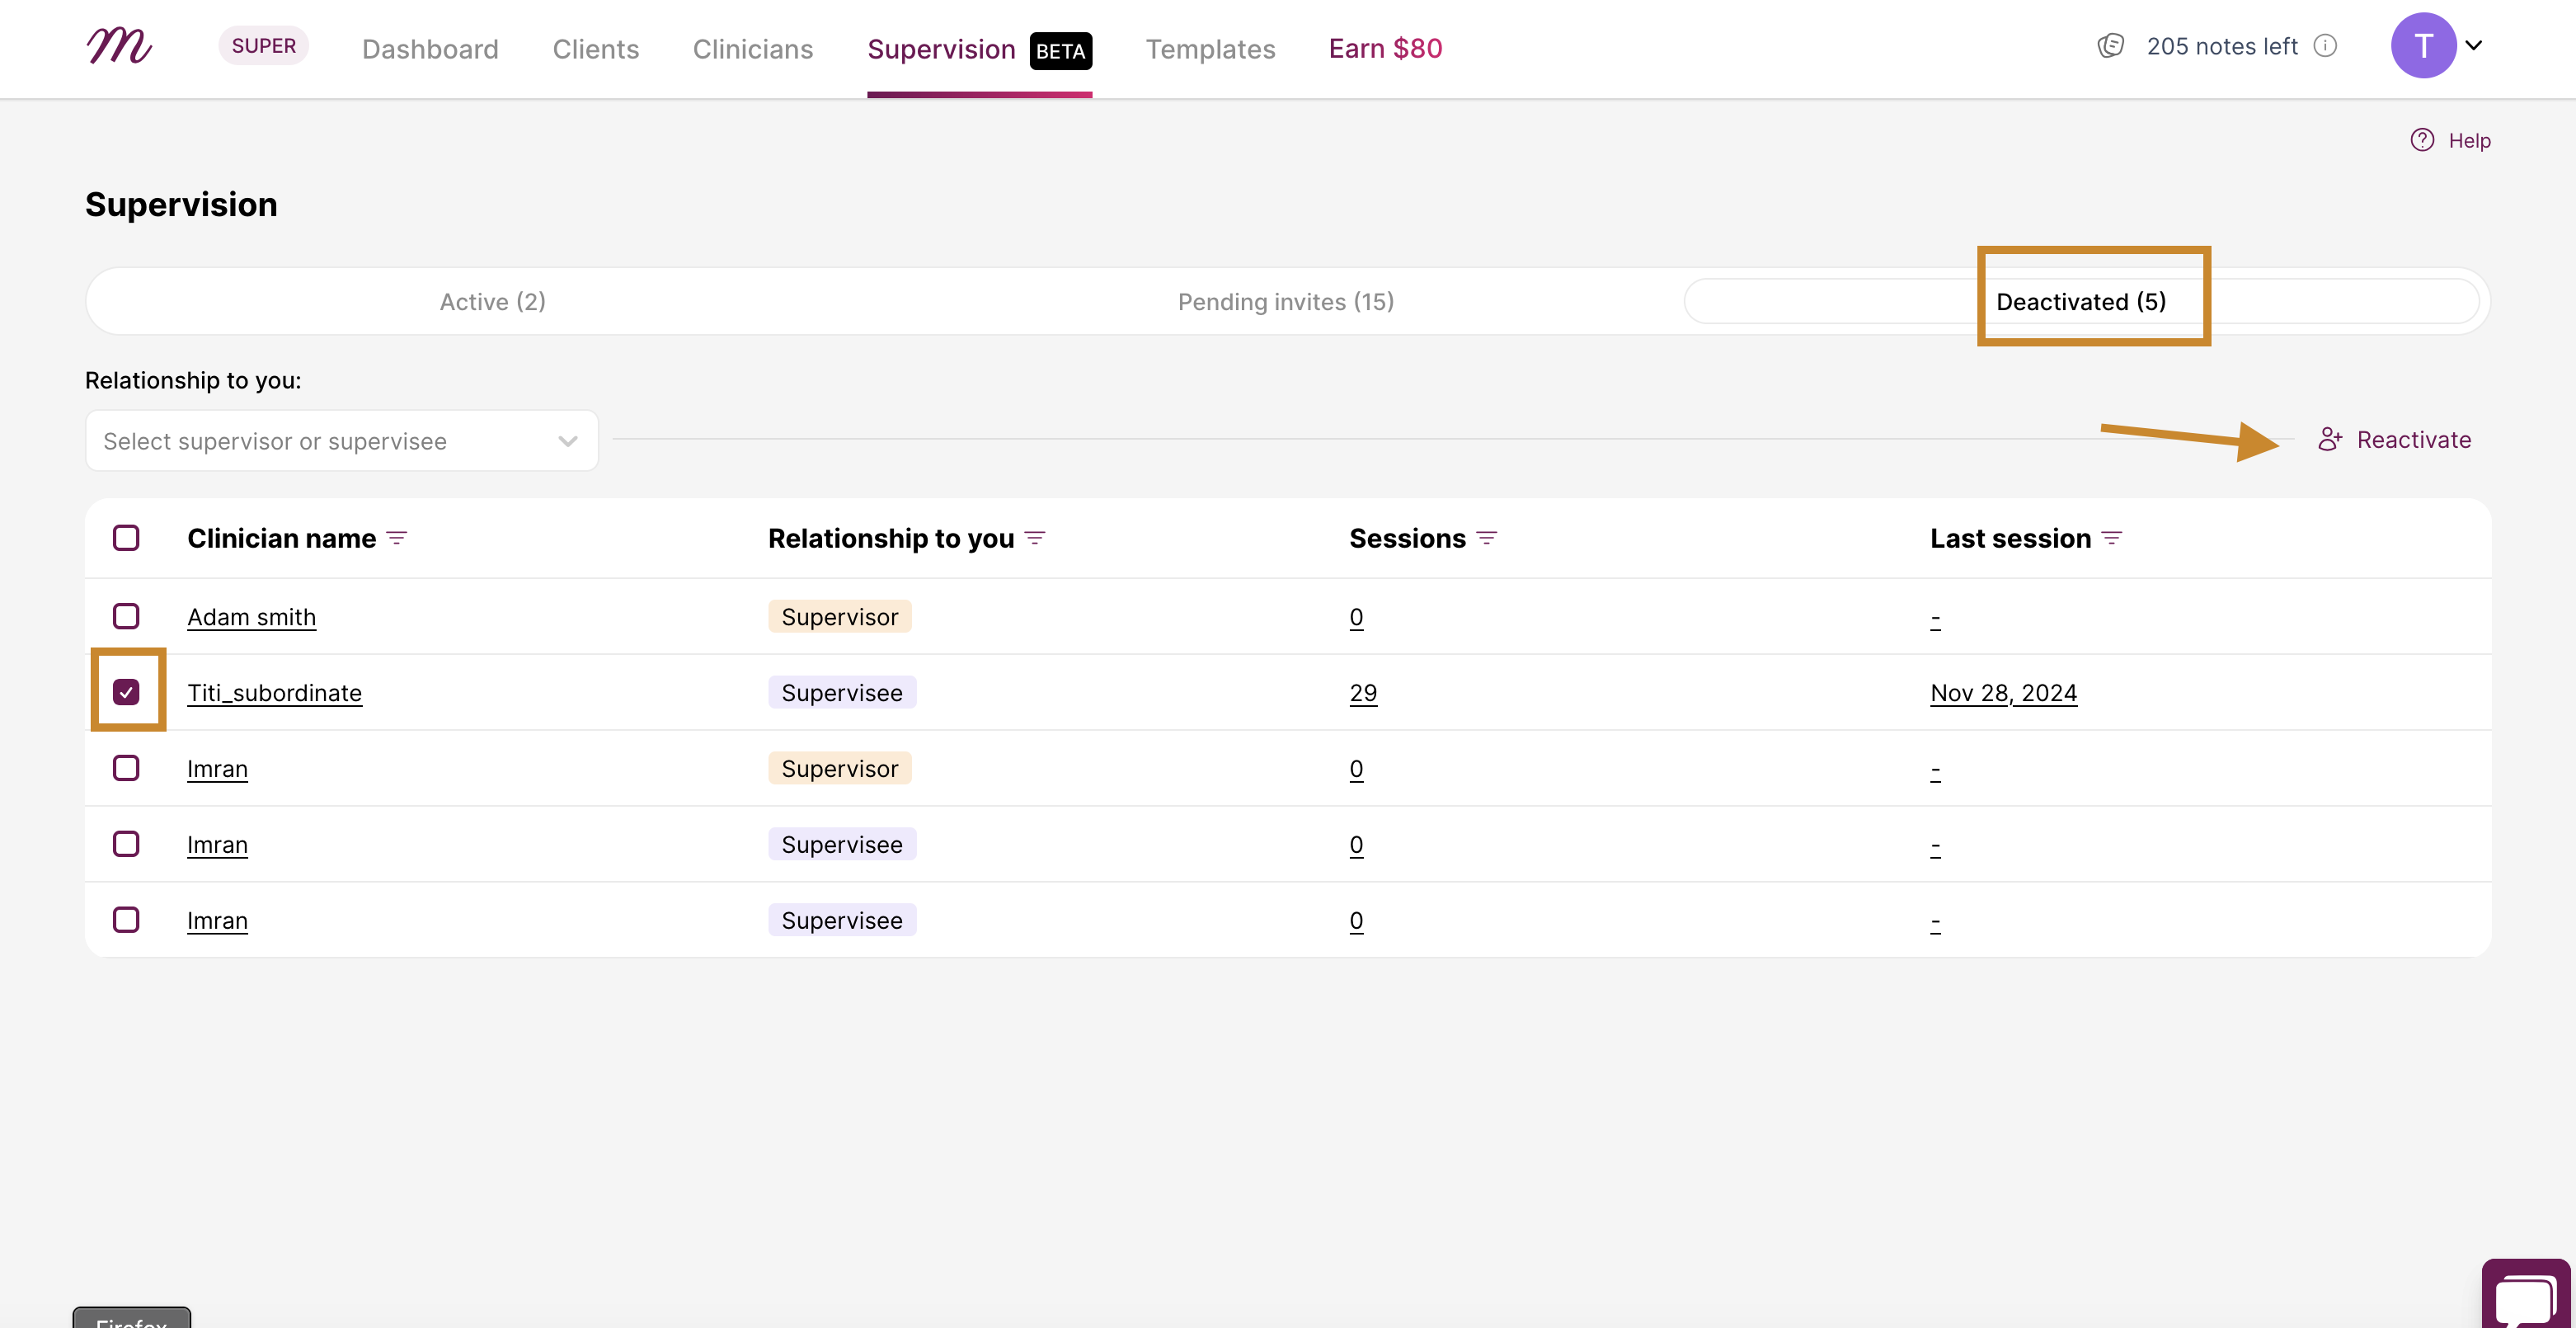
10. Reactivating a supervisor / supervisee
When you are on the “Deactivate” tab, click the small box beside the email address of the supervisor or supervisee then click on the “Reactivate” button. And those will be added back to the active tab.
C. How to Conduct a Supervision Session and Create Supervision Notes
You can carry out supervision sessions and create supervision notes from two main areas of the platform depending on where you are working from:
- The Supervision Tab
- The Dashboard
Let’s walk through both methods step by step.
Conducting a Supervision Session and Create Supervision Notes from the Supervision Tab
1. When you are on the supervision page, find the name of the supervisee or supervisor you want to work with on the “Clinician names” column and click on it. This opens their profile.
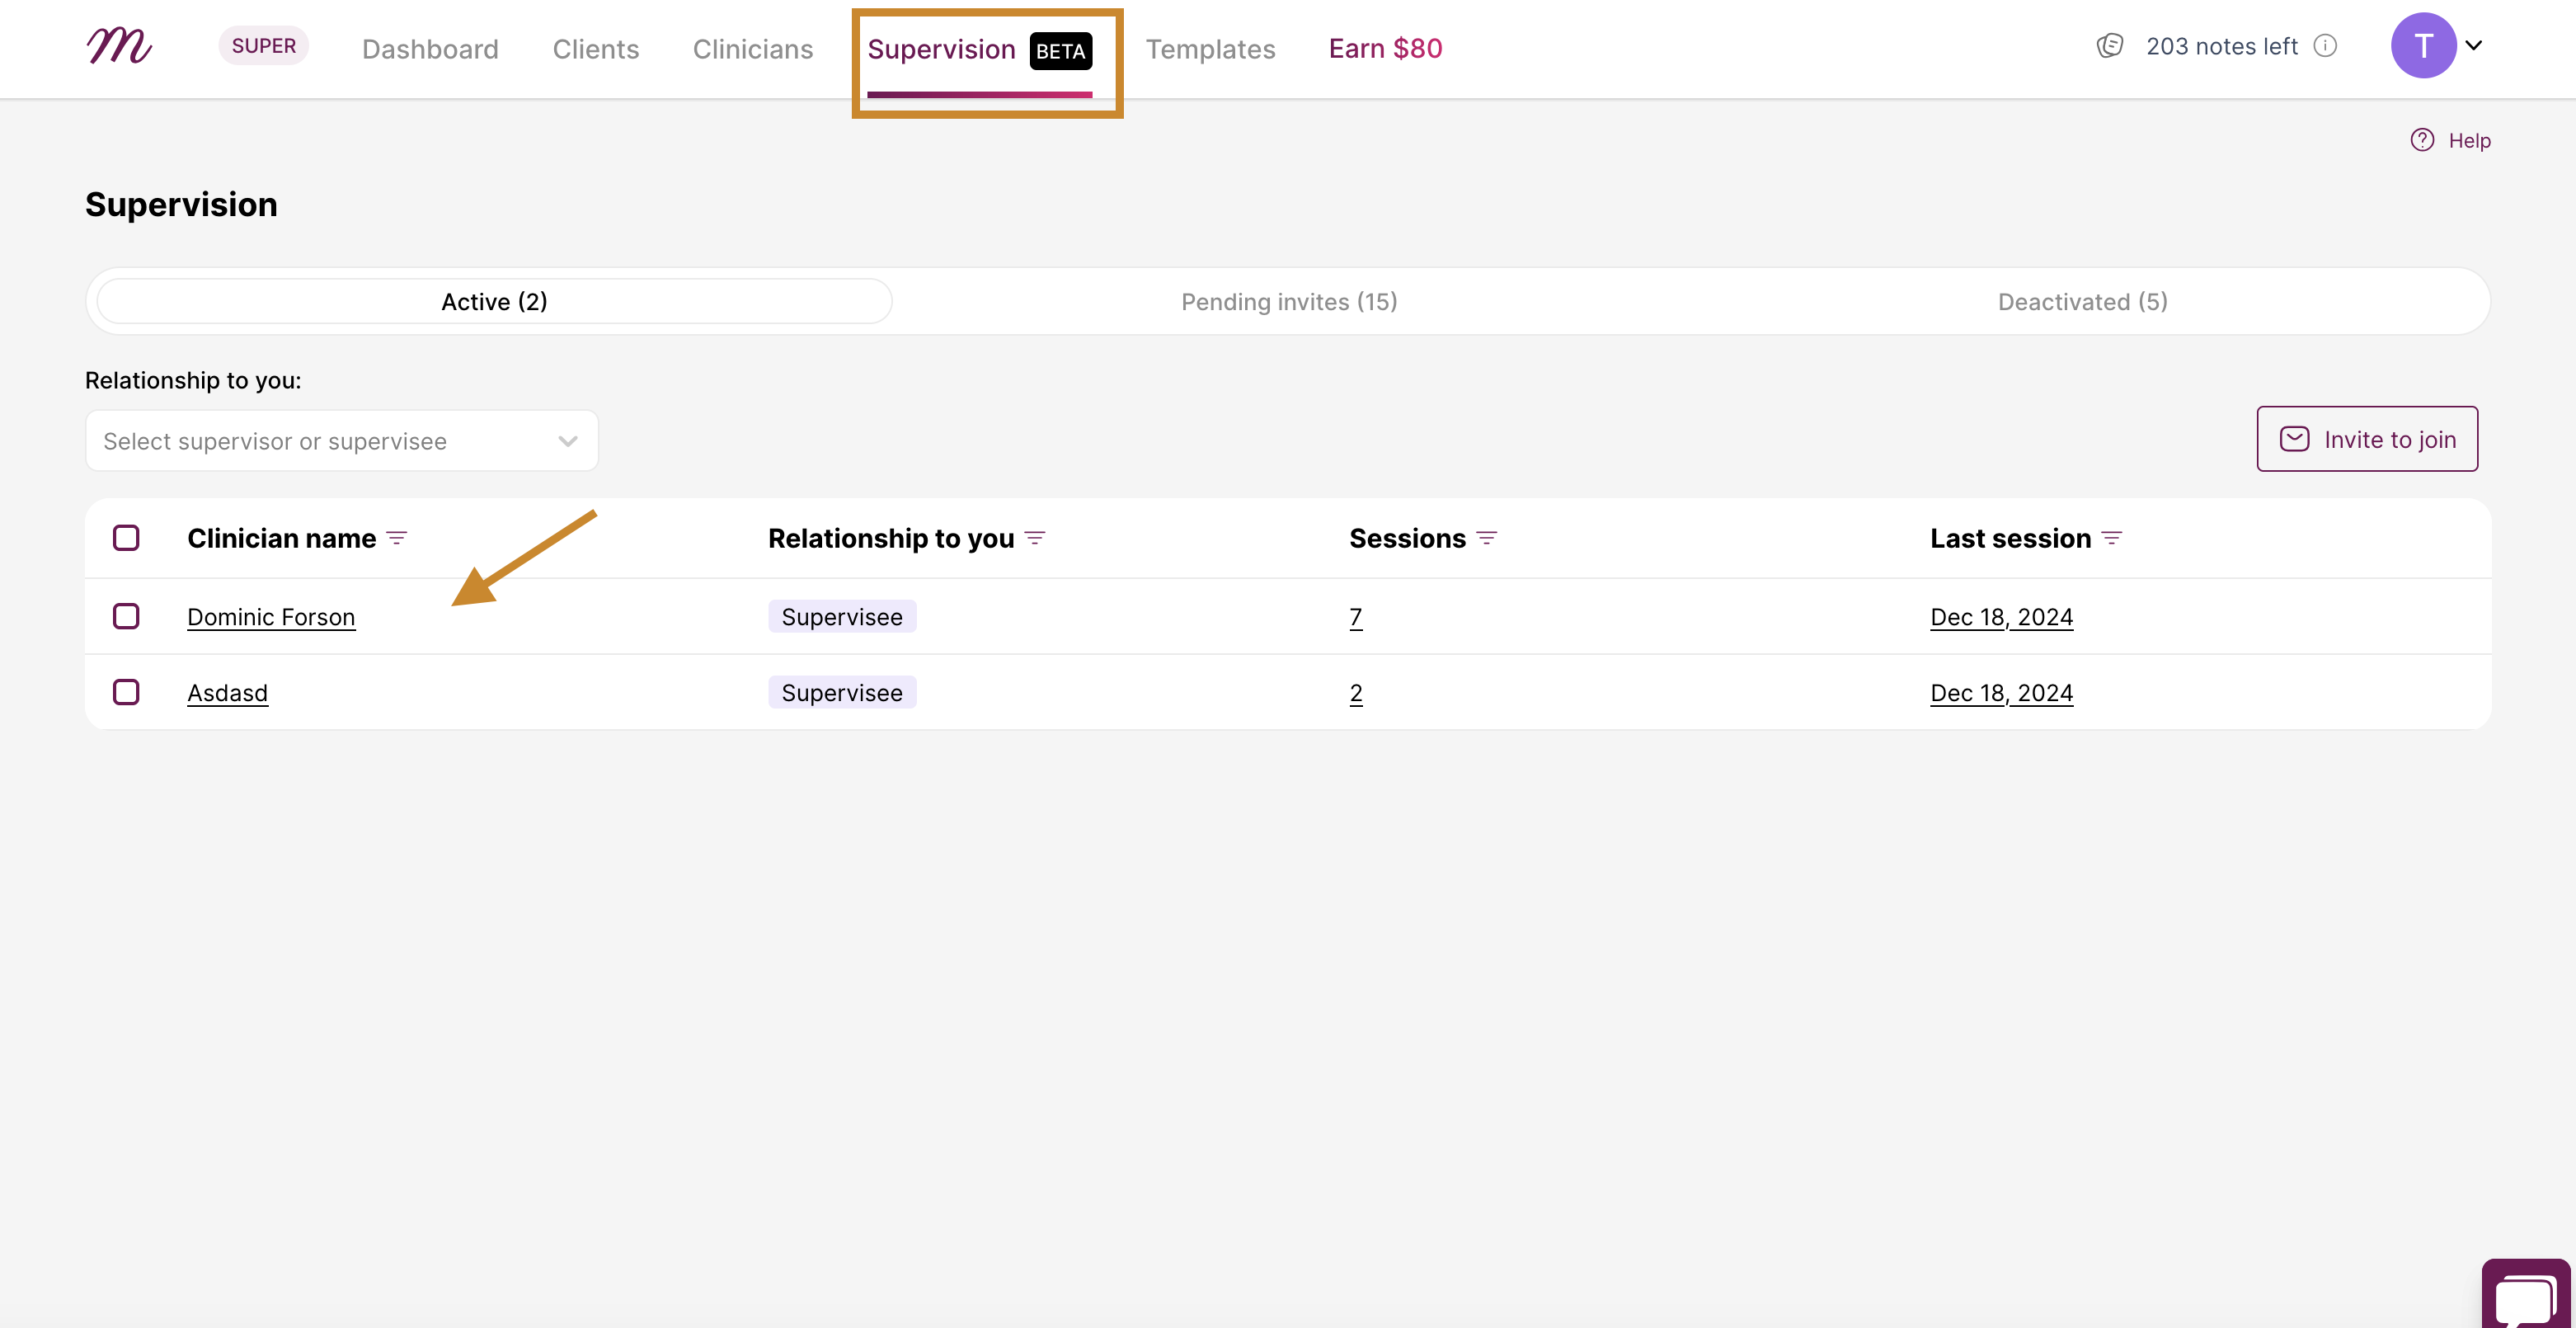
2. You will be taken to their information page. Then you click on “Upload session”

3. The next steps are more or less the same with generating notes for your clients. You can choose from the options how you want to add a session.

4. Choose How to Add Details: You’ll see several options depending on your workflow:
- Record a Session: Use this if the supervision is happening live and you want to record it in real-time.
- Dictate Details: Speak about the session, and the app will convert your speech into text.
- Describe the Session: Manually type out details about the session.
- Upload a File: If the session was recorded on another device, upload the file here.
Click on “Configure and generate” to generate your notes when you are done.
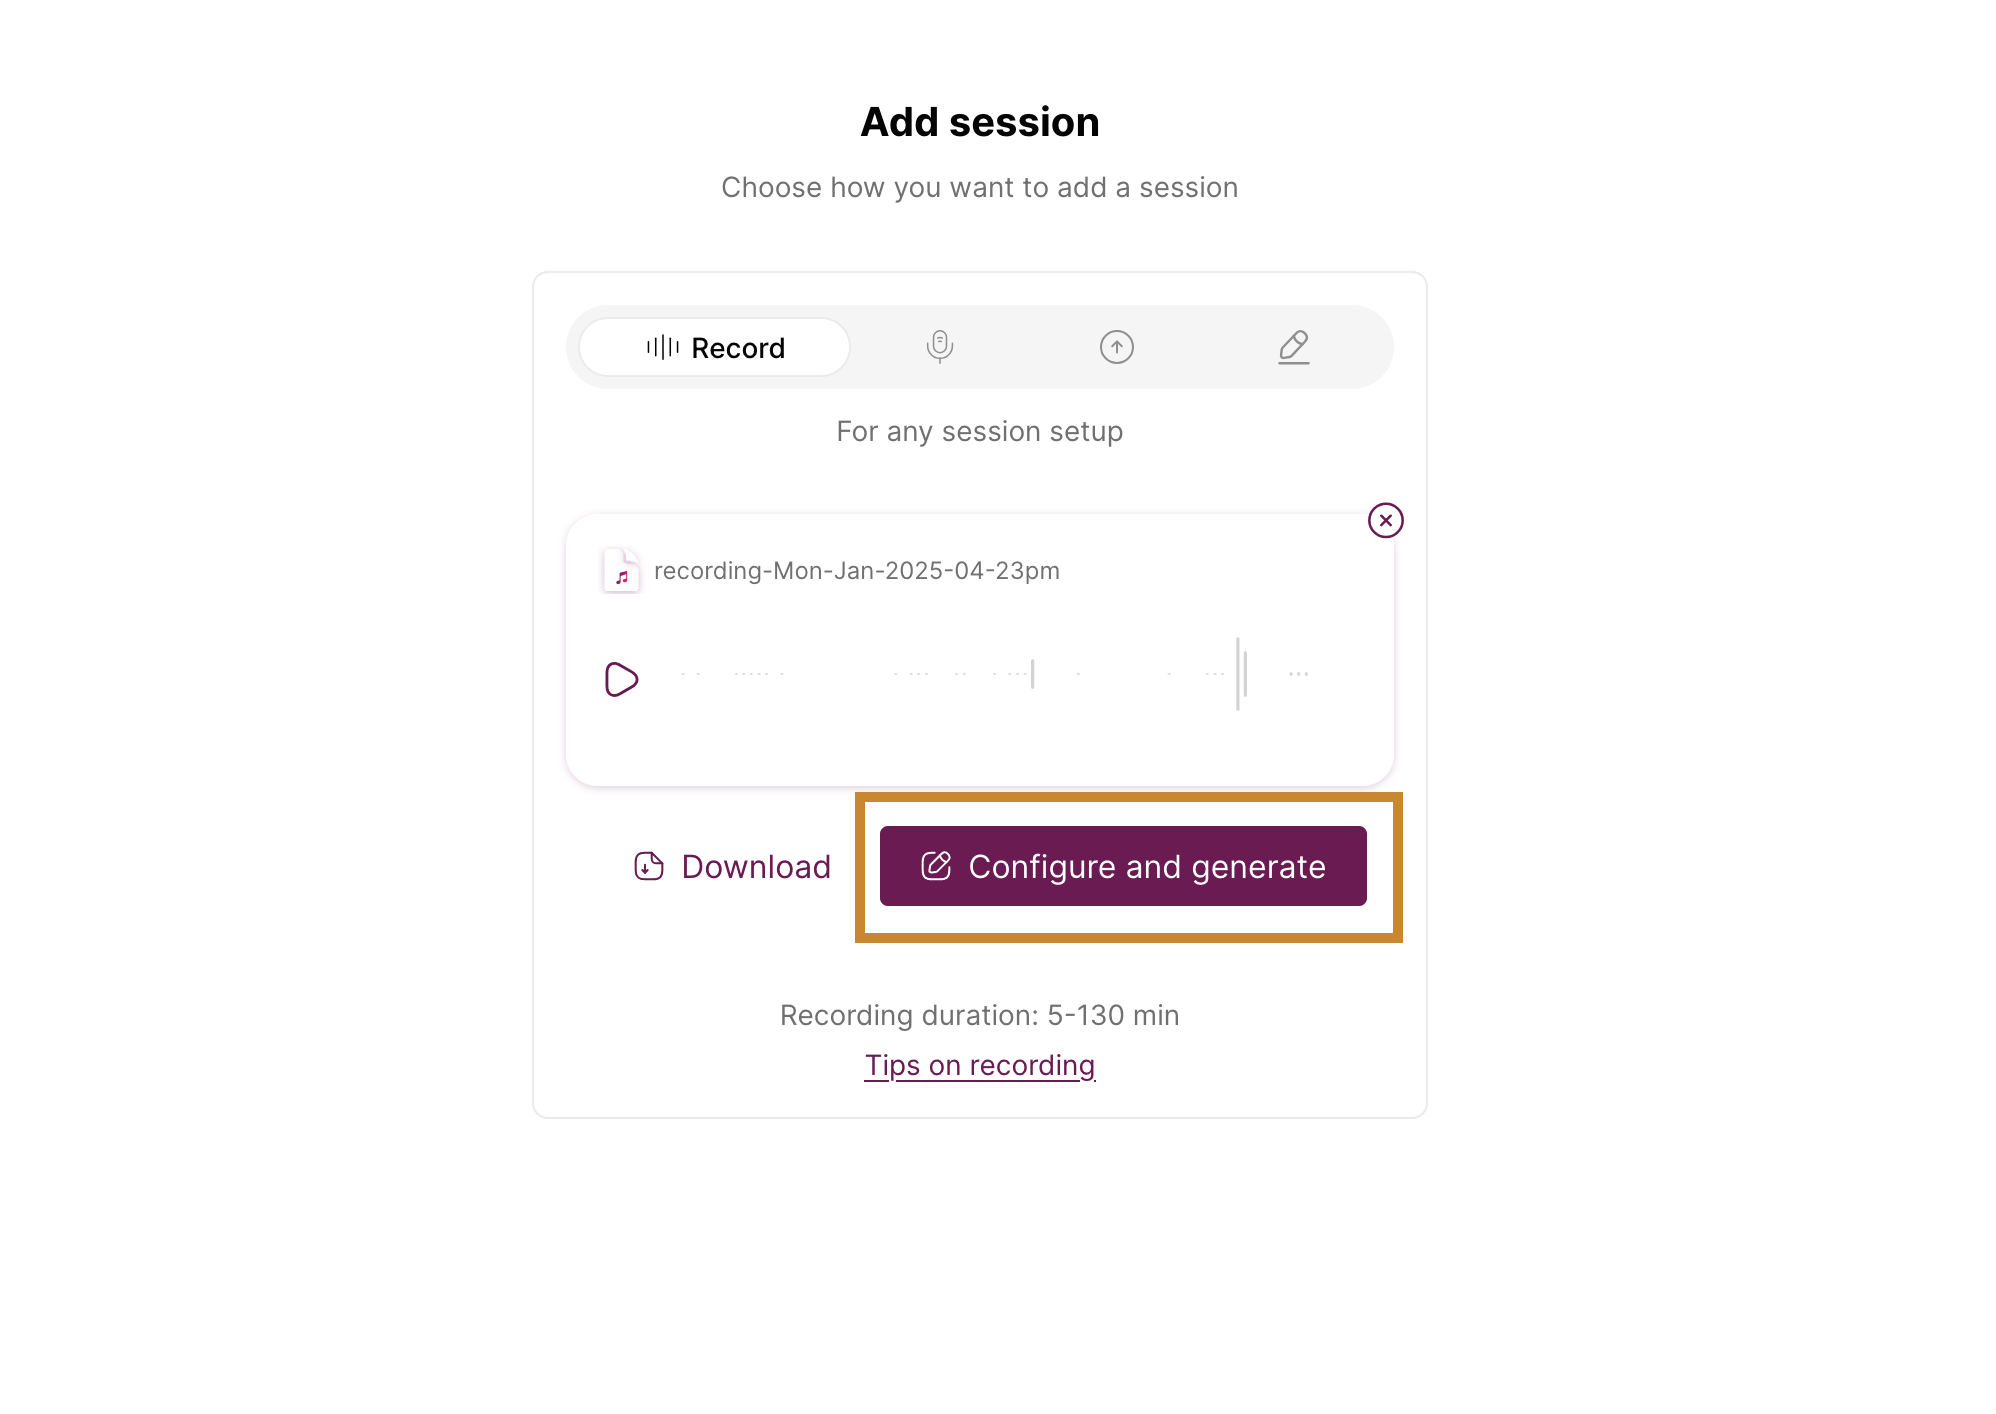
5. You can edit the session date, duration and location. Then click “Generate note”
Please note: Because you got to this page from the Supervision page and by initially clicking on a specific clinician name, you will not be able to edit the “Session with”, “Note type”, or “Template”.

6. On the next page you will see the session generating the session transcript
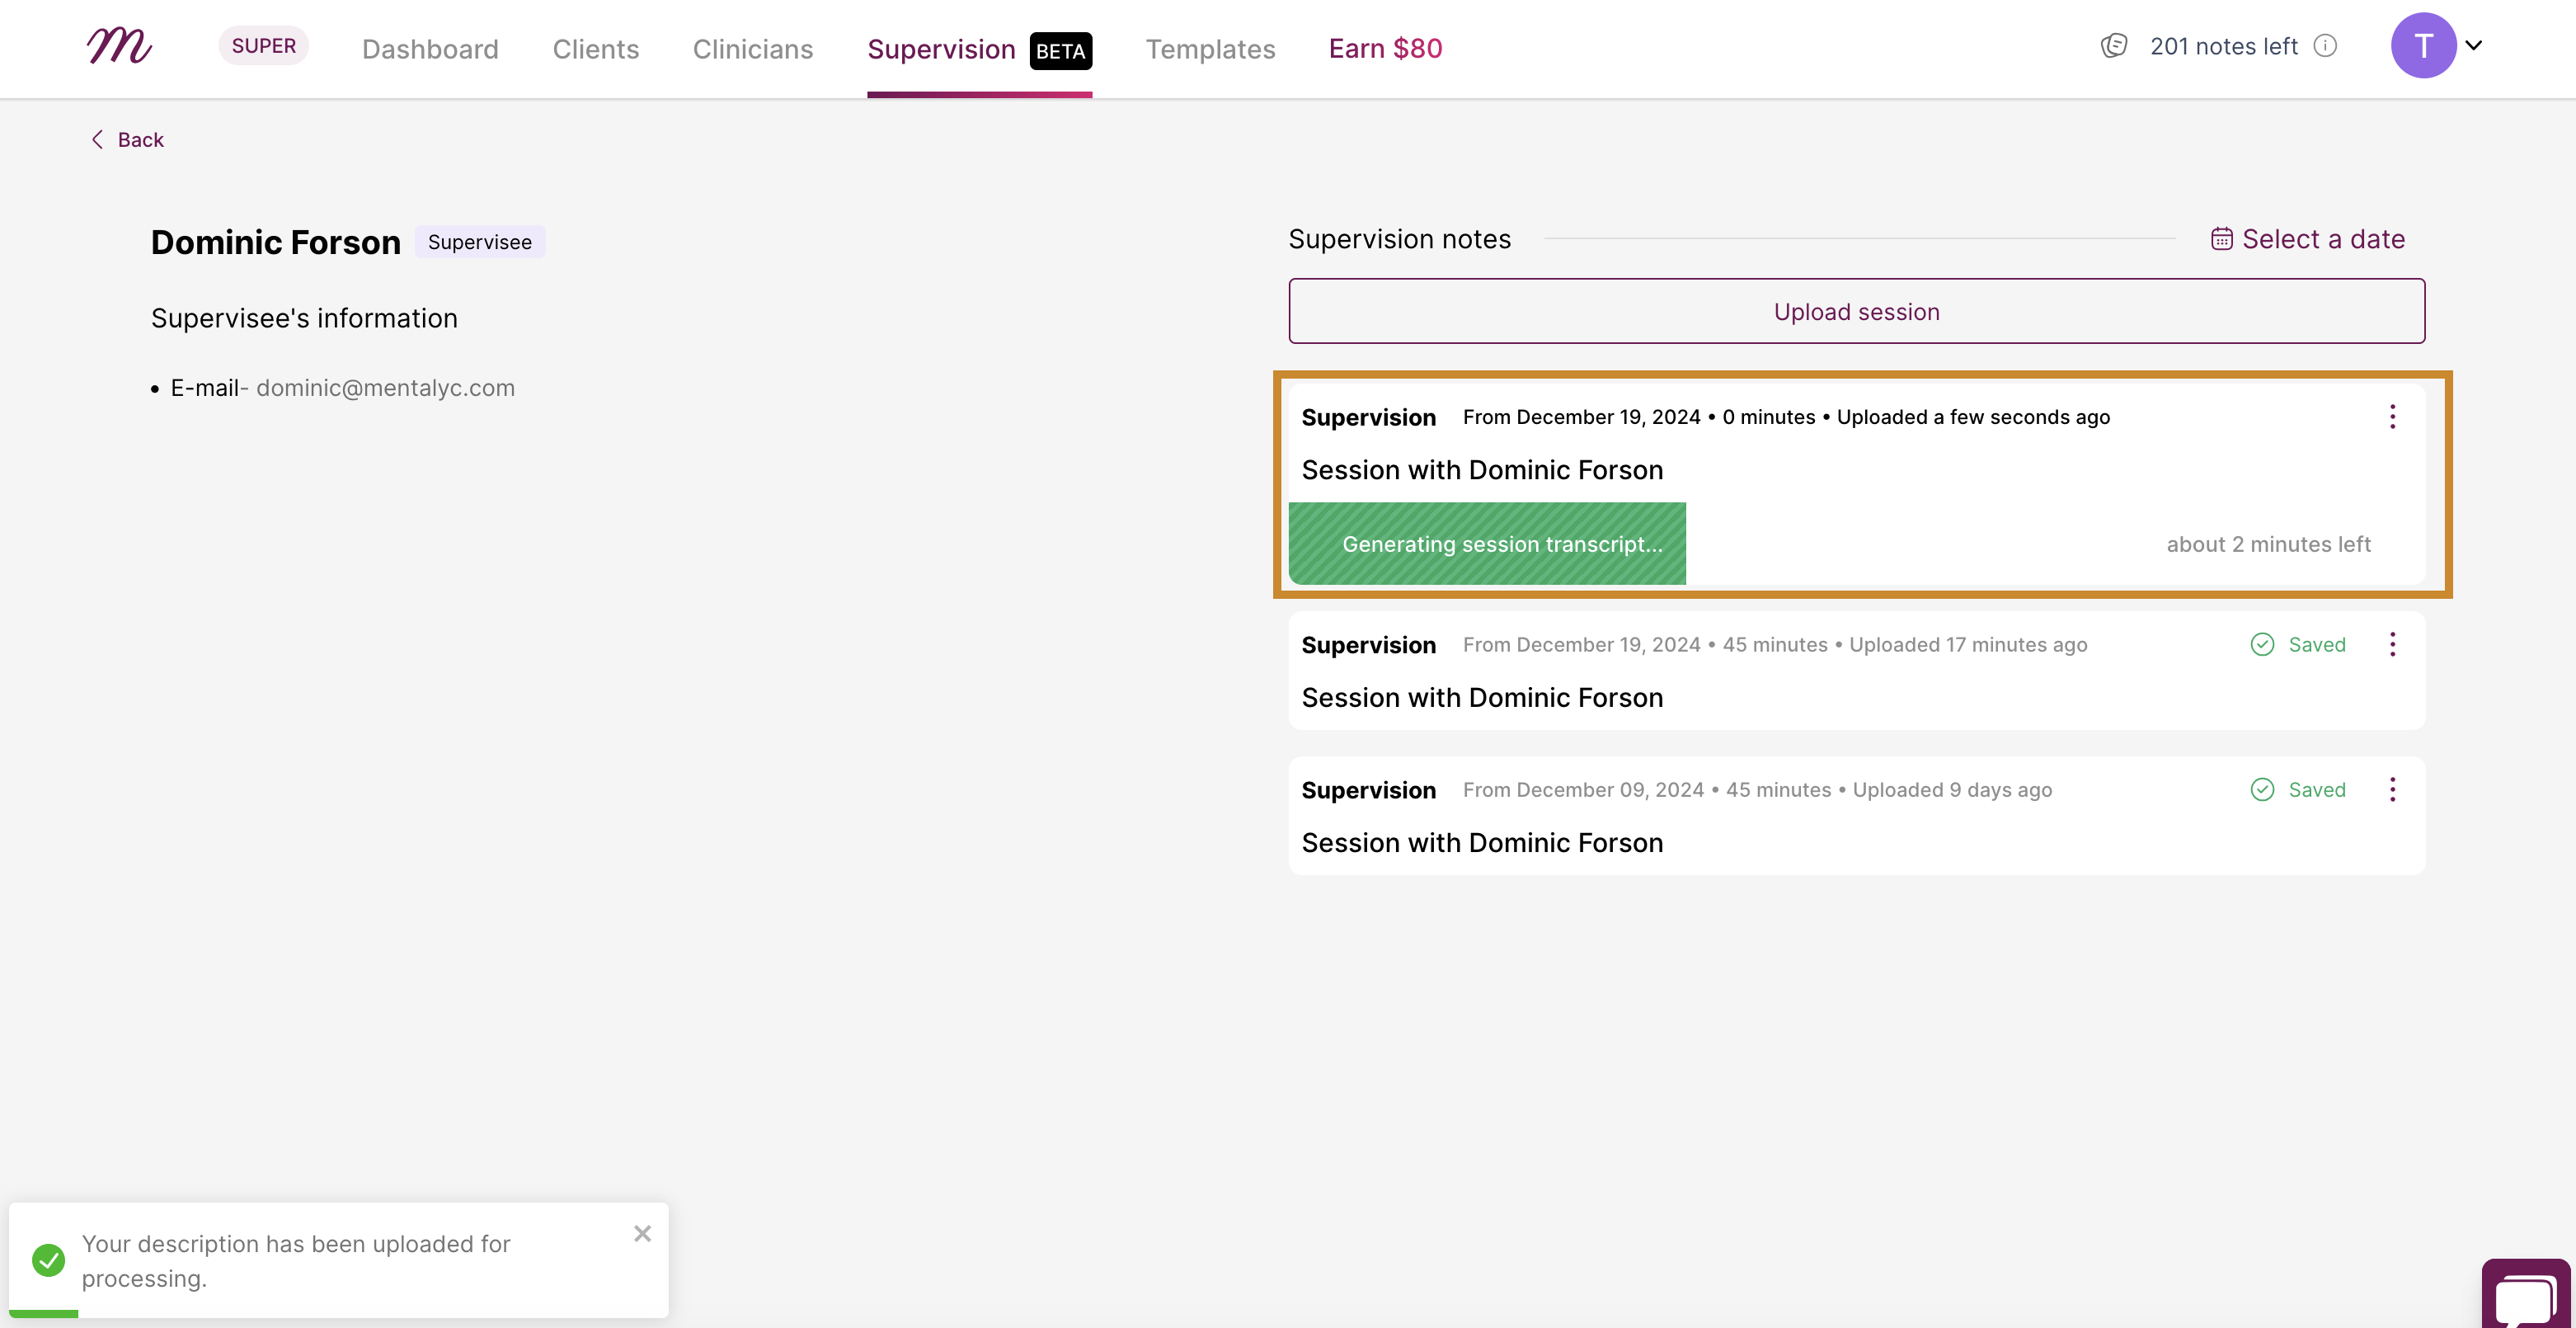
7. After the transcript has been successfully generated, click on “View note” to be able to view the note details.
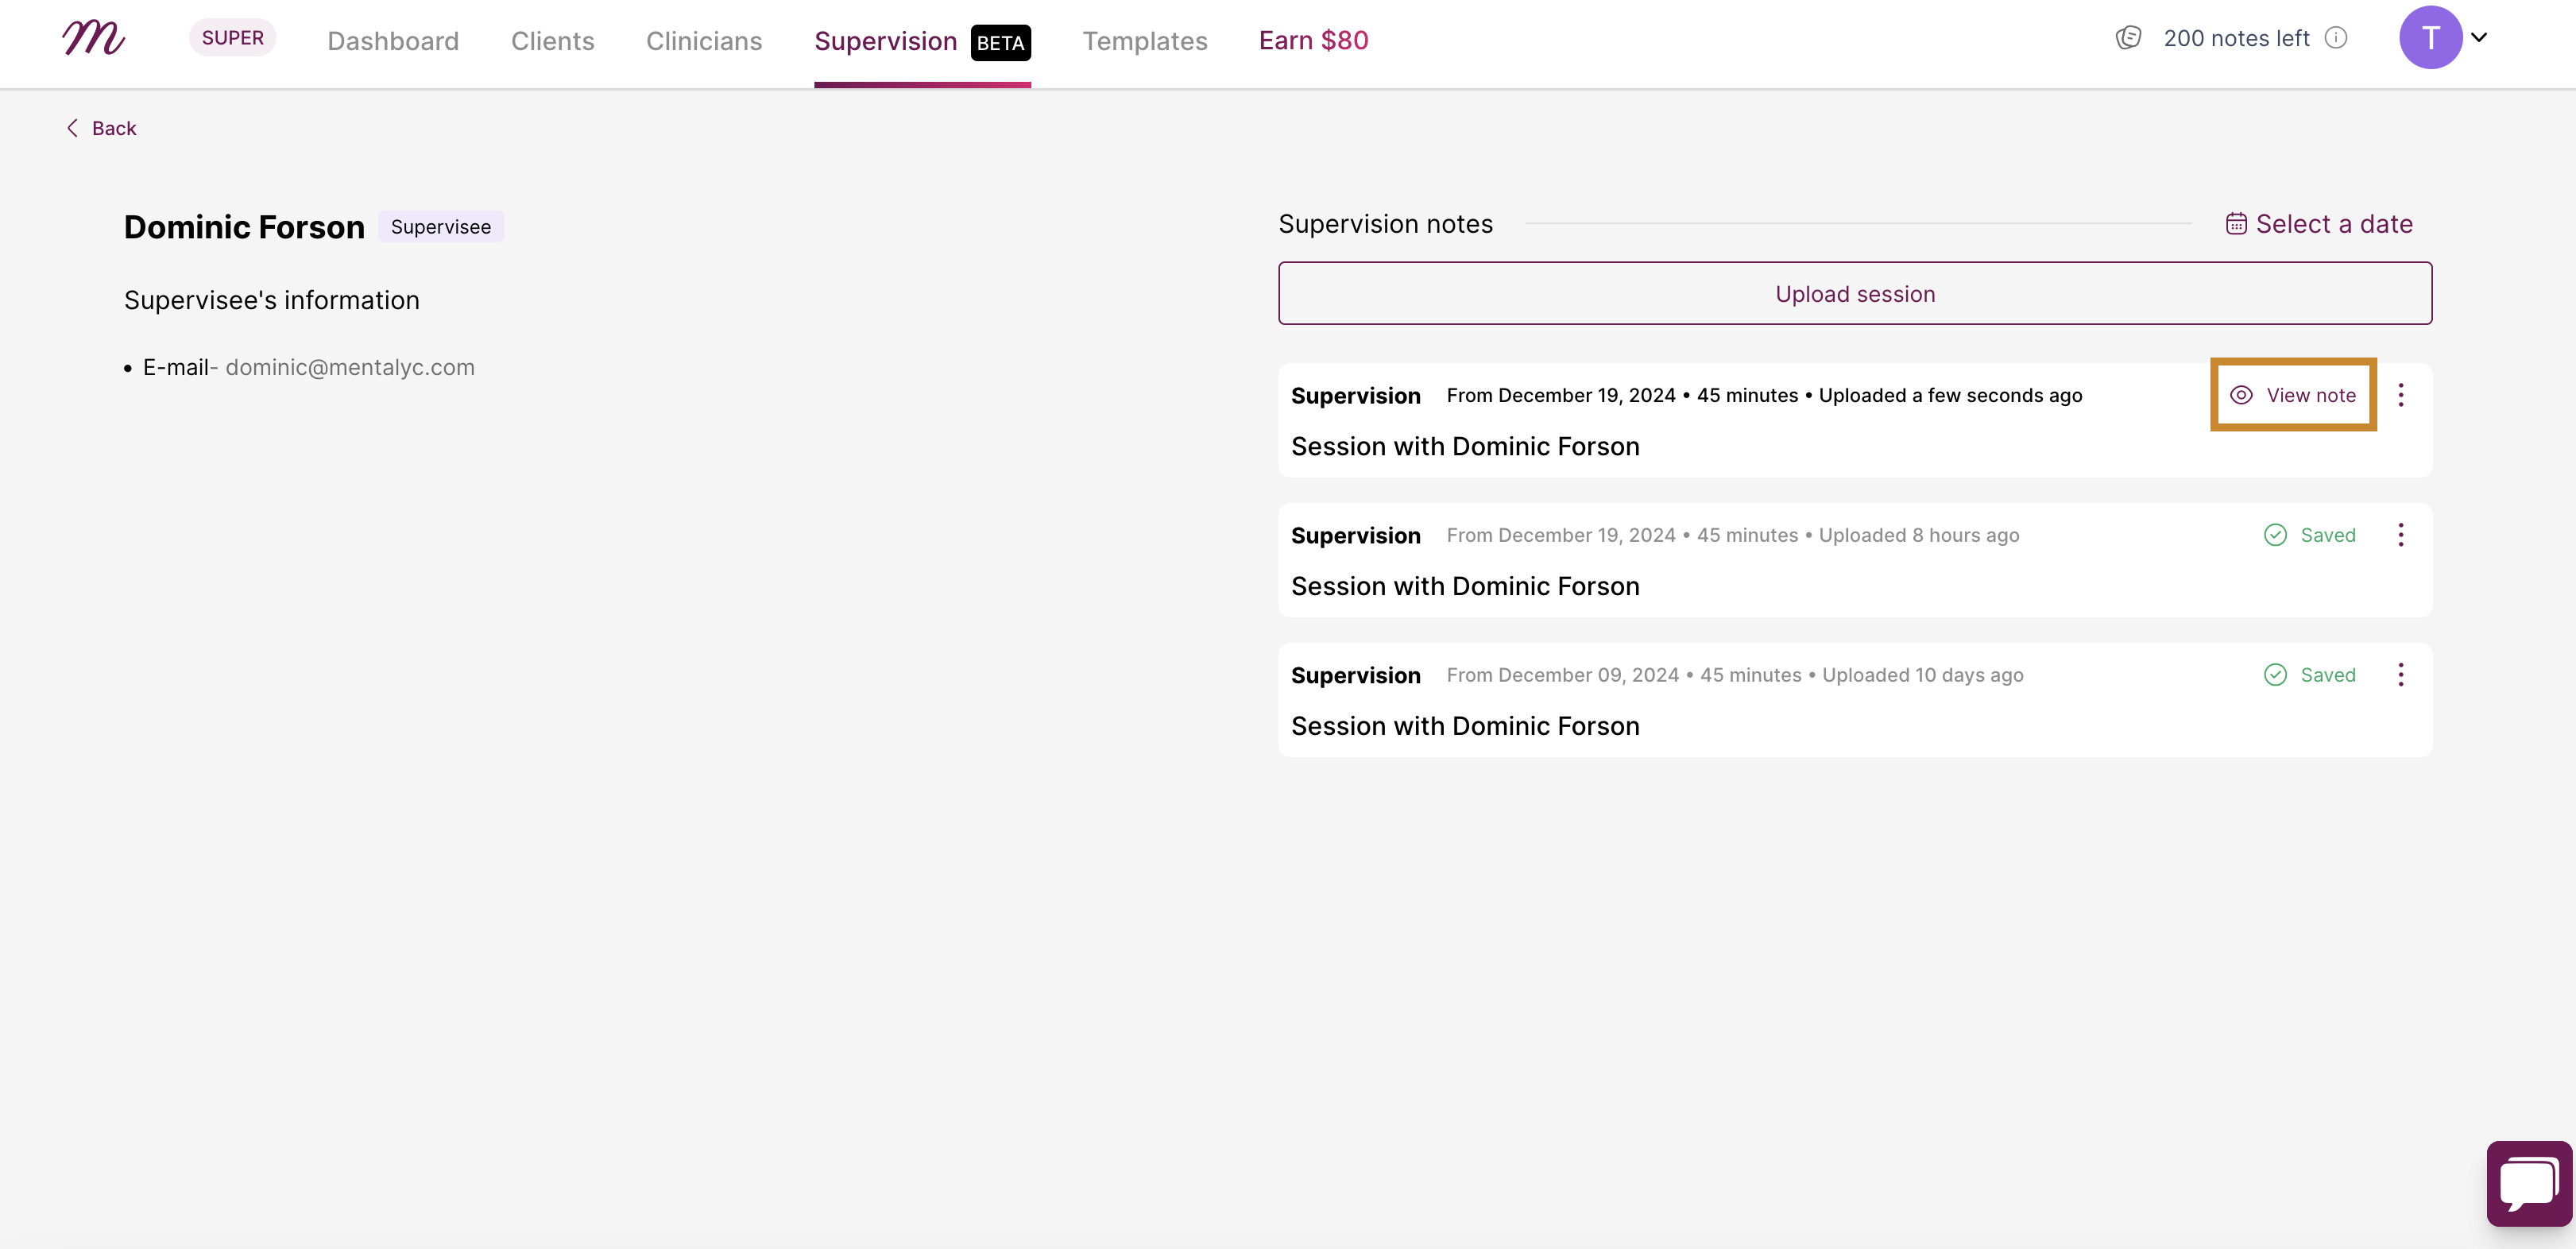
8. The next page displayed will be the details of the note. You can review the notes here and make any edits you want.
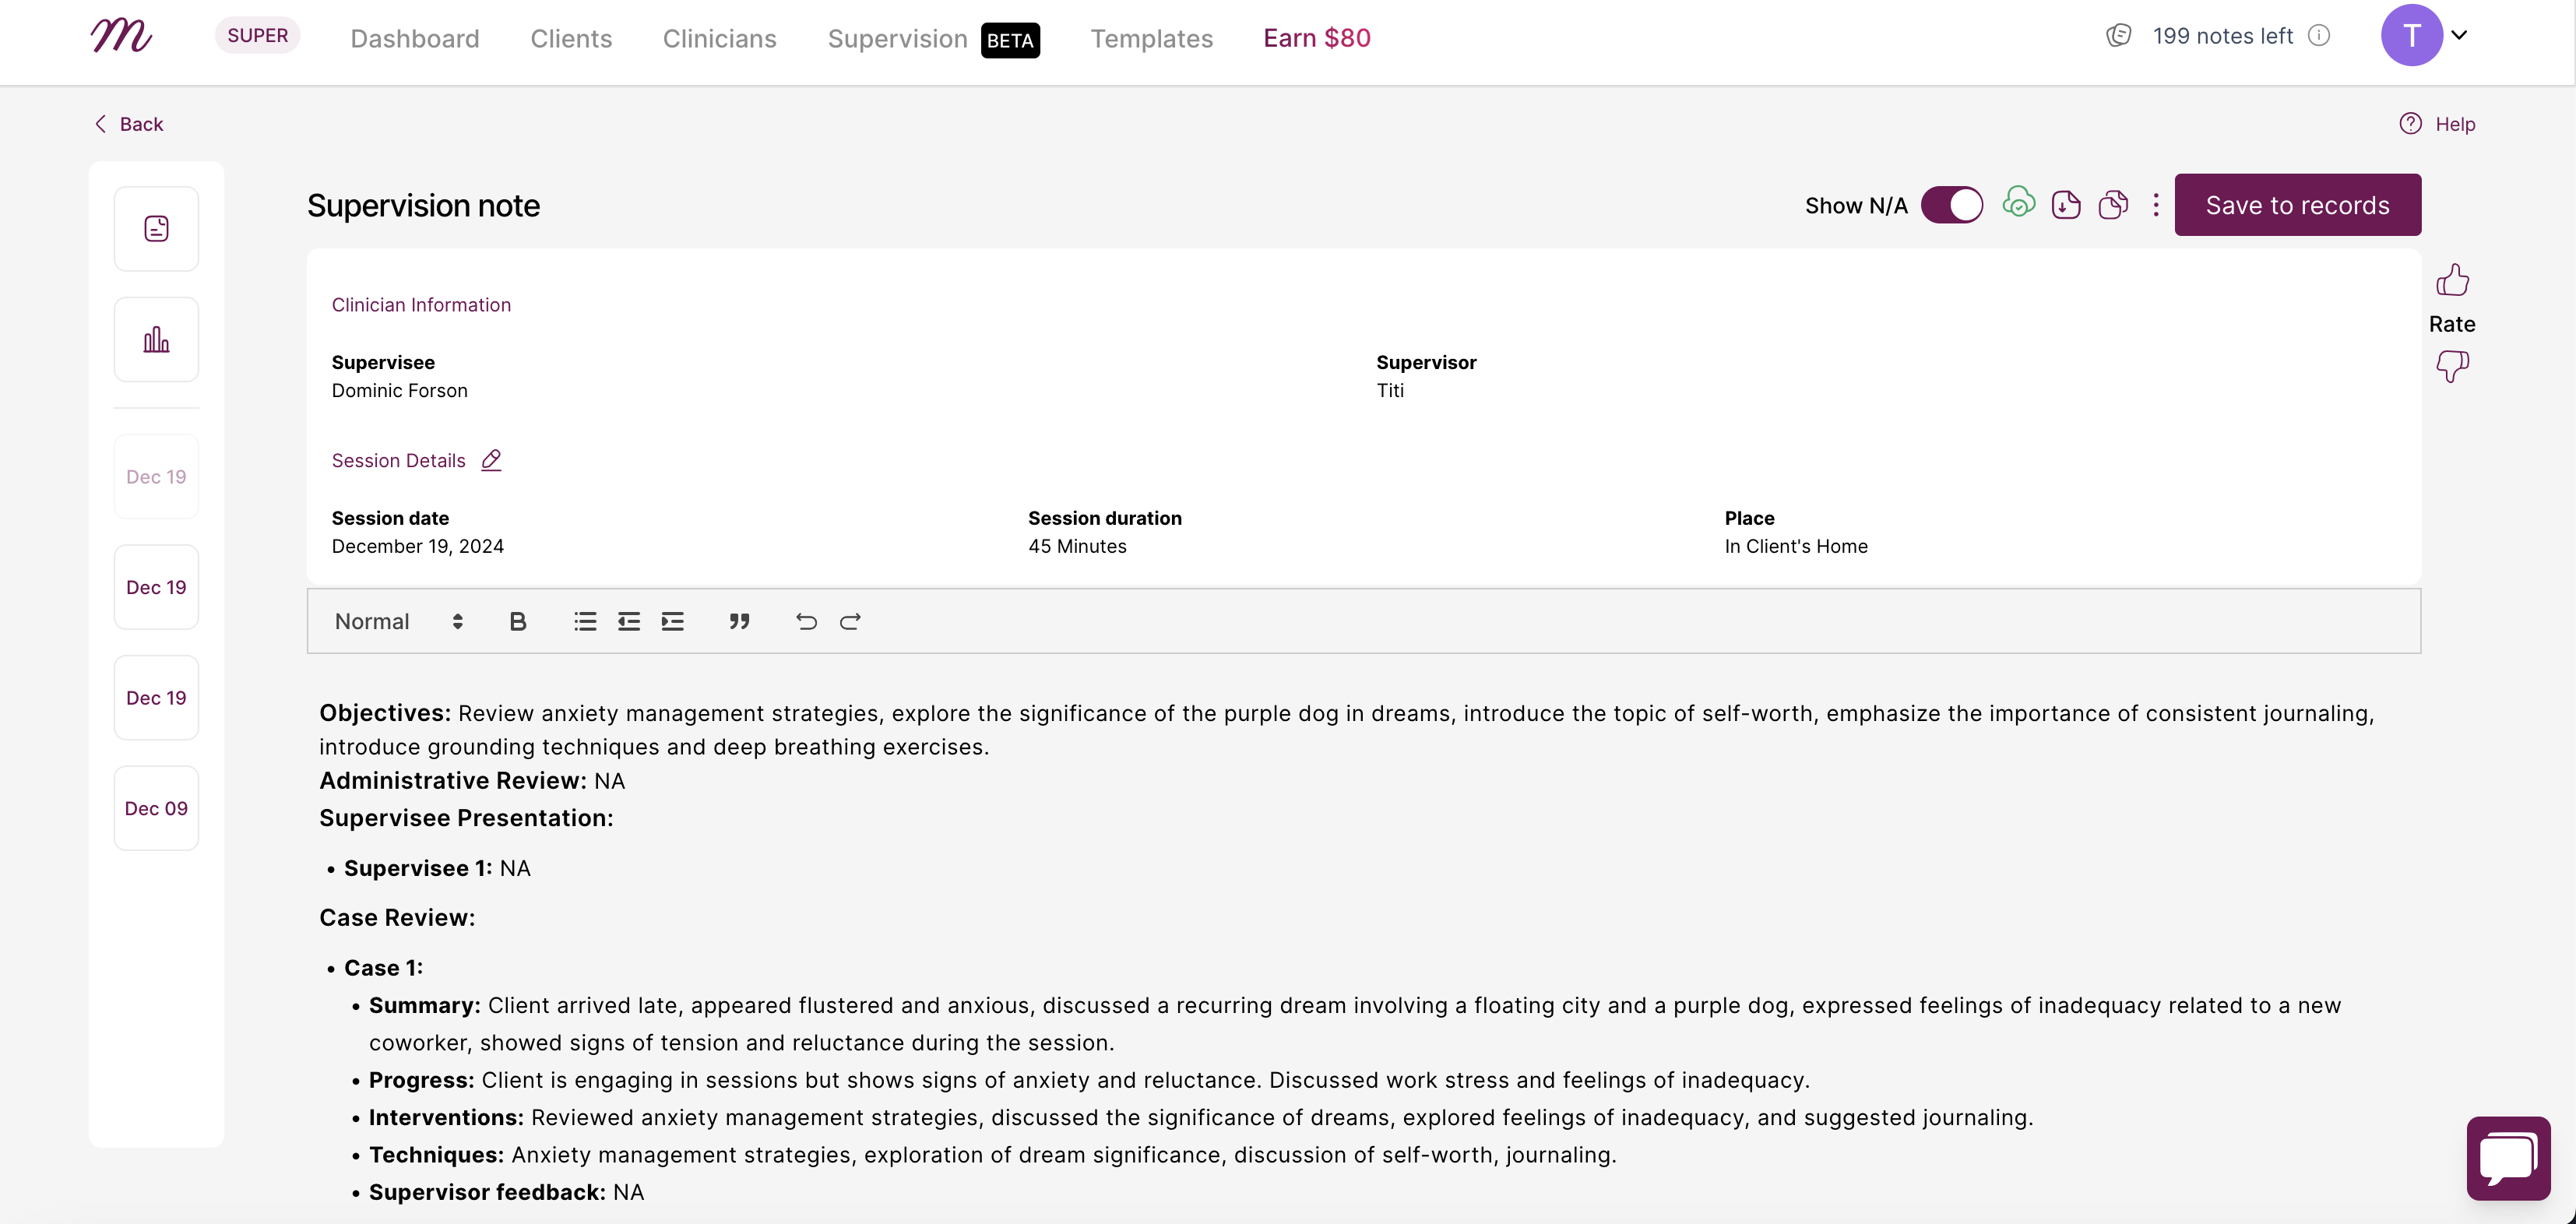
Conducting a Supervision Session and Create Supervision Notes from the Dashboard
1. Navigate to the “Dashboard” page and choose from the options how you want to add a session.

- After typing out the session, click on “Configure and generate” to generate your notes

3. You can edit the session date, session duration and session location. Then click “Generate note”. But this time, you have to enter the client name. Click on “Enter client name” and search or scroll down to locate the supervisor / supervisee name.
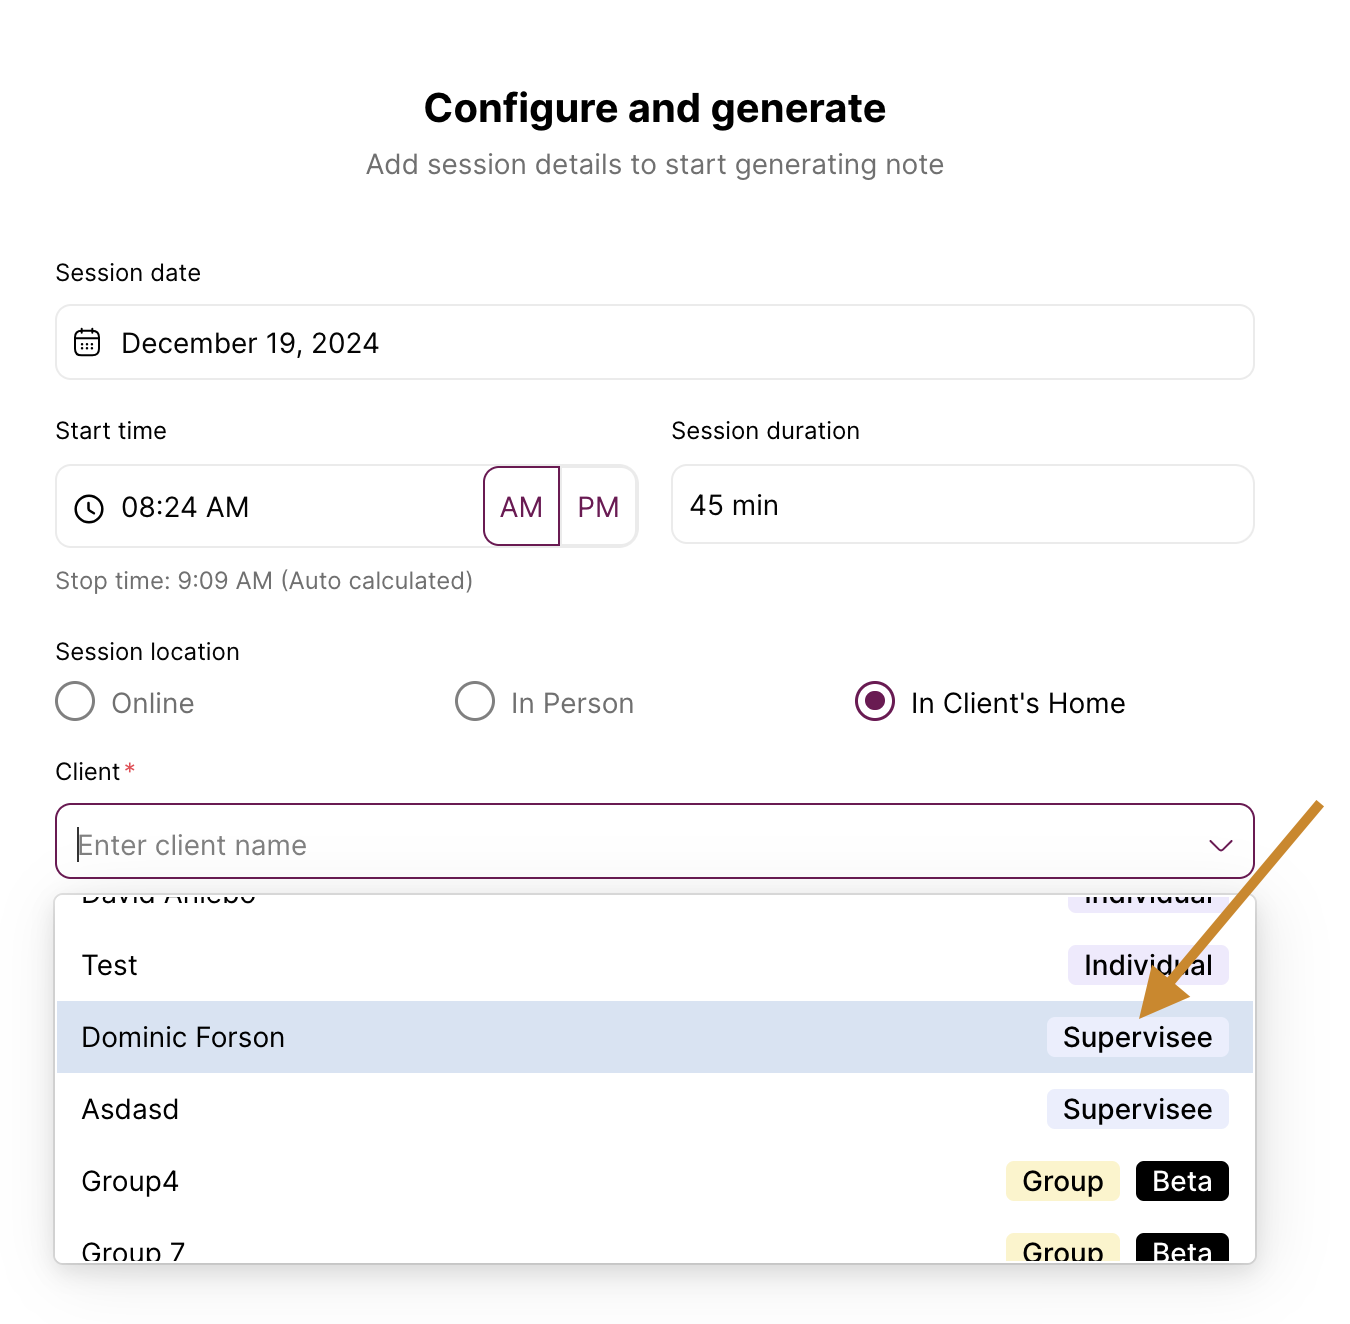
4. After clicking on a specific supervisor / supervisee name, you will not be able to edit the “Note type”, or “Template” because it is a supervision session that will be generated.
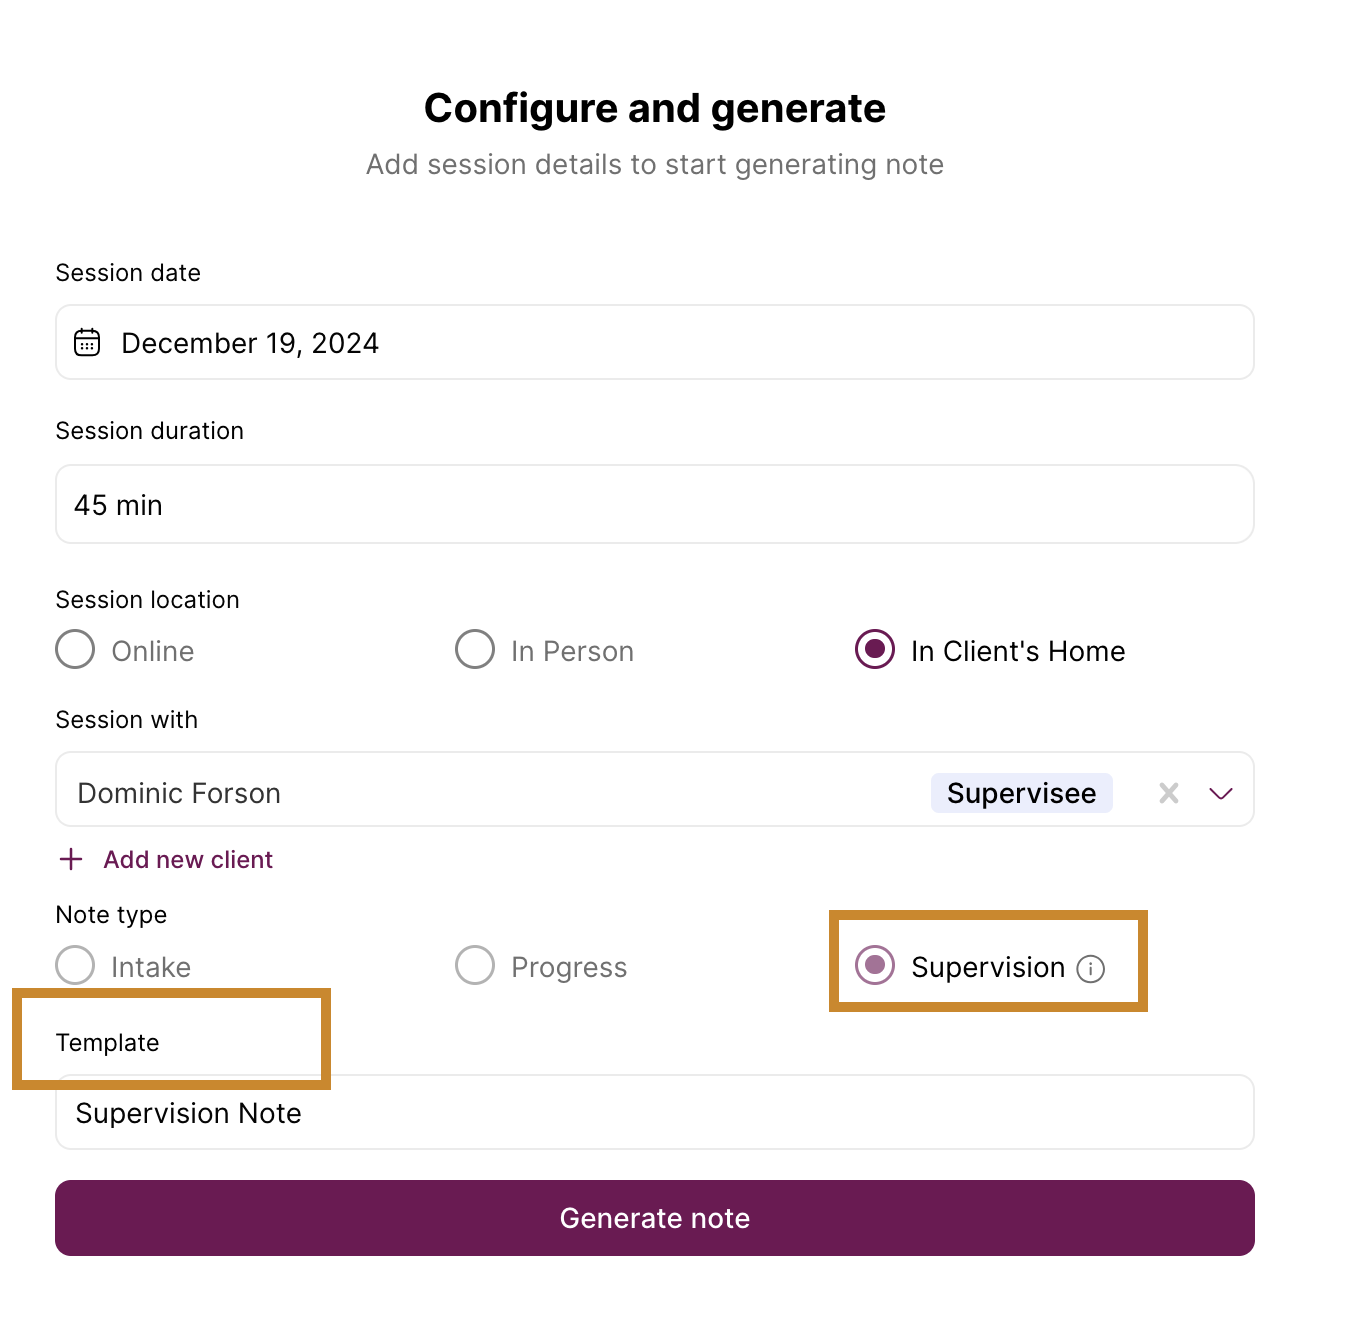
5. On the next page, your note will be added to the list of all your note for you to review.
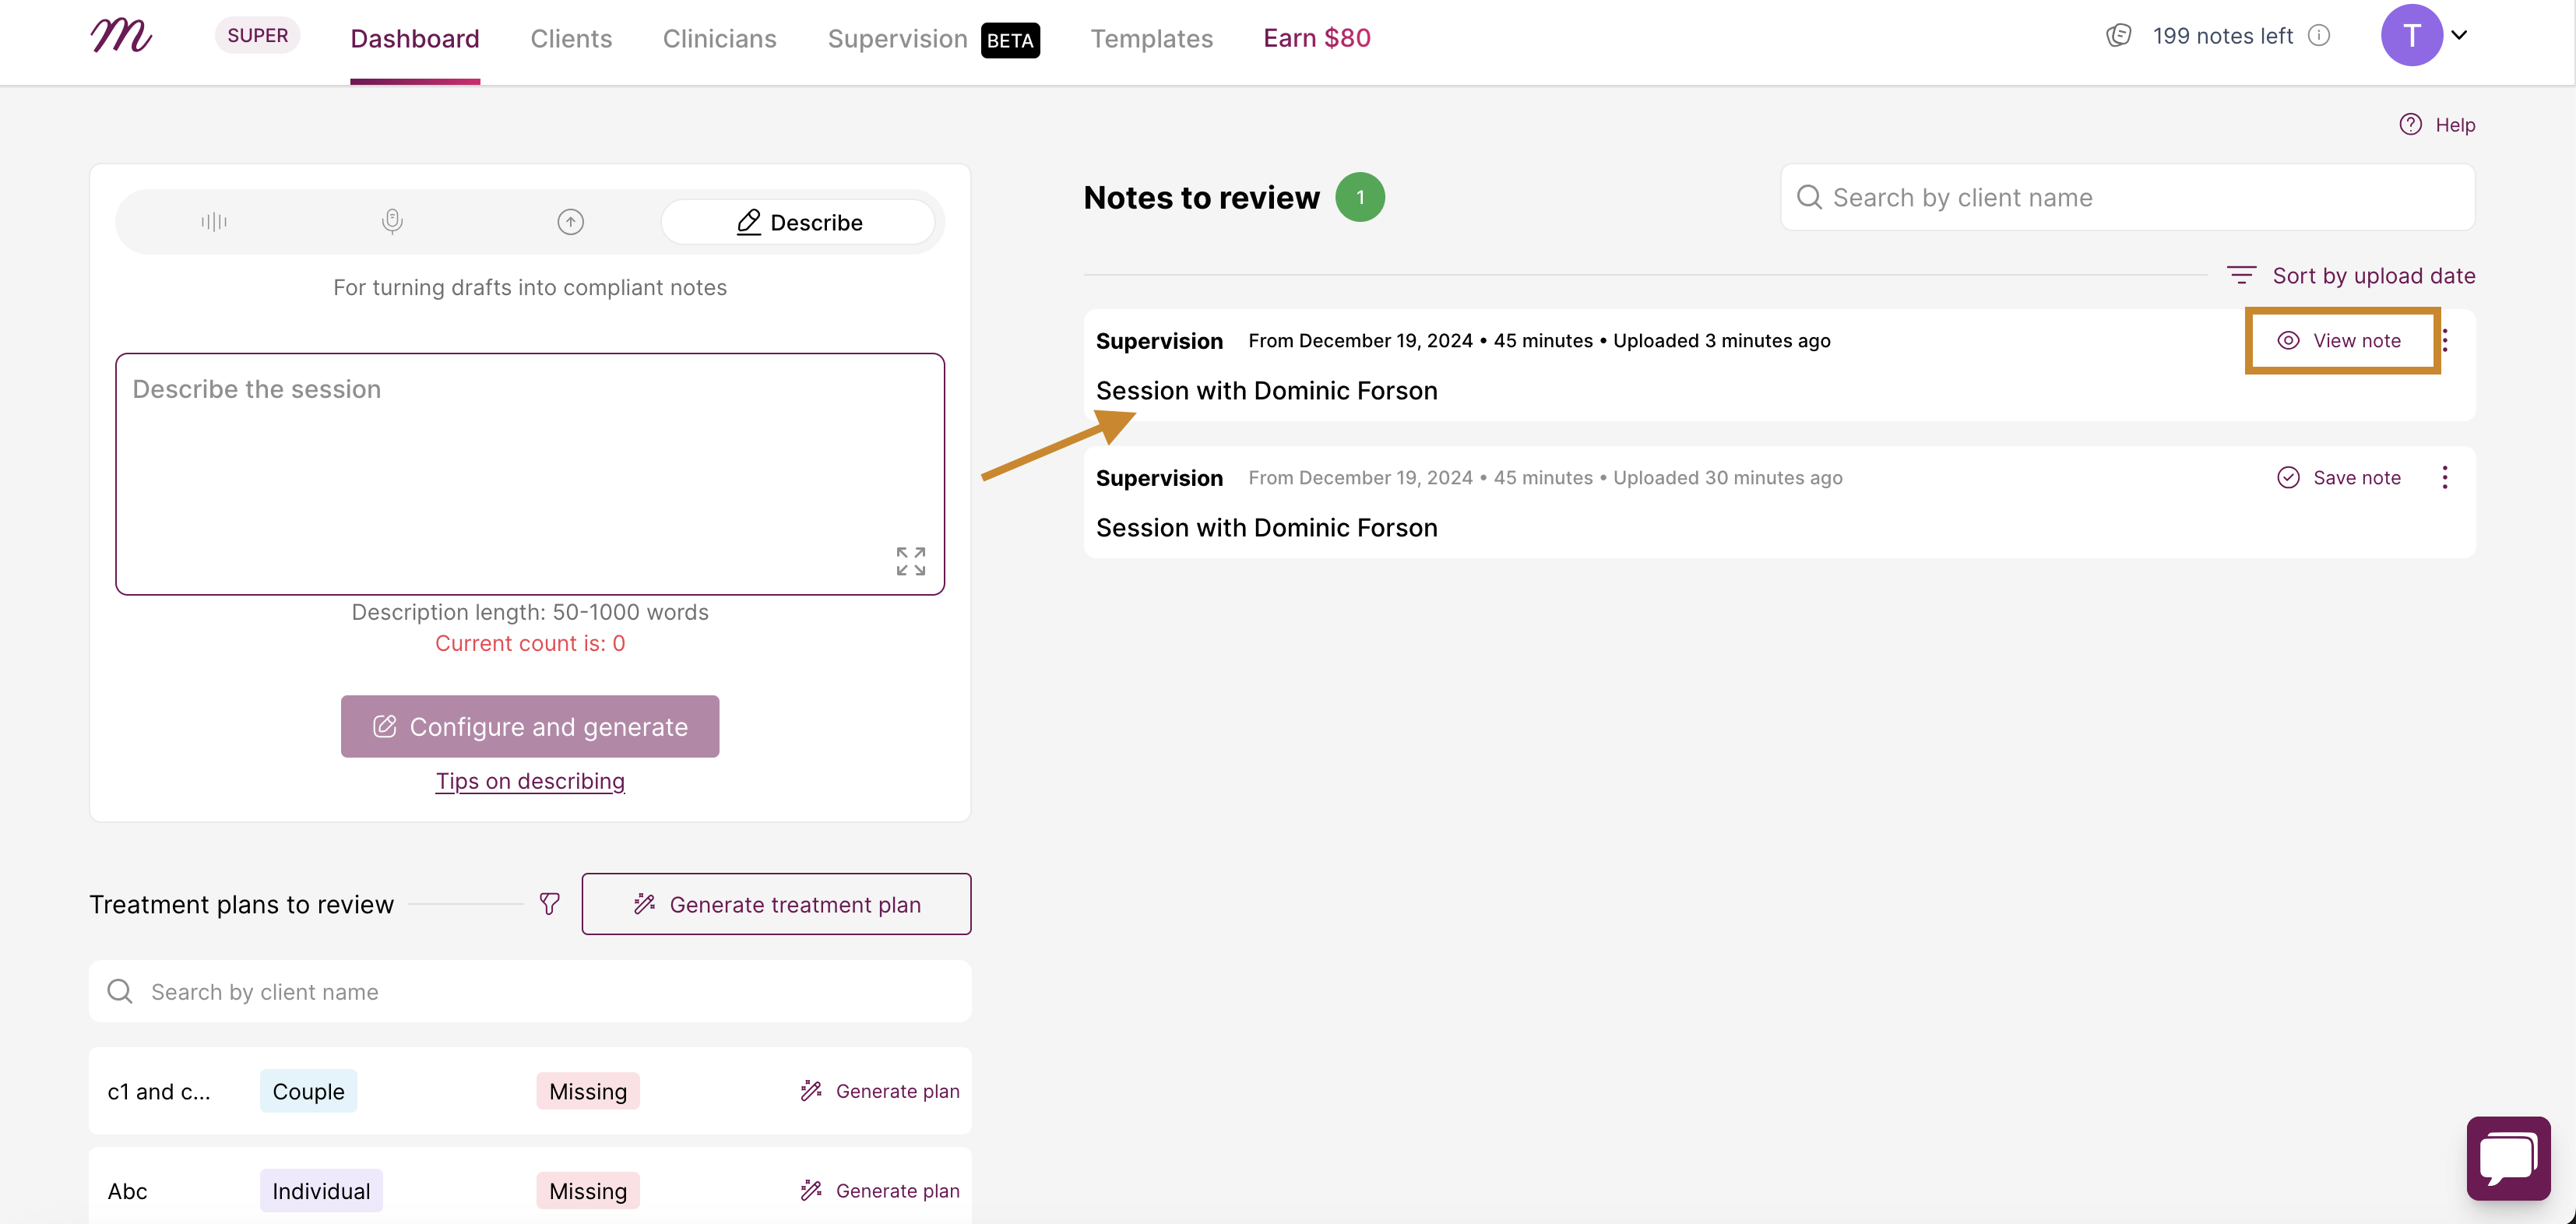
6. The next page displayed will be the details of the note. You can review the notes here and make any edits you want.

D. How To Save Supervision Session to Records
1. After reviewing the notes, click on “Save to record” to save the note.
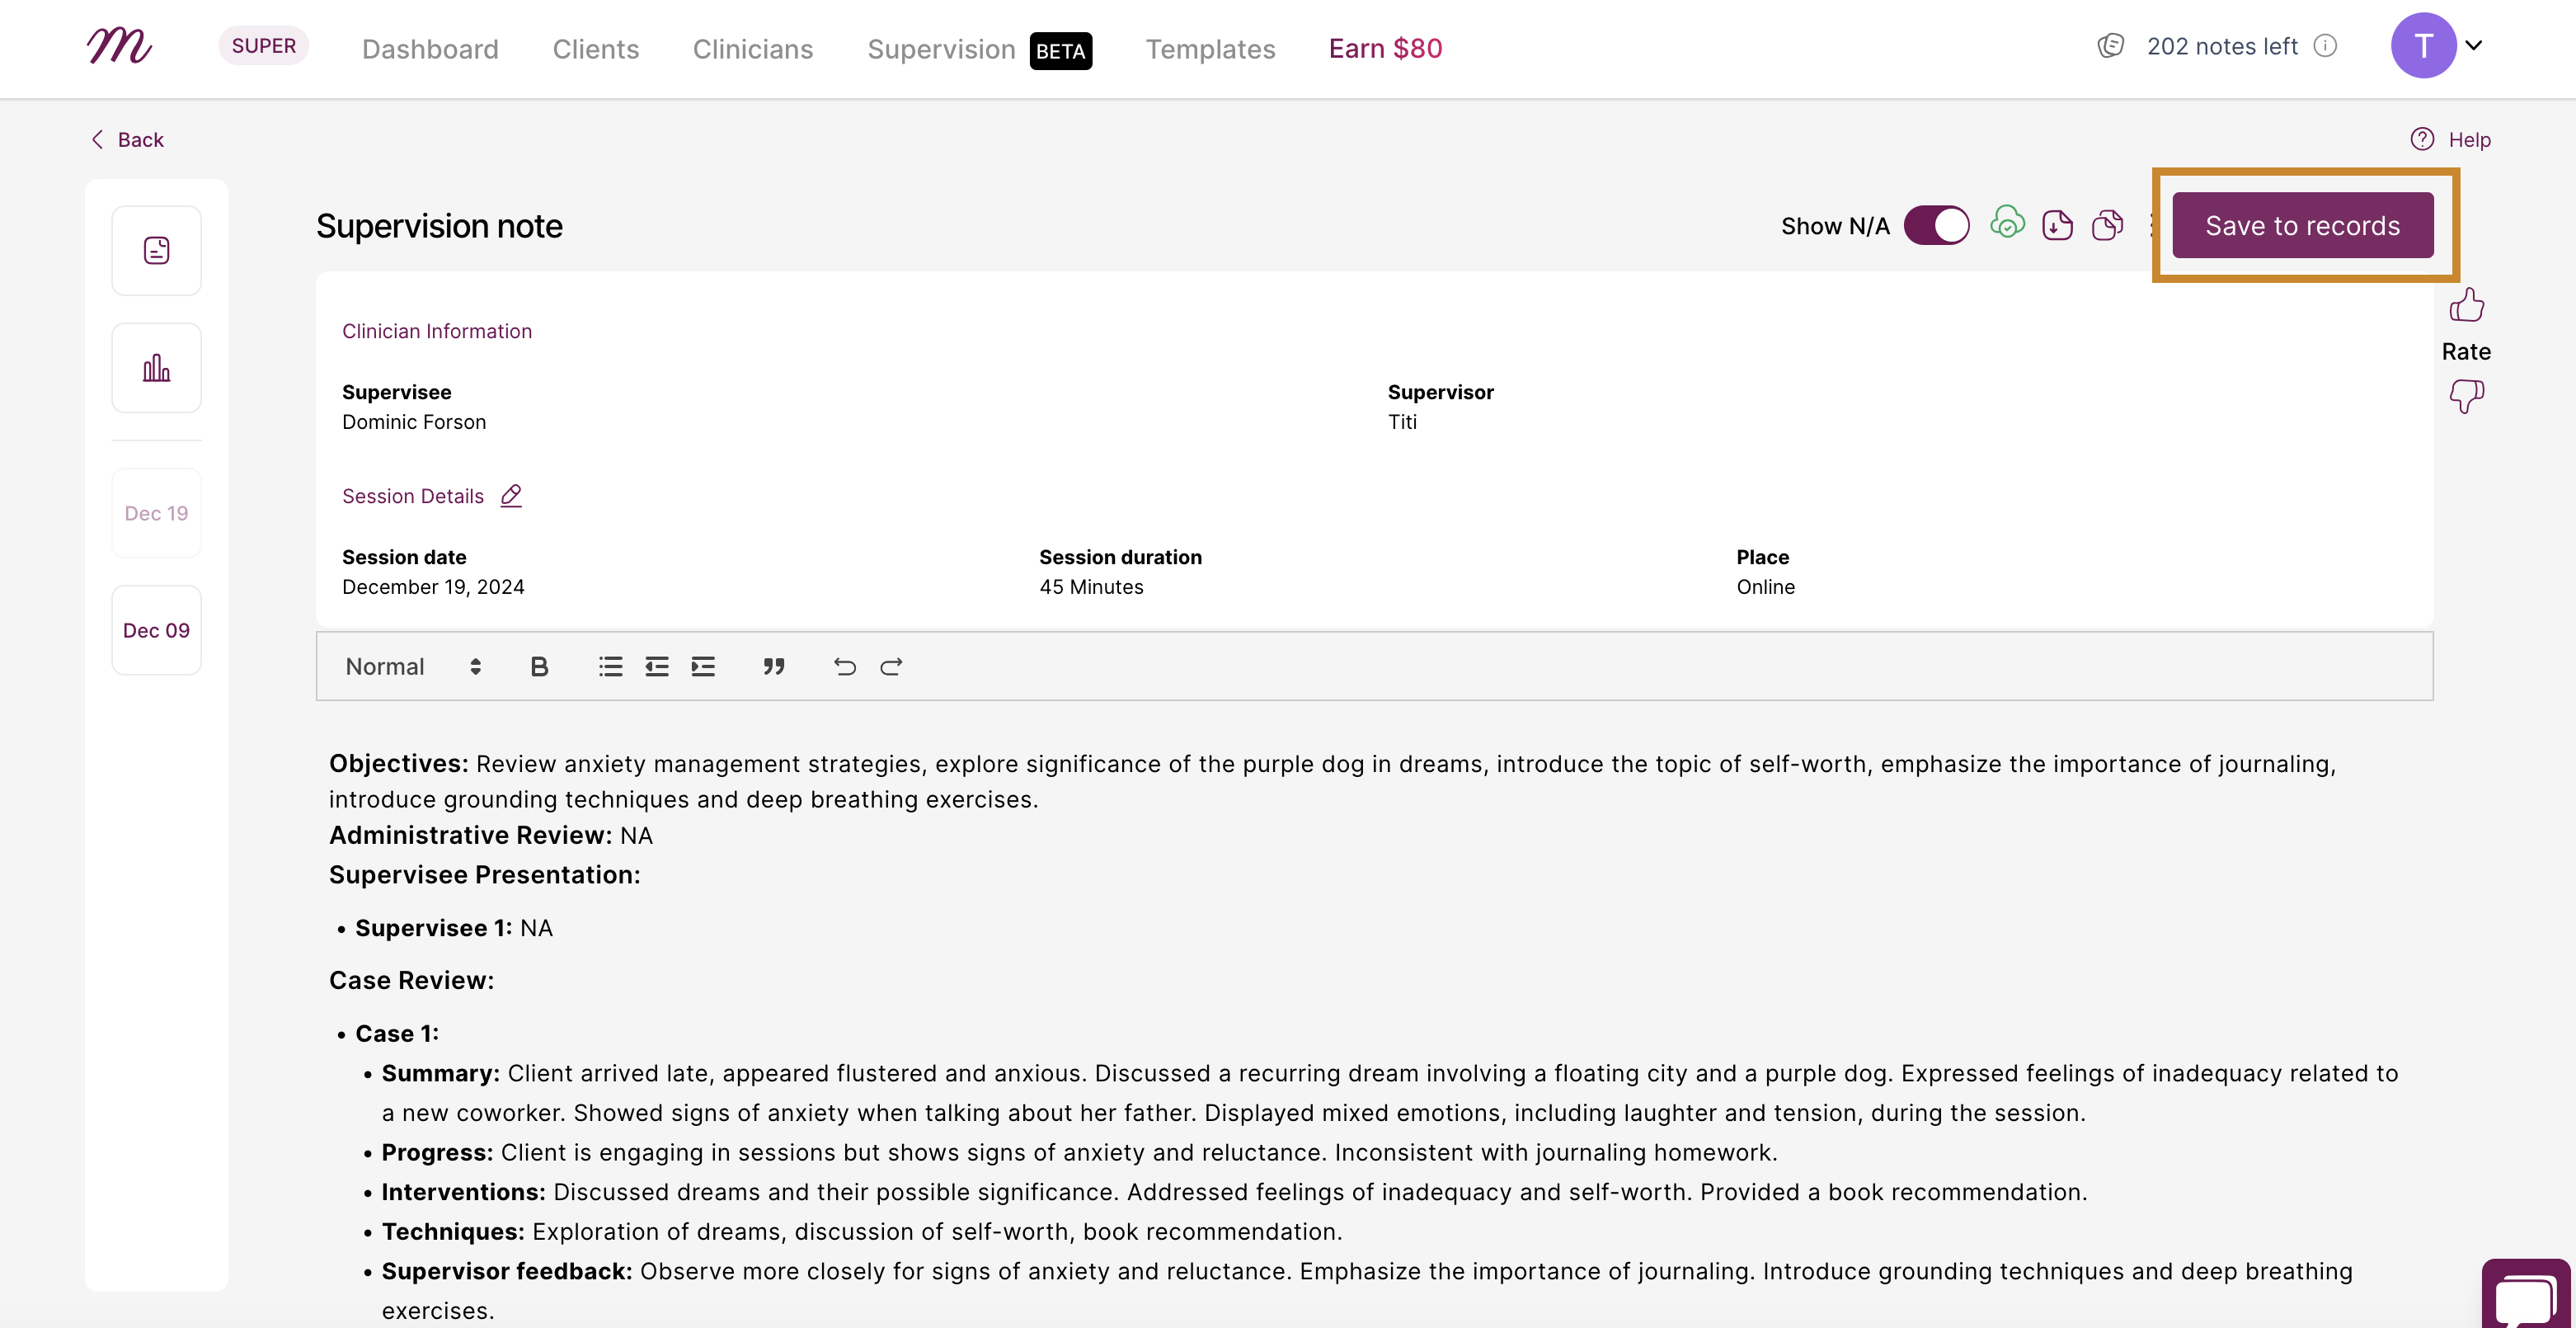
2. The pop up will appear. You can toggle on the “Share with supervisee” if you want the person you had the session with to have access to the note on their own mentalyc account.
After that, you click on “Save” to save the note.

E. Stop Sharing Session With Your Supervisee / Supervisor
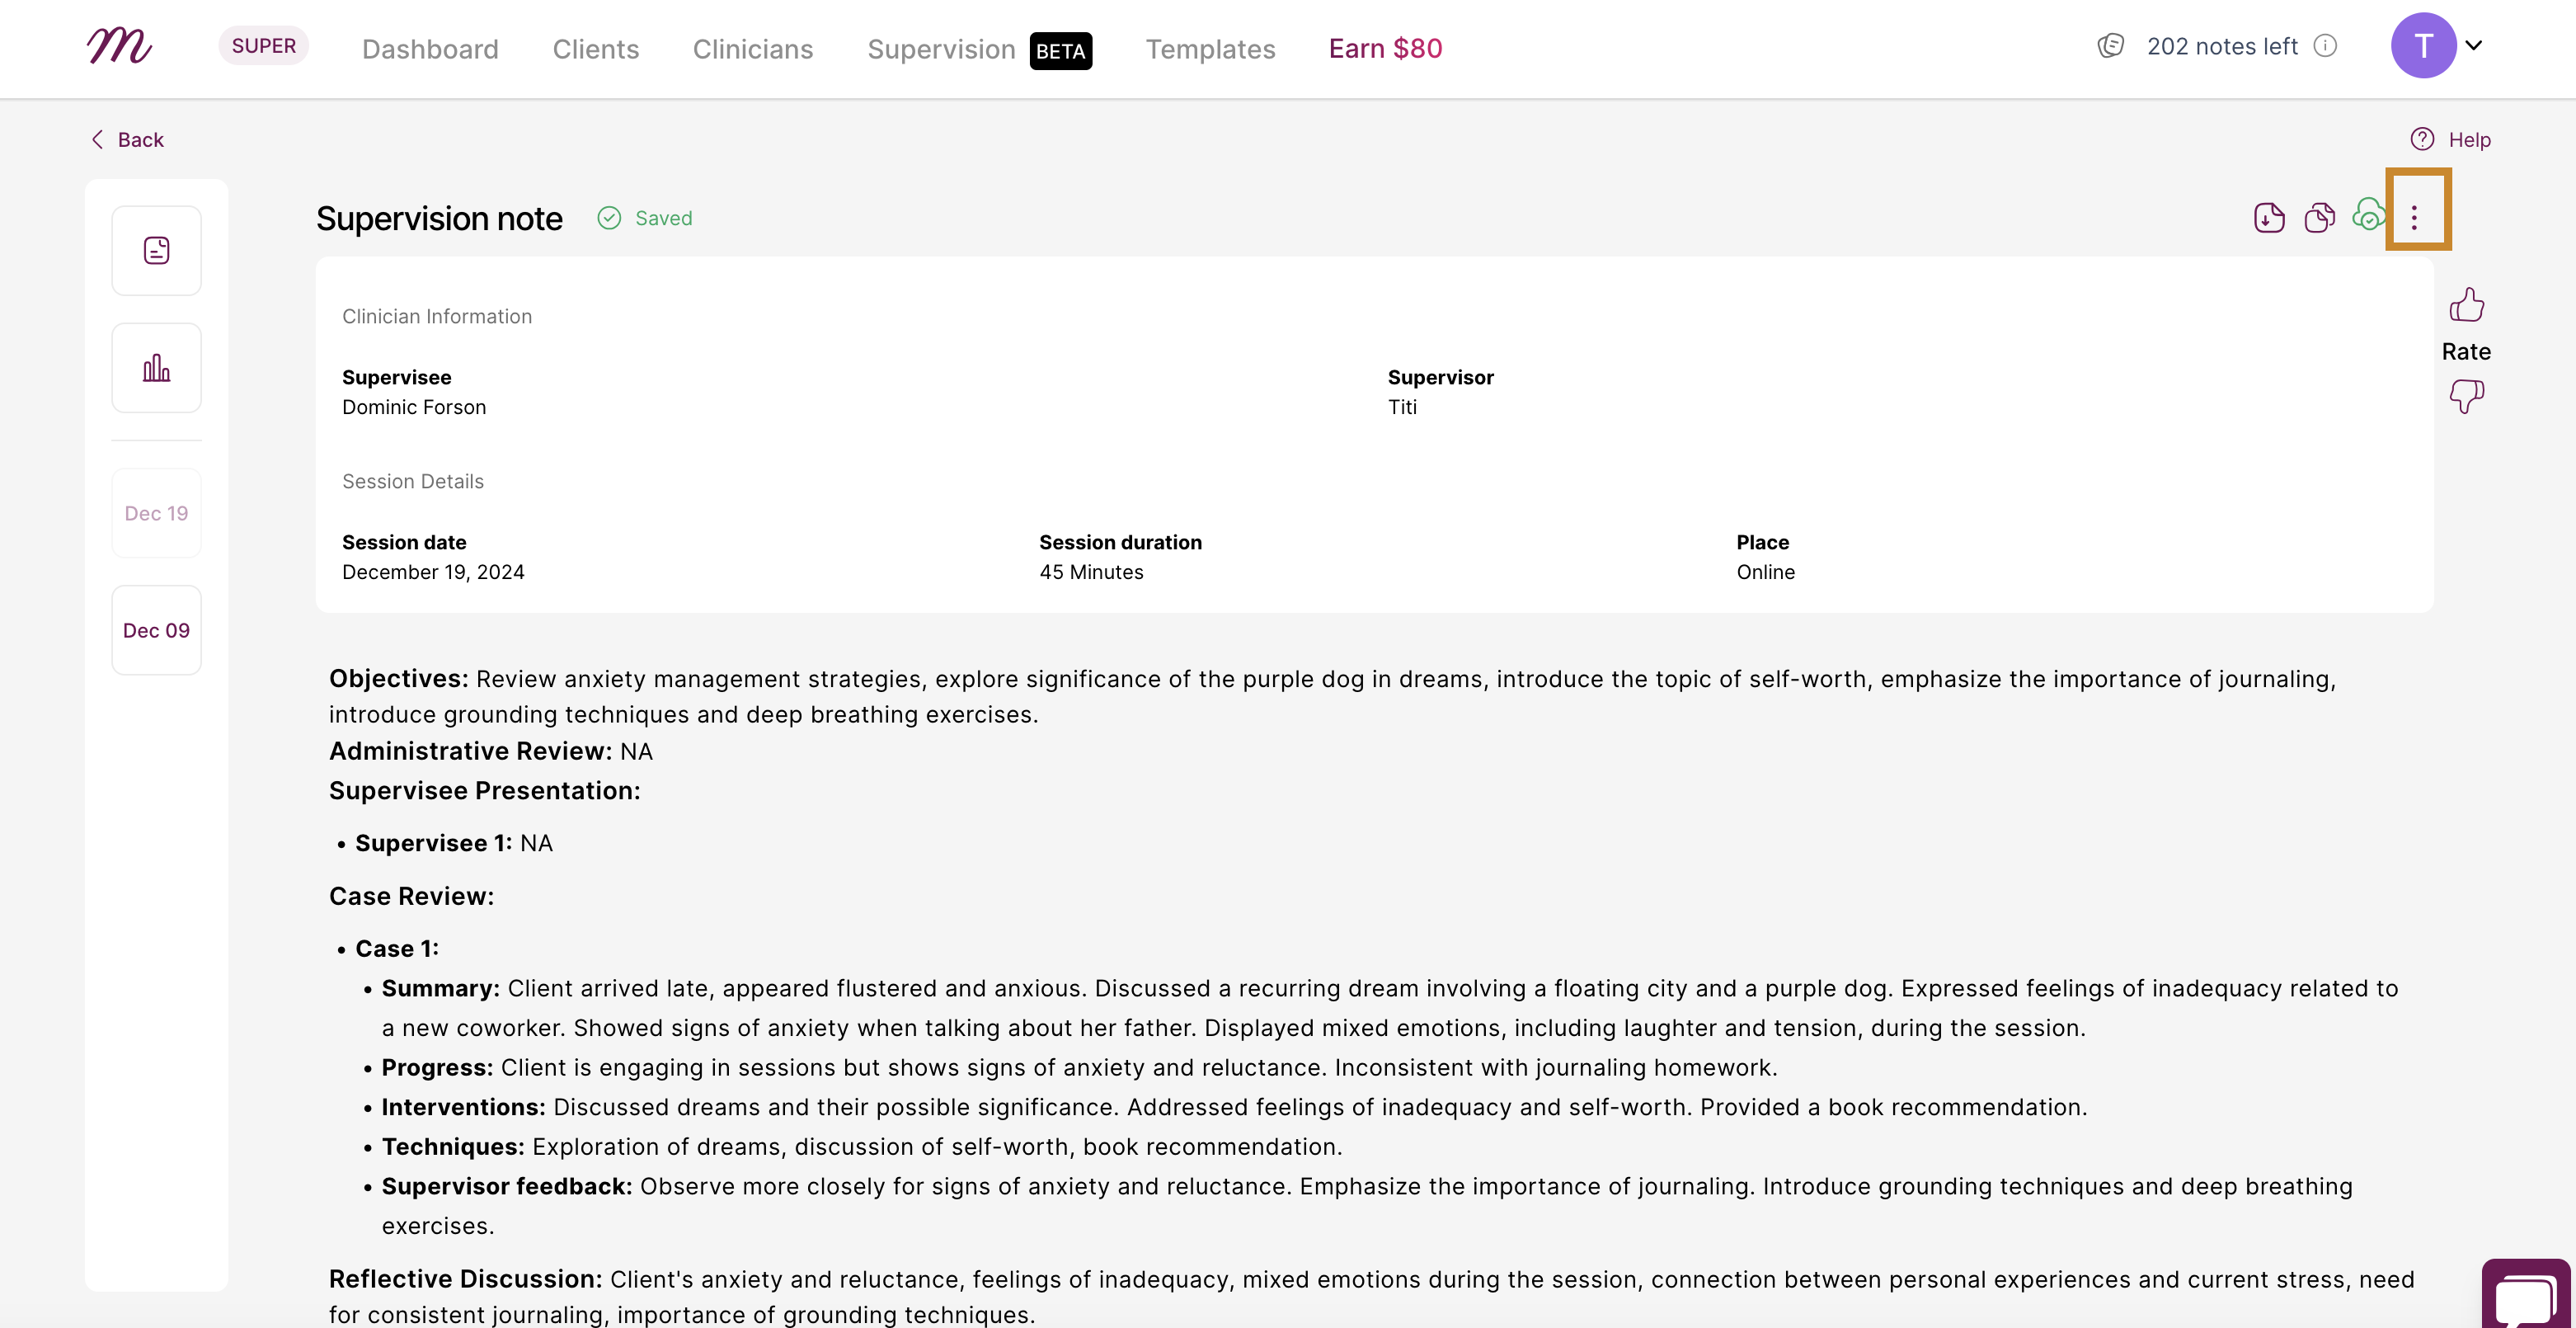
1. To stop sharing a session with a supervisor / supervisee, open the session you want to stop sharing and click on the three dots on the top right hand corner
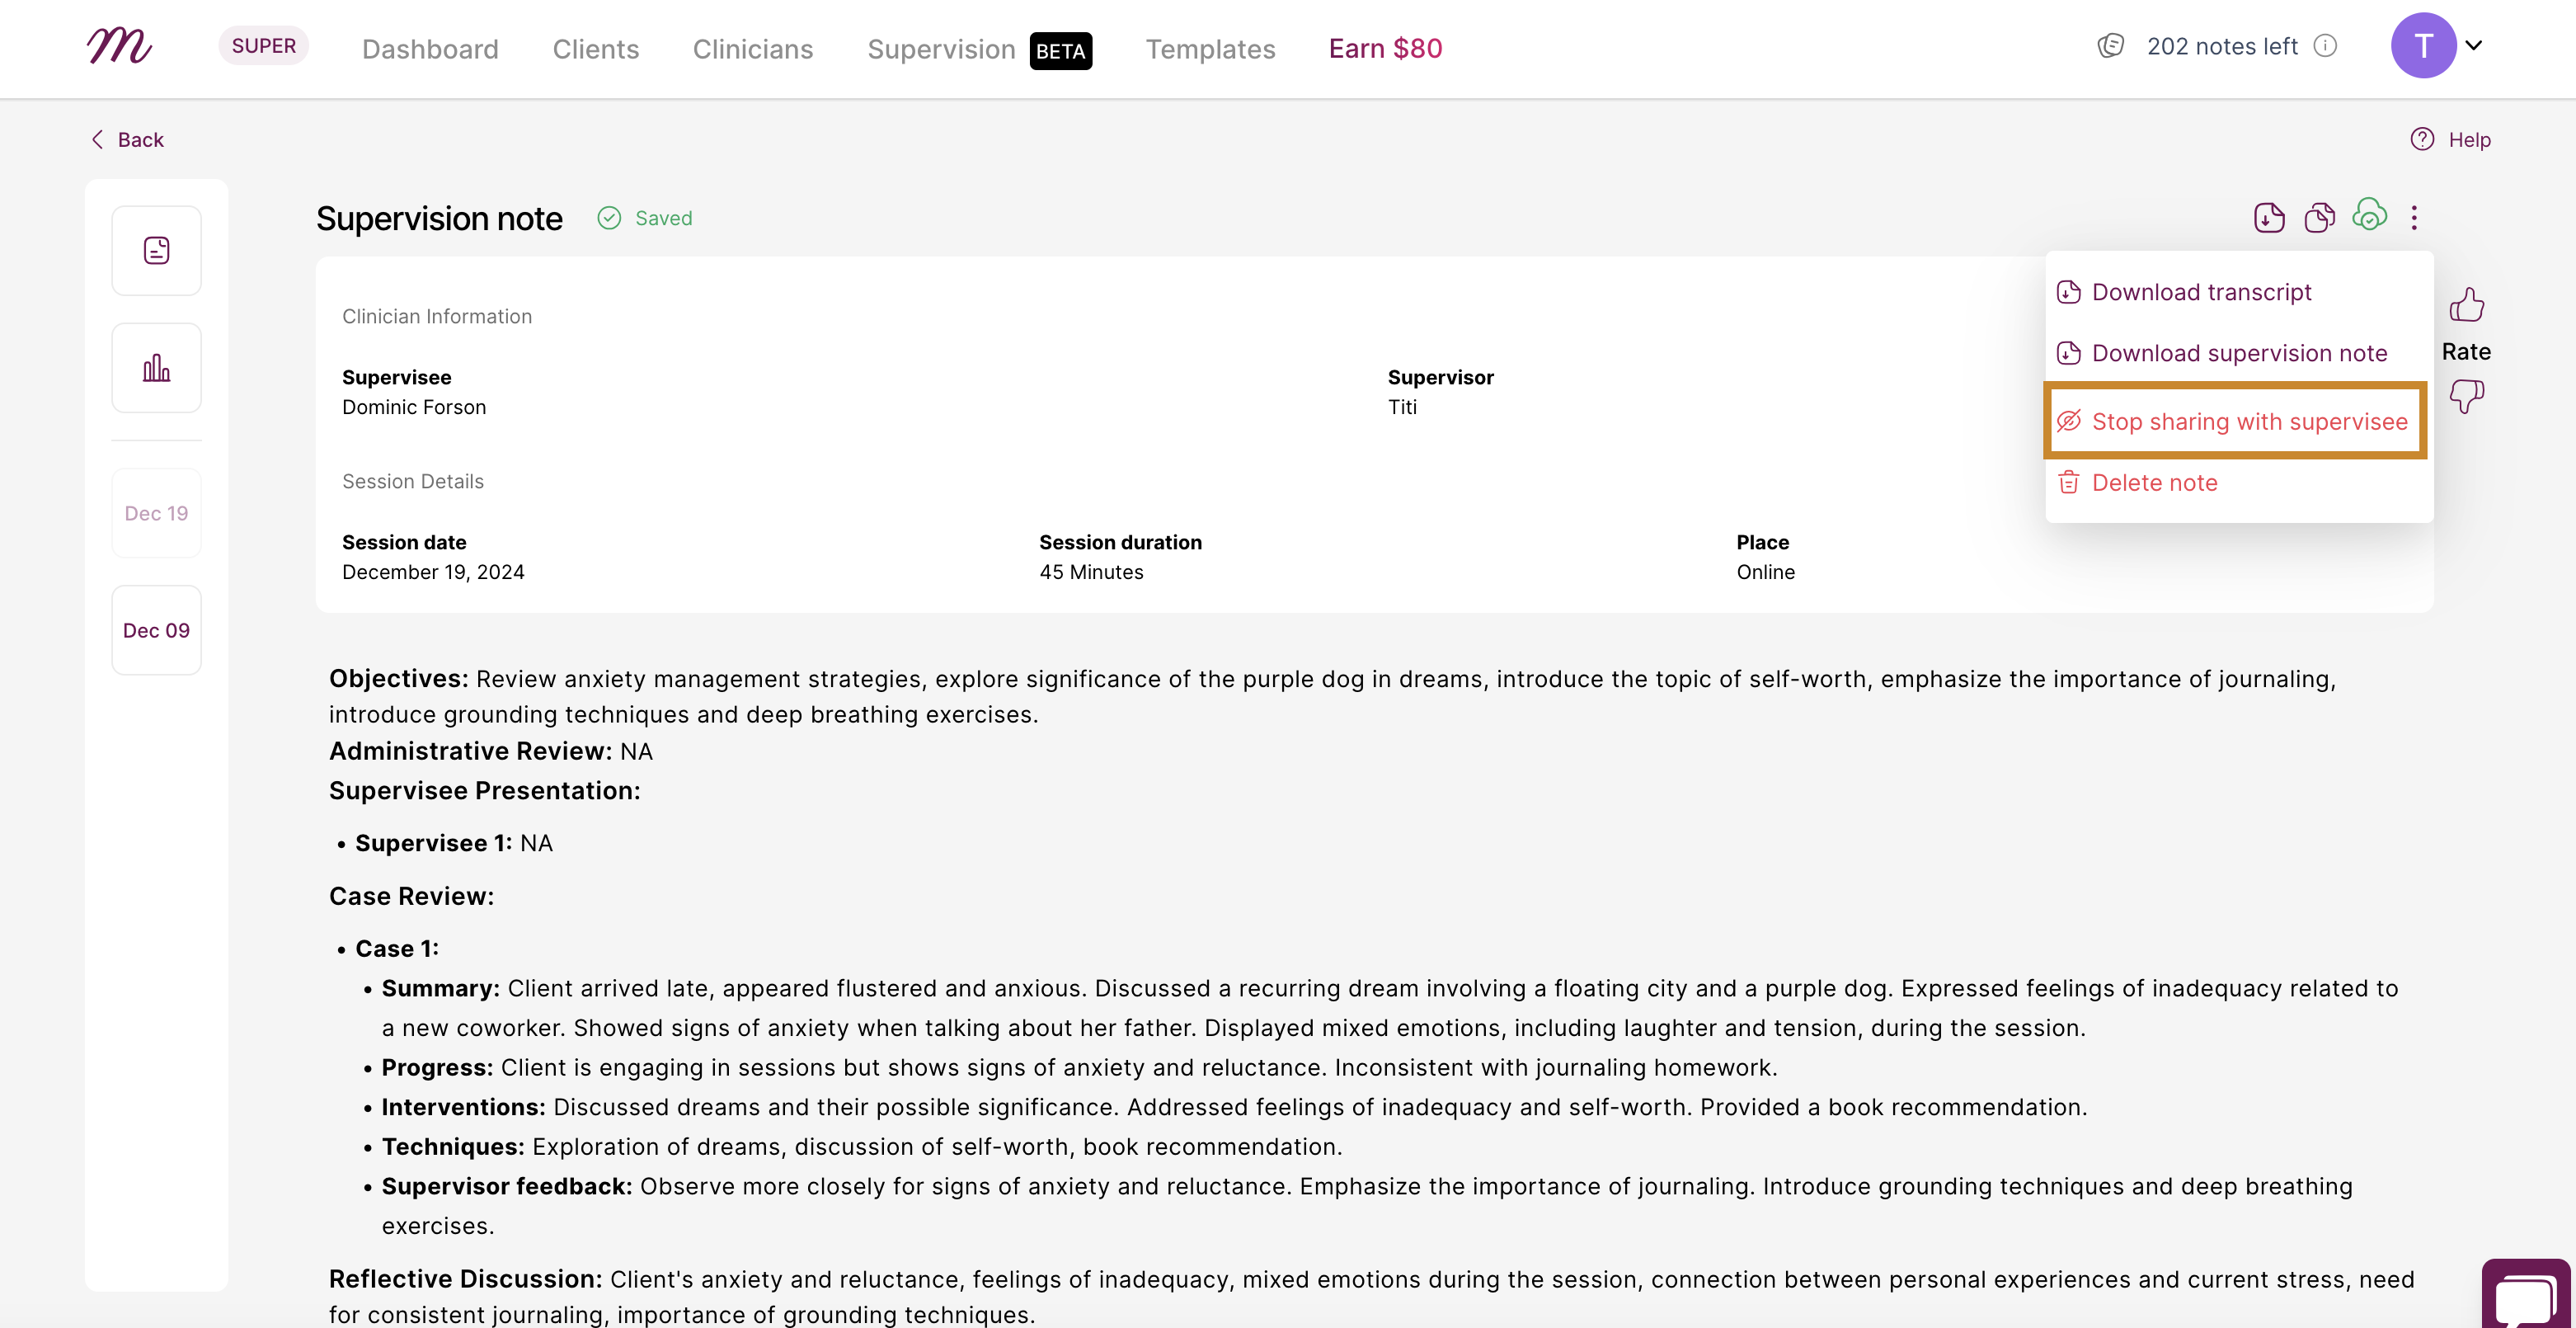
2. From the option displayed, click on “Stop sharing with supervisee”
3. You will get a success message saying that your supervisor cannot view that session anymore.

With these steps, you’re well-equipped to leverage the supervision feature on Mentalyc, ensuring productive and organized collaboration between supervisors and supervisees.
For further assistance, contact support. Happy supervising!
